Remote Device Access with Soracom VPG, Gate, & Arc

Remotely accessing cellular-enabled devices has become easier with the launch of Soracom’s new service, Soracom Arc. Arc was originally created as an alternative way for devices to connect securely to the Soracom platform when a cellular link is not available. This enables more devices to take advantage of the suite of IoT services Soracom has to offer.
A customer recently asked me how they might remotely access some programmable logic controllers (PLC) behind their cellular router. Specifically, they have PLC software running on their work laptop that communicates to the PLC with UDP. This means that Soracom Napter would not work as it only supports TCP-based connections. A better solution is to use Soracom Arc and I will show you how we set it up so you can try it too.
In this blog, we will combine the functionality of Arc with services allowing communication between connected devices as a way to enable remote access. We will then look at how to leverage this to remotely access a router admin page over HTTP. You can even extend this solution to access devices behind cellular routers with simple port forwarding.
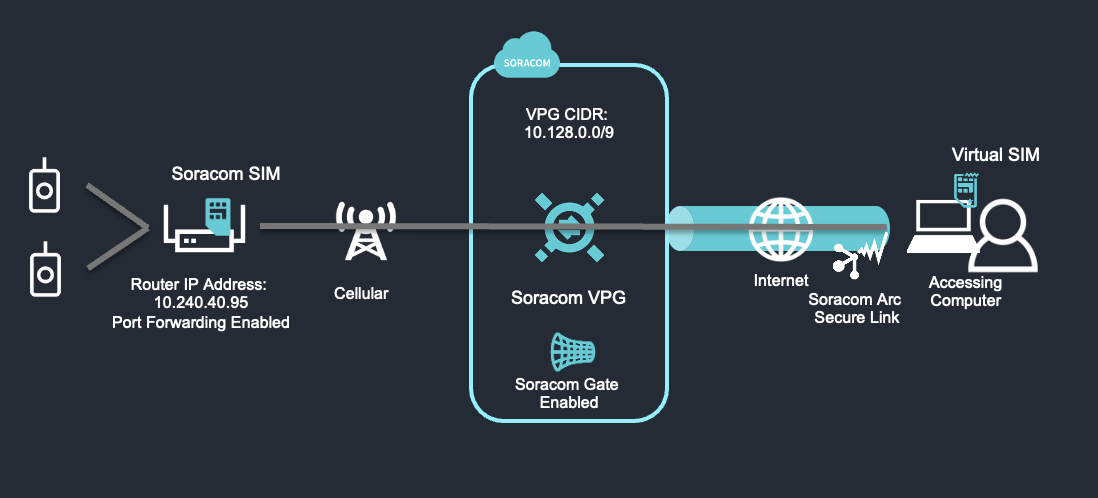
In this guide, I will show you how to allocate your Soracom devices into their own virtual network and enable them to communicate with each other. Finally, we will configure your laptop with a virtual SIM so that it can also communicate securely with the Soracom network.
Here are the steps to get configured:
- Creating a dedicated networking environment for devices
- Enabling device-to-device communication
- Creating a secure connection for the accessing computer
- Moving all devices into the network environment created in Step 1
- Remotely accessing your device
Creating a dedicated networking environment for devices
The first step is to create a Soracom Virtual Private Gateway (VPG) within your Soracom Operator account. This is going to be the foundation for your private networking environment.
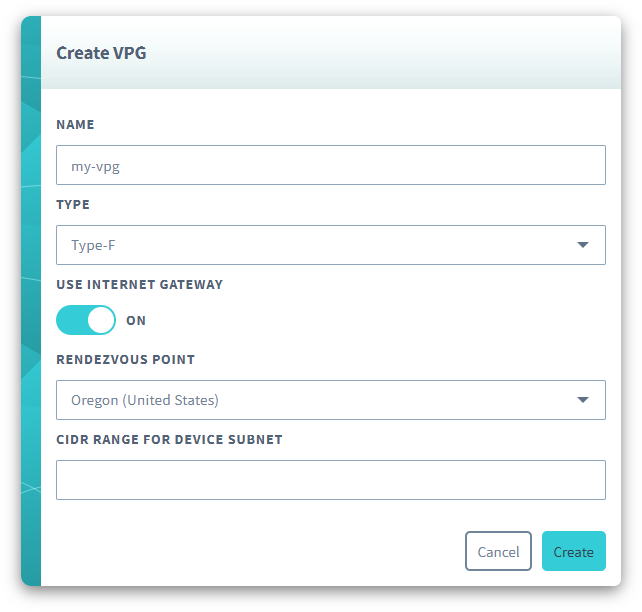
Navigate to the Soracom VPG page from the ‘Menu’ pane on the upper right of your Soracom Console. Click create VPG.
Select a local breakout region that makes sense for your deployment and choose between VPG types E and F. The difference between these two is that a Type F VPG will allow you to extend the private network to your own cloud or on-premises system, whereas Type E does not have this capability. For example, if you might later want to set up VPC peering to your AWS account or a VPN to your data center, you should choose VPG Type F.
Make sure to leave the Internet Gateway toggle on if your devices will need to access resources over the internet. Finally, define a CIDR block range for the devices that will connect within your VPG, otherwise, the default 10.128.0.0/9 will be used.

Enabling device-to-device communication
By default, devices that are placed within your Soracom VPG will not be able to communicate with each other. In order to allow for device-to-device communication, we will enable Soracom Gate to open up communication between devices. This is found on the Advanced Settings tab of the VPG.

Since the Gate configuration is enabled at the VPG level, only devices within the VPG will be able to communicate with each other. If needed, you can move the devices out of the VPG and this configuration will no longer apply.
Creating a secure connection for the accessing computer
Now let’s configure your accessing computer to connect to the Soracom platform. Only devices with a secure authenticated connection, like what cellular normally provides, can access the Soracom platform and private network. We will need to create a secure communication channel between your computer and Soracom with a VPN. For this, you’ll want to use Soracom Arc, which will require you to download a WireGuard desktop client to your computer.
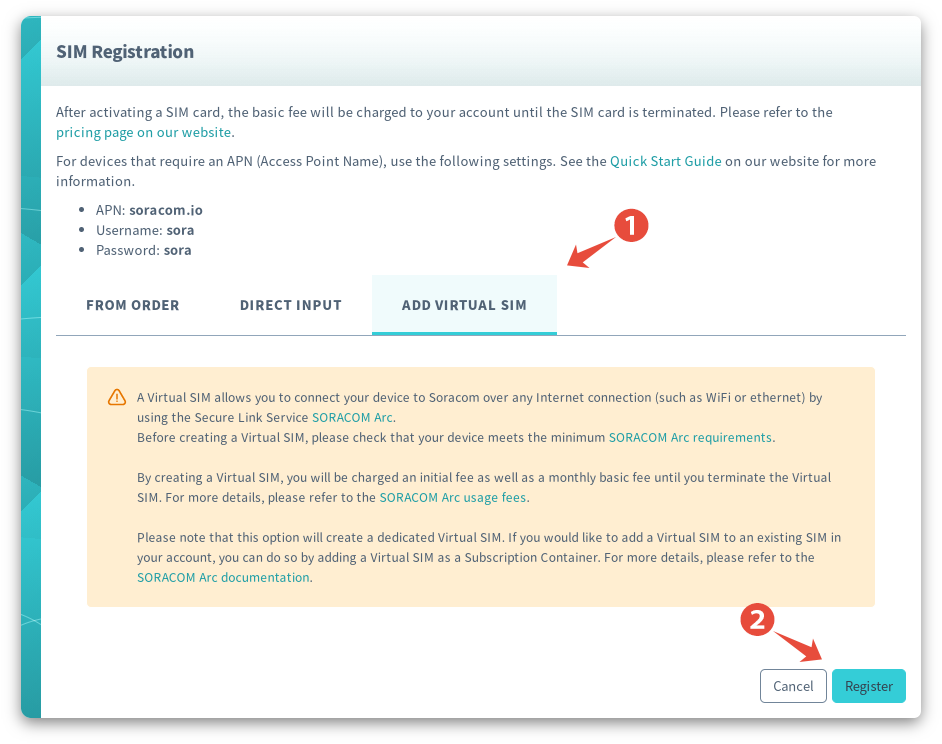
Once that is in place, you’ll need to create a standalone virtual SIM in your Soracom Operator account.

You will then copy the virtual SIM connection credentials into your WireGuard desktop client.
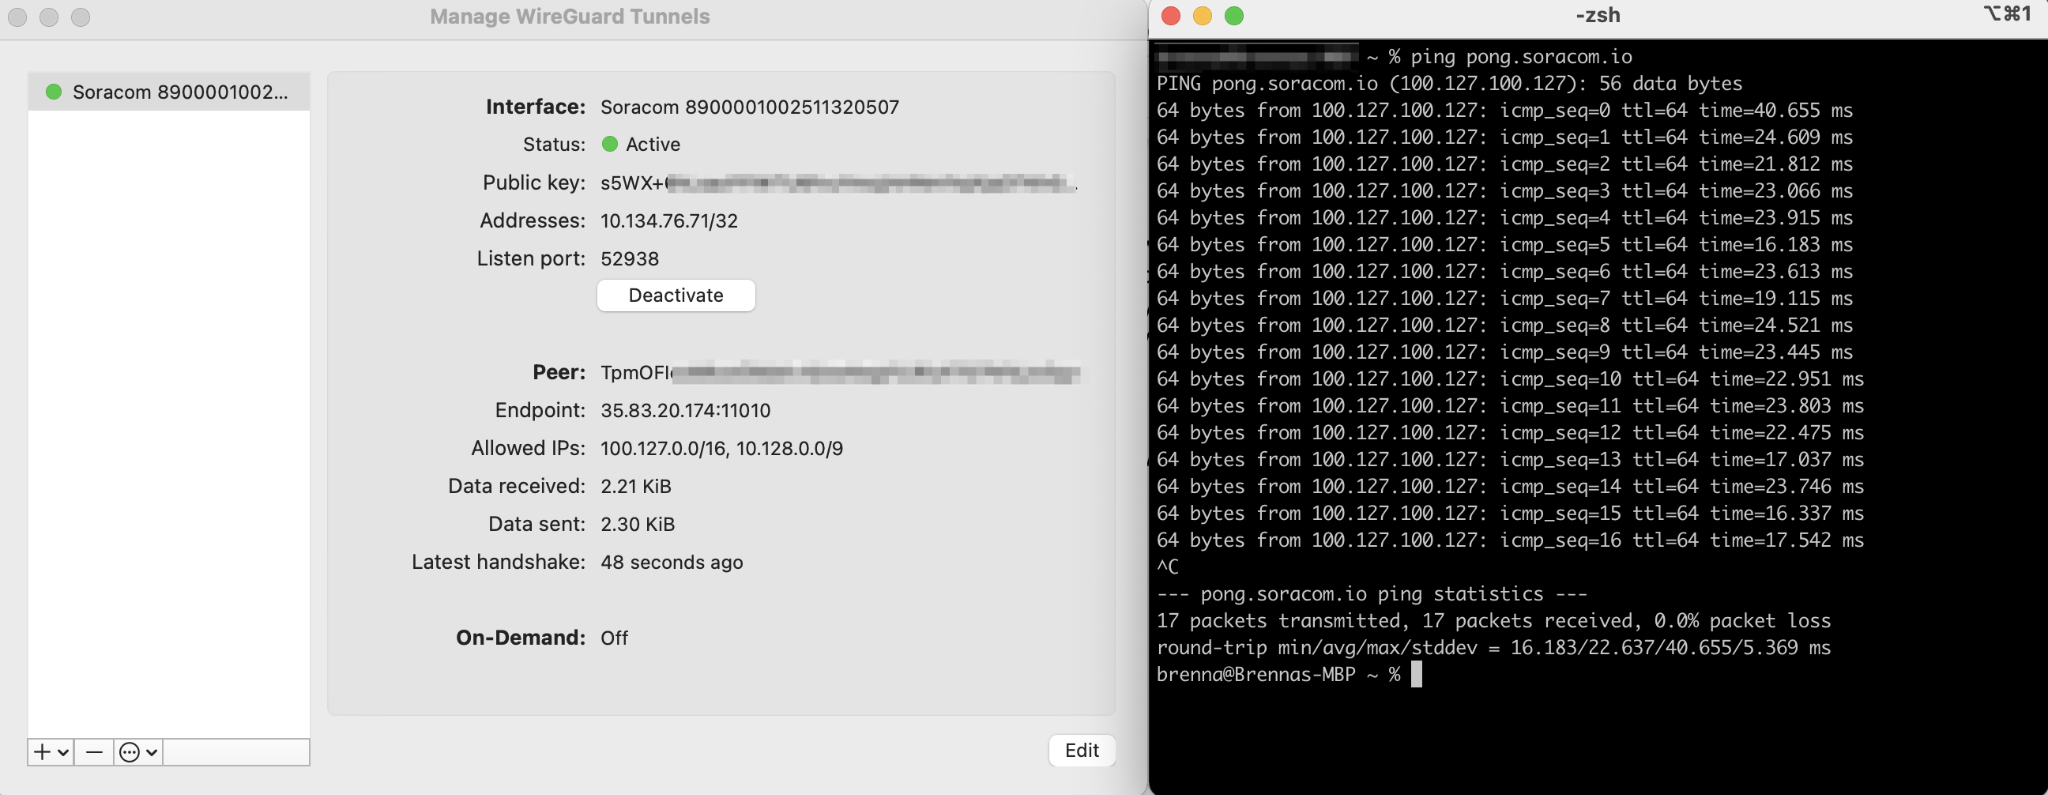
The AllowedIPs field determines what traffic should be routed over the WireGuard connection. As is, only traffic routed to Soracom services will be routed through WireGuard. We will also add the CIDR address block of your VPG to enable traffic destined for your remote devices to also use the WireGuard connection. If you left the CIDR range blank when creating the VPG, use the default CIDR (see below), otherwise, add the CIDR range you specified. If needed, you can also find this information on the VPG details page.
AllowedIPs = 100.127.0.0/16, 10.128.0.0/9
Finally, activate the WireGuard connection. You can make sure the link is up by pinging pong.soracom.io because this service is only available through a secure link into Soracom.
Moving all devices into the network environment created in Step 1
Now your computer is connected to Soracom with a virtual SIM as if it had a cellular connection. Let’s move it, along with the device(s) you are remotely accessing, into the Soracom VPG you created previously so that they can reach each other.
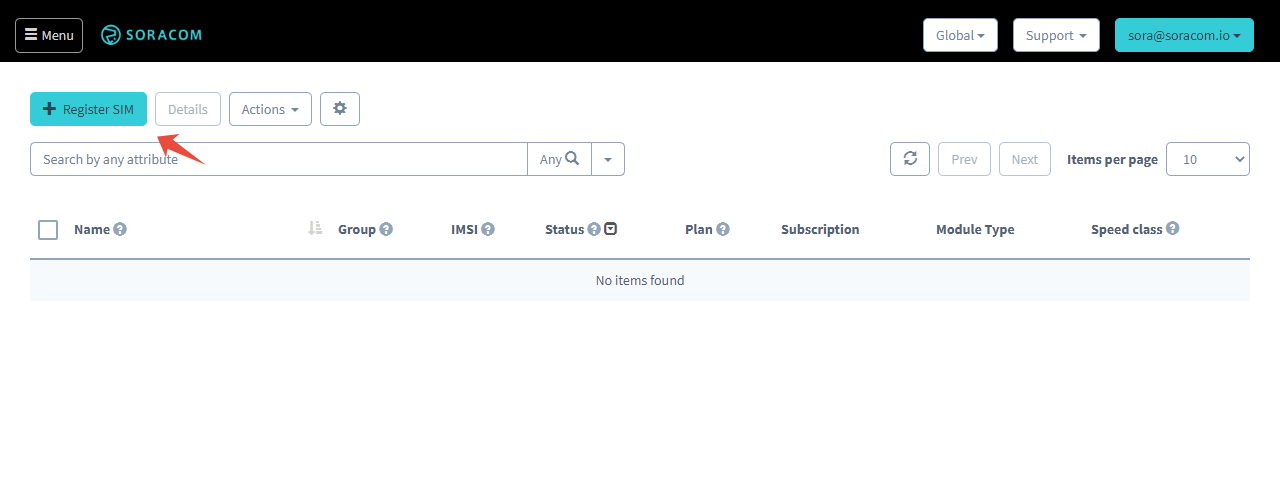
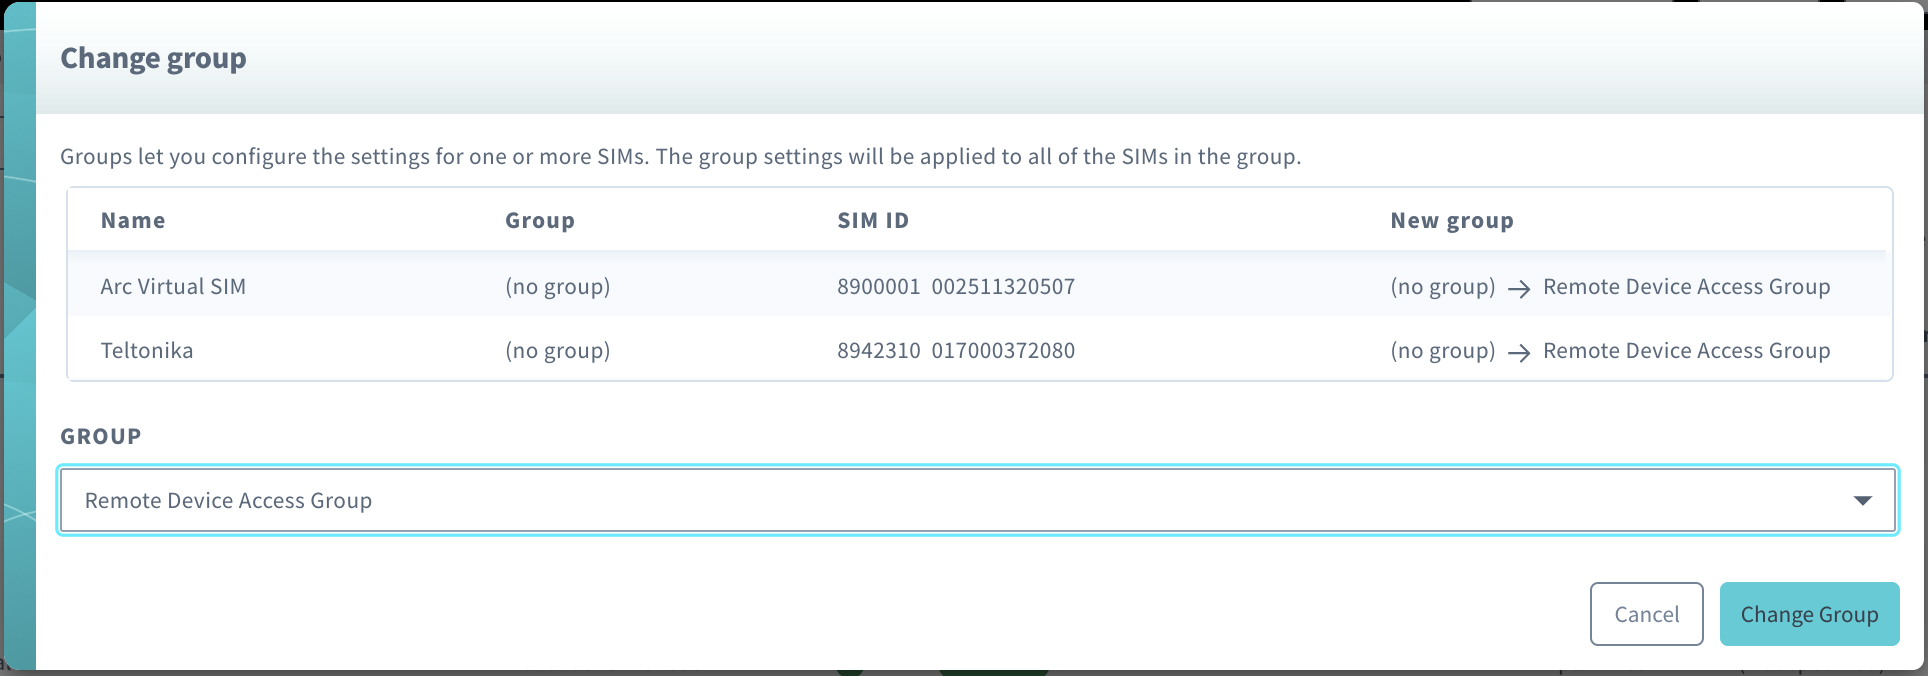
In the console, select your virtual SIM and the SIMs for your other devices. From the Actions menu, click ‘change group.’ Choose an existing group in which to place these SIMs or create a new one.
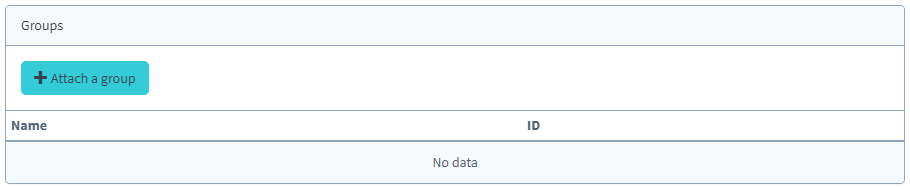
The next step is to attach this group to the VPG you created earlier from the Basic Settings tab of your VPG.
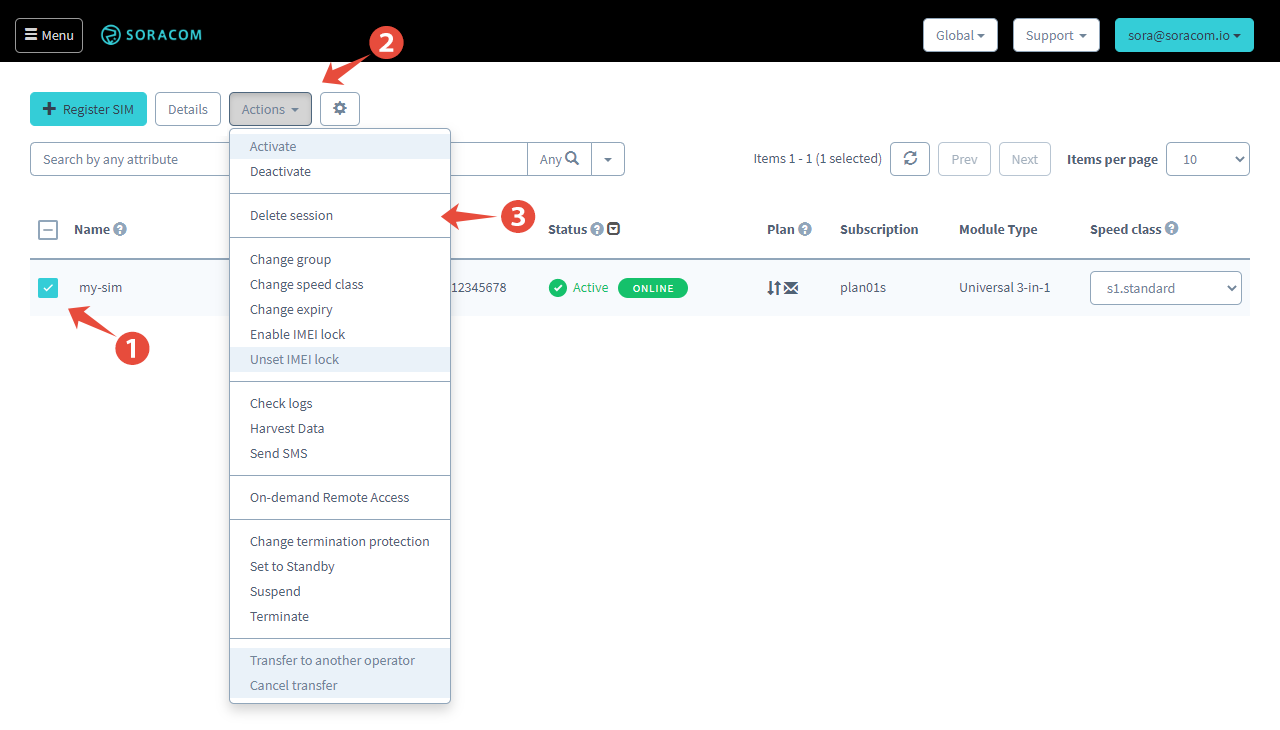
Now that devices have been assigned to the VPG, let’s ensure that they are actually moved into it by having them recreate their cellular sessions. On the main page of the Soracom console, select your SIMs (including the virtual SIM) and select ‘Delete Session’ from the ‘Actions’ menu. The cellular modem of your device will recreate its session immediately and the SIM will be moved into the Soracom VPG environment.
Remotely accessing your device
Our private networking environment is all set up so let’s test it out. Grab the private cellular IP address assigned to the device you would like to access from the Soracom console. If your device is serving a webpage you can access it from your browser. Otherwise, you can access the device directly with SSH or Remote Desktop (RDP). In my case, I am testing with a Teltonika RUT240 router so I will access the admin webpage from my browser.

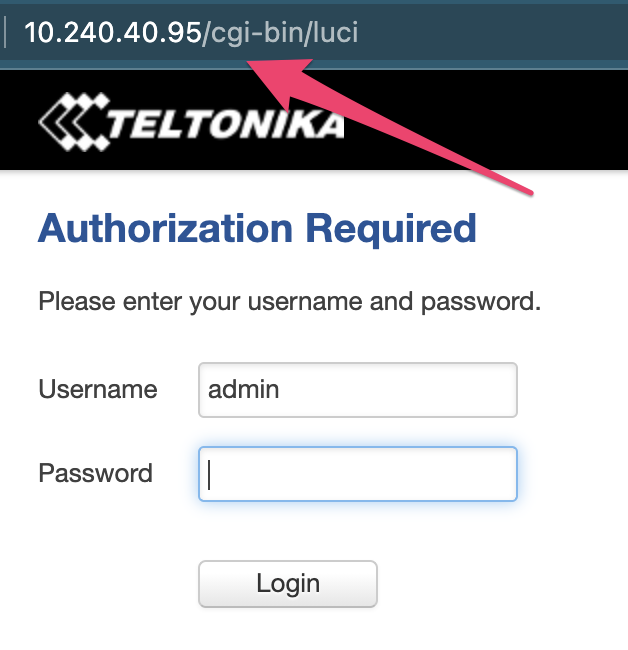
Here we can see I was able to access my router by its private cellular IP address.
Additional Configuration
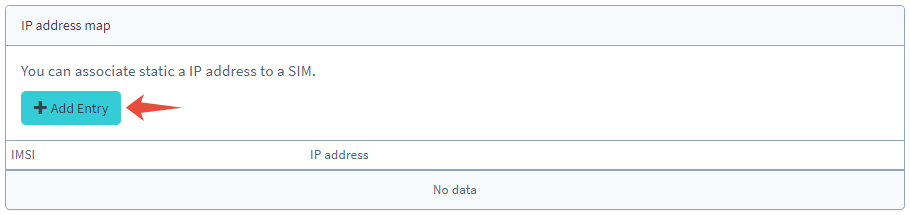
Soracom devices will be assigned an IP address dynamically. If you would like to assign static IP addresses to devices, you can do this within your VPG settings.
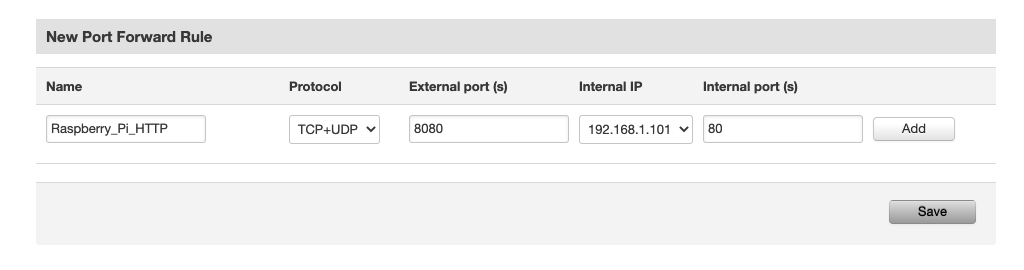
To access devices behind your router, like PLC devices, all you need is to enable port forwarding and access them using the private IP address of the router and the port you specified in the configuration.
Summary
By the end of this tutorial, you will have created an entirely secure link from your computer to your IoT Devices. While there is a bit of upfront work involved to get everything configured, accessing more devices will be really simple. All you need to do is add them into the group you have created and delete their sessions.
I personally really like this solution and use it often. I keep my WireGuard connection active at all times on my Macbook because we configured it to only route traffic destined for Soracom over the VPN connection. This means I can easily bring up the Teltonika admin page or access a Raspberry Pi connected to cellular whenever I need it without having to do anything.
Hopefully, you enjoyed this guide. Let us know if you give it a try!
………………
Got a question for Soracom? Whether you’re an existing customer, interested in learning more about our product and services, or want to learn about our Partner program – we’d love to hear from you!