Light up the Sky With this Fireworks Button

Hi, my name is Arata Fujii, and I’m an intern at Soracom’s Tokyo office. I’ve written about my first steps into IoT before, and this time, I’d like to have a little fun. In this blog, I would love to share with you the IoT firework button that I created this week for Soracom’s Family Day using the Soracom LTE-M Button.
Family Day is an annual “bring your child to work” event for the Japanese team, and I was tasked to make a cool IoT gadget to demonstrate the power of IoT to the children attending. While brainstorming what I could make for the exposition, I came across a cool javascript firework library (fireworks-js), so I got to work creating a system where a child can click a button, start a countdown on a small, local screen, and then launch a firework on a webApp displayed on a large projector.
This is a fun project that can help entertain the kids, and can be easily built! So let’s get straight to it.
Equipment
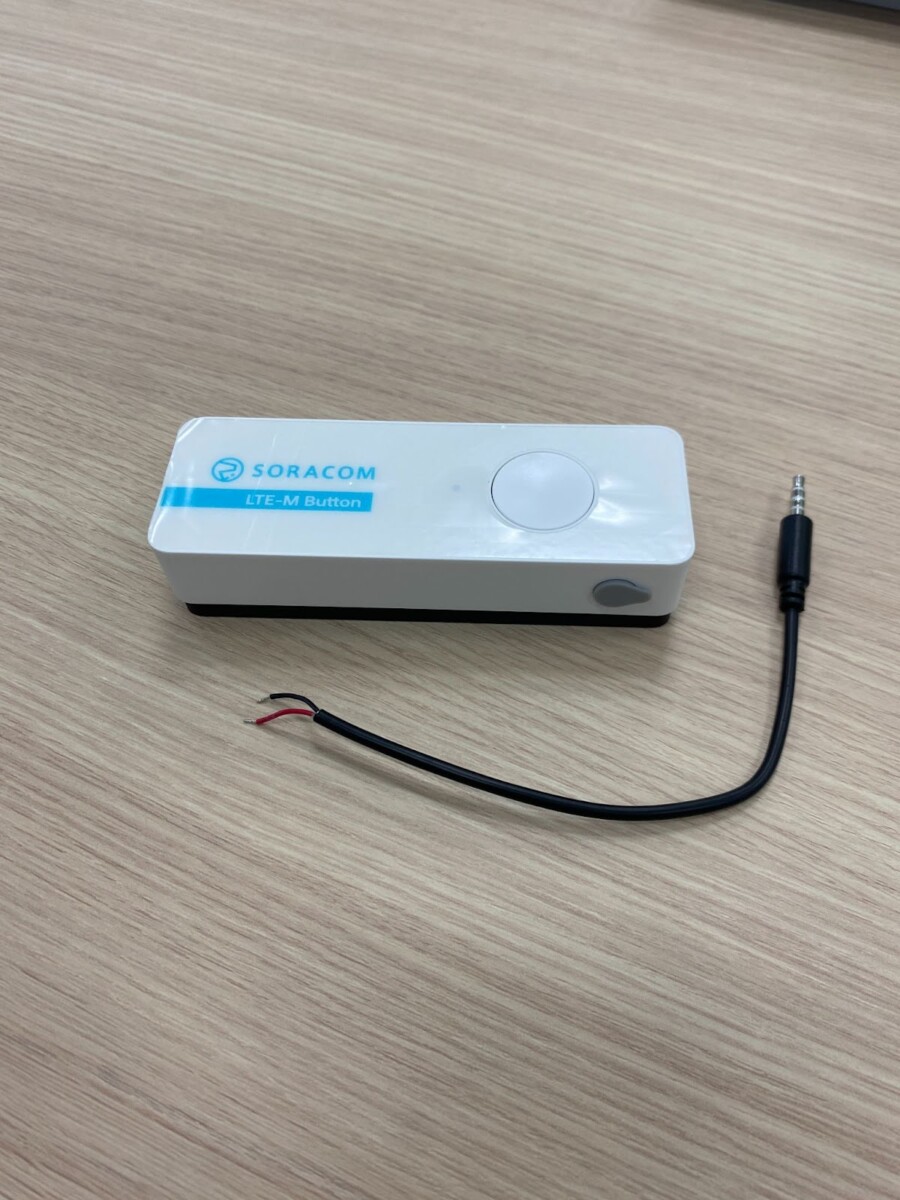
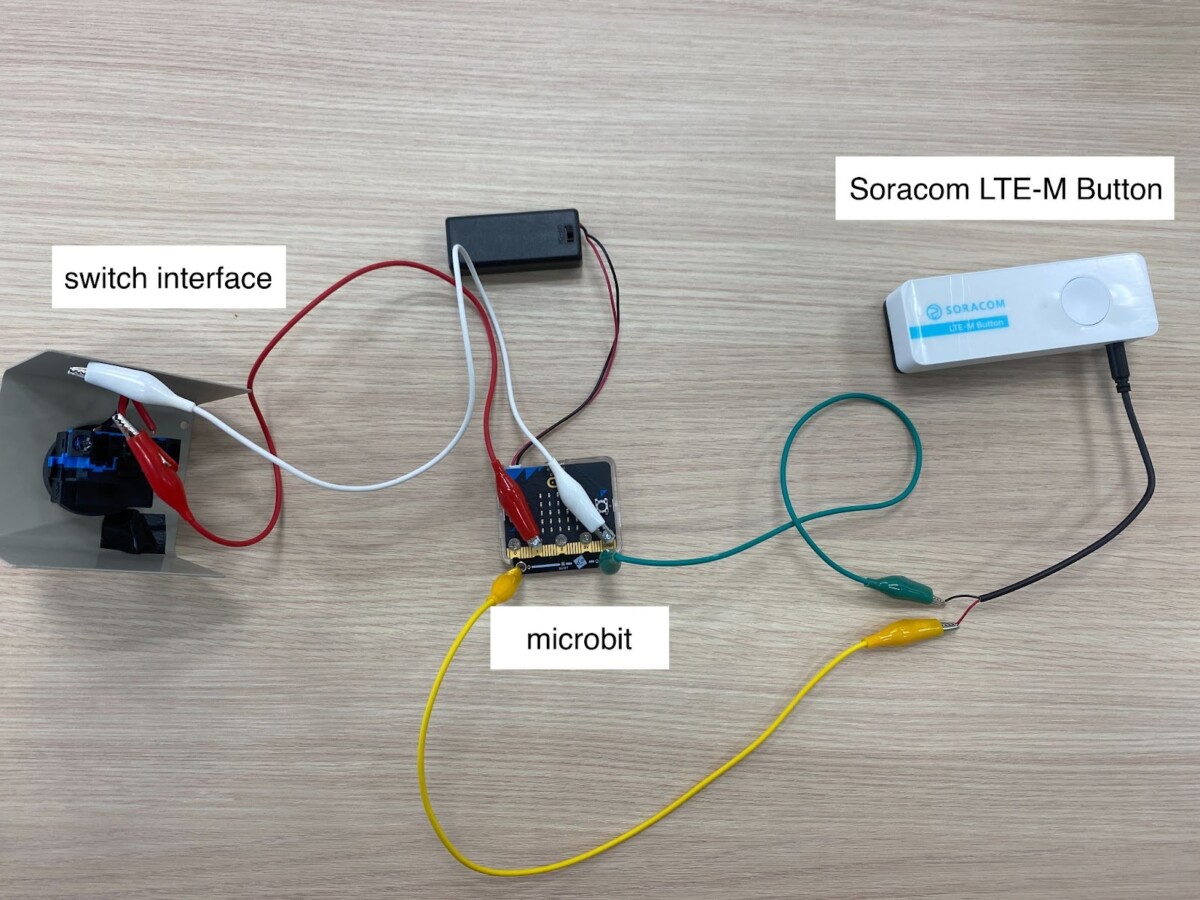
Soracom LTE-M Button
At the heart of this project, I used the Soracom LTE-M Button. The button is a simple, yet highly versatile device that can send click events from anywhere in the world to the cloud. You can check out my unboxing and initial setup of the button here! In this project, the button sends the signal to the webApp.
micro:bit
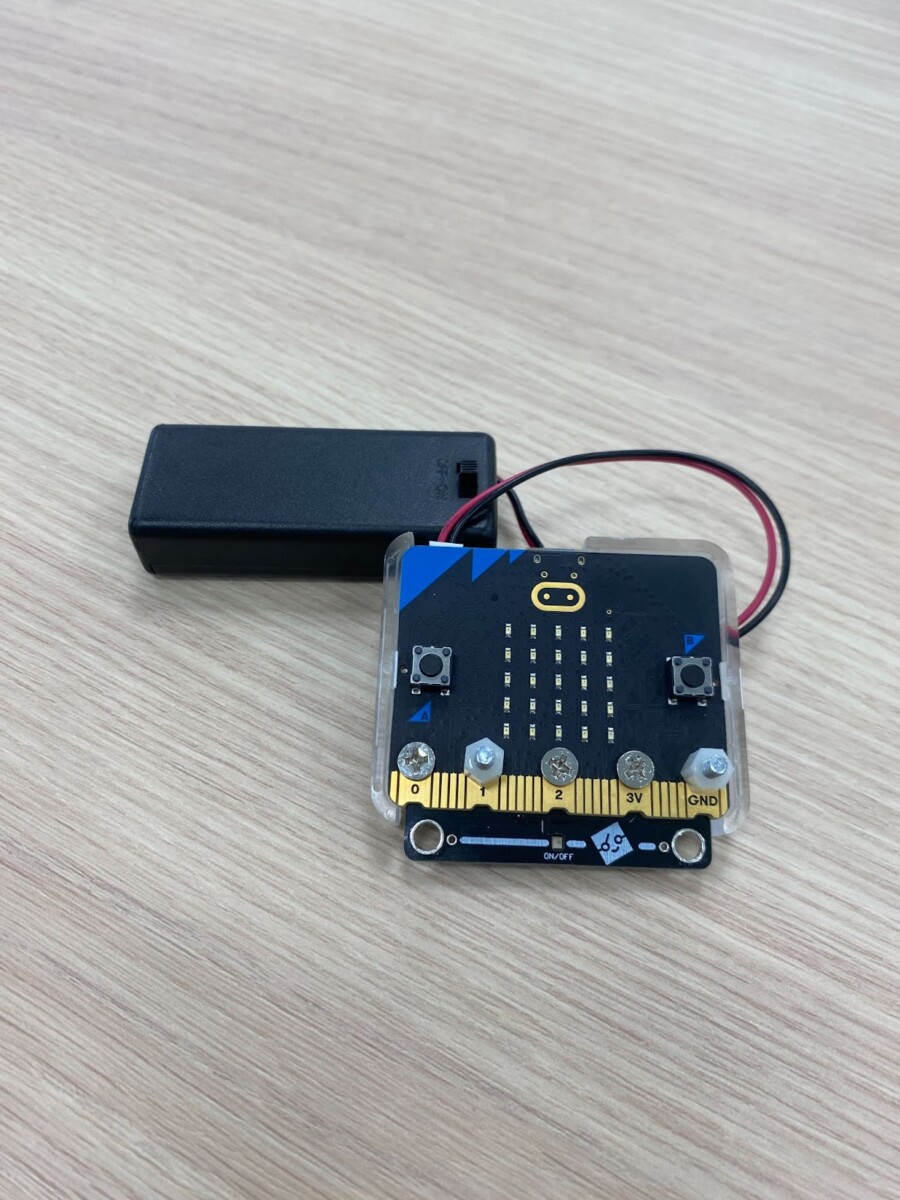
I used a micro:bit to act as a screen to display the countdown before the fireworks shoot up on the big projector. I have a relay unit for the micro:bit attached so that both the button and the countdown can be triggered with one click event.
Any Kind of Switch Interface/ Casing (optional)

I used a switch interface to both house the electronics and cables, and provide some visual flare! This isn’t really necessary, since you can use the built-in button on the micro:bit, or make a custom casing from cardboard and aluminum foil if you’re crafty.
Architecture

The architecture for this project is fairly simple. When a click event is sent to the micro:bit, its screen will start a countdown, and the Soracom LTE-M button’s click is triggered through the relay unit. This sends a JSON click event to AWS lambda through Soracom Funk. The Lambda function triggered by this event puts an additional item in AWS DynamoDB. This new entry is then polled by the firework webApp, and updated accordingly, shooting a firework into the sky/screen.
Implementation
1. Connecting the LTE-M Button with Amazon DynamoDB
The first part of this project is exactly the same as Example 3 in the Soracom LTE-M button developer documentation. I enabled Soracom Funk for the button and made a Lambda function that is able to receive button press events in a JSON format. At this point, we will parse this data to fit our needs. Although the Lambda function parser provided in the developer documentation is in node.js, I opted to use Python. I also made a DynamoDB table to house the parsed data.
Here’s the Python code:
import json
import datetime
import boto3
def lambda_handler(event, context):
print(event)
dynamodb = boto3.resource("dynamodb")
table = dynamodb.Table("hanabi-table-new")
dt_now = datetime.datetime.now() + datetime.timedelta(hours=9)
time=dt_now.strftime("%Y %m/%d %H:%M:%S")
cliType = event['detect_type']
if (cliType == "Single short click"):
response=table.put_item(Item={'clickTime': str(time), 'clickType': 1})
print(response)
elif (cliType=="Double short click"):
response=table.put_item(Item = {'clickTime': str(time),'clickType': 2})
print(response)
elif(cliType == "Single long click"):
response=table.put_item(Item = {'clickTime': str(time),'clickType': 3})
print(response)
elif(cliType == "Rising edge"):
response=table.put_item(Item={'clickTime': str(time), 'clickType': 4})
print(response)
else:
print(response)Code language: PHP (php)
I made sure to parse each event to handle all types of clicks, where 1 represents a single short click, 2 represents a double short click, and so on. This is stored as the sort key in DynamoDB, while the click time (the date and time when the button was clicked) is also stored as the partition key
Once you add DynamoDB items by clicking the LTE-M button, the potential applications are endless. Use it for operation optimization at factories, a simple habit tracker, or anything where you’d want to leave a record using a click event. This time, I made an exciting firework webApp and used the DynamoDB items as triggers for the webApp.
Now let’s look at how I made the actual webApp.
2. Create the Firework WebApp
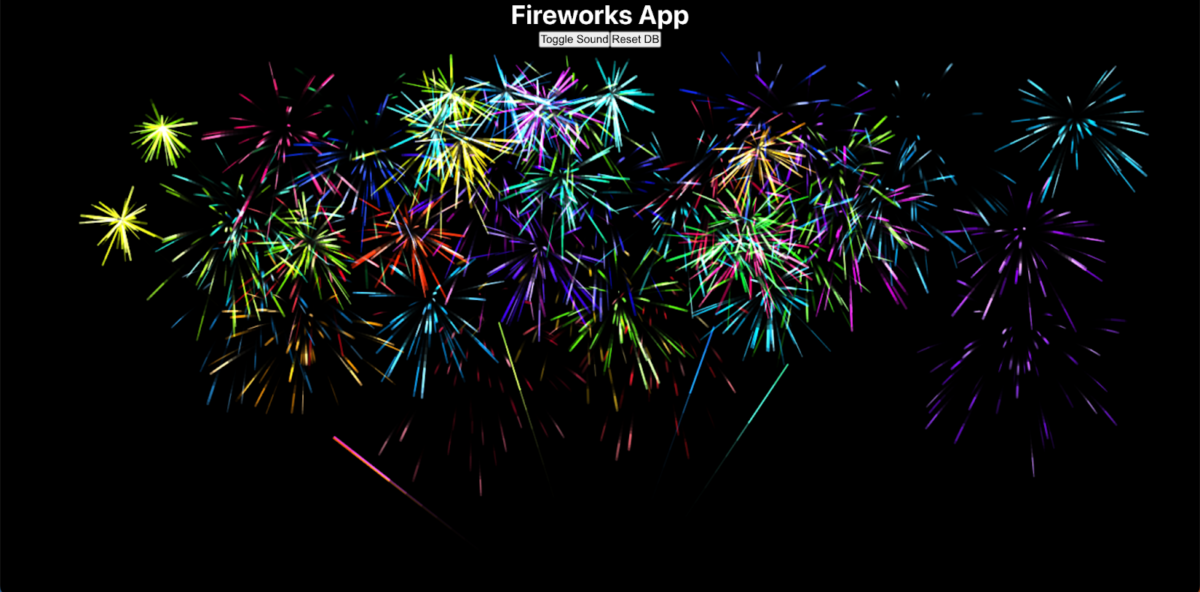
Now the fireworks! For this example, I used fireworks-js, a beautiful javascript fireworks library on the react framework. They work with JS frameworks other than React, so use whatever you’re comfortable with.
Here’s how I initialized the fireworks object with Javascript:
import React, {useEffect, useState, useRef} from 'react';
import Fireworks from 'fireworks-js';

const fireworks = useRef();
  useEffect(()=>{
    const container = document.getElementById('fireworks-container');
    fireworks.current = new Fireworks(container, options);
    delete_table();
  }, []);Code language: JavaScript (javascript)
Here’s the code I used for the actual fireworks effect:
const delay = ms => new Promise(res => setTimeout(res, ms))
useEffect(()=>{
    if(count > 0){
    console.log('effect called' + count);
    fireworks.current.launch(10);
    makeRequest();

    async function makeRequest() {
      await delay(100);
      fireworks.current.launch(10);
      await delay(200);
      fireworks.current.launch(10);
    }}
}, [count]);Code language: JavaScript (javascript)
I made the useEffect trigger on the useState called count. Later, I updated this according to the DB to make sure that every time the DB has a new item, the effect will trigger.
Adding Sound to Your Fireworks (optional)
To add sound to your fireworks, download some mp3 files of your favorite booms and bangs, add them to your working directory, then import them. Next, update your instantiated firework object’s options using the updateOptions() command. This can make the fireworks much more lively and realistic!
3. Receive Data from Dynamo on the Web App
There are many ways to notify your webApp of a new entry in DynamoDB, but because there’s not going to be a ton of data being stored on the DB anyways, I opted to go with polling. I coded the app to scan the count of the database every 5 seconds. If that count changes, then the count variable (which is a useState) changes and triggers the firework animation.
To poll from a Dynamo database, I created a document client and threw in my authentication information.
import * as AWS from 'aws-sdk';

const docClient = new AWS.DynamoDB.DocumentClient({region: 'Your_region', accessKeyId: 'Your_accessKey', secretAccessKey: 'Your_secretAccessKey'})Code language: JavaScript (javascript)From this docClient, we can scan the DB every 5 seconds and update our count state.
const [count, setCount] = useState(0);

function count_update(num){
   if(num > count){
      setCount(num);
   }
}

useEffect(() => {
   const interval = setInterval(() => {
      console.log('This will be called every 5 seconds');
      var params = {
         TableName: "Your_table_name",
         Select: "COUNT",
      };
      docClient.scan(params, function (err, data) {
         if (!err) {
            count_update(data.Count);
         }
         if(err) {
            console.log("Error", err);
         }
      })
    }, 5000);

    return () => clearInterval(interval);
  }, []);Code language: JavaScript (javascript)
4. Adding a Countdown Timer to the Soracom LTE-M Button
I plugged in the 2-wire attachment included with the LTE-M button using the 3.5mm audio jack port on its side. Just remove the waterproof plug and you’ll see the port. When connected, the wires can activate the button the same way a click can, but the JSON parsing for the click types I mentioned earlier will change:
- Rising edge denotes that the wires are attached
- Falling edge denotes that they have been separated
You can read more about the 2-wire accessory in the product’s developer documentation.
To make a countdown timer using a micro:bit, I attached a relay unit to the device and hooked the two wires onto it. Any switch interface or module can be connected to an unoccupied port (in this example P1) and the other ground port.
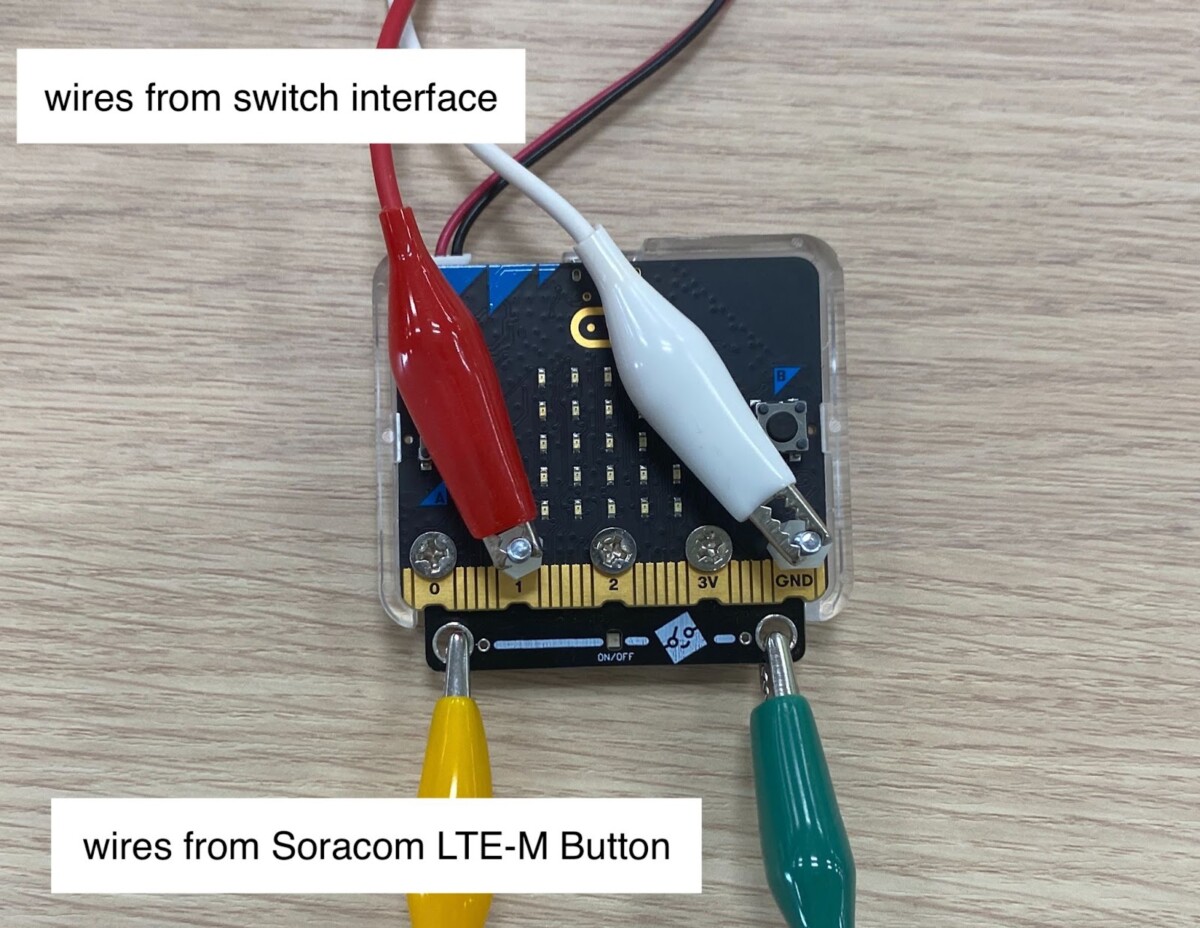
I then coded the logic into the micro:bit to do two things when a switch input comes in from port 1 or P1:
- Start a timer on the built in screen.
- Enable the relay unit and let current through the two wires.
The relay unit enabling current through the two ends of the wire adapter acts the same as a regular press of the button. I was able to program these two steps very easily on the micro:bit editor since they have ready-to-use code blocks for the relay unit that displays numbers.
I’ve attached a sample script for the micro:bit below:
let countdown = 0
let bool = 0
input.onPinPressed(TouchPin.P1, function () {
if (bool == 0) {
bool = 1
countdown = 7
pins.digitalWritePin(DigitalPin.P0, 1)
basic.pause(200)
pins.digitalWritePin(DigitalPin.P0, 0)
for (let i = 0; i < 7; i++) {
basic.showNumber(countdown)
countdown -= 1
basic.pause(500)
}
control.reset()
}
})
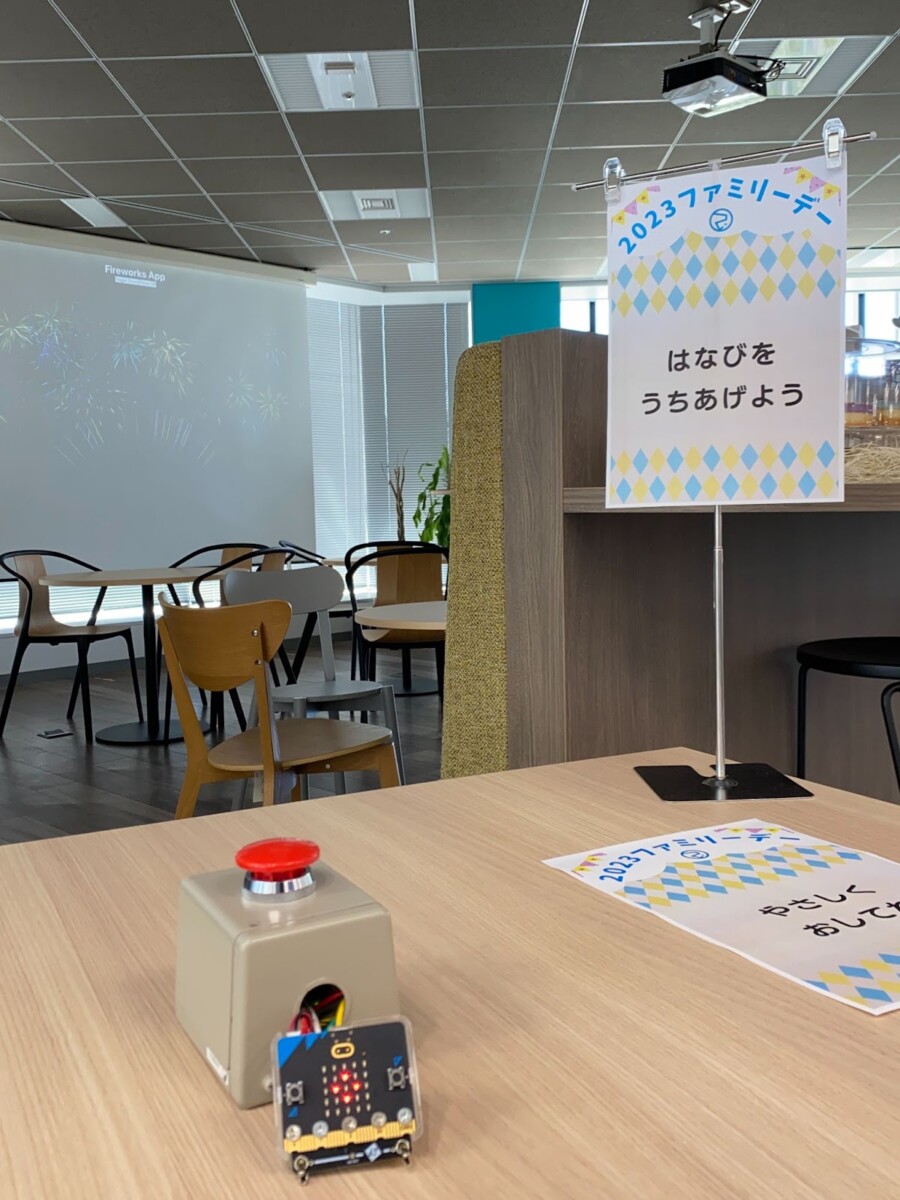
pins.setPull(DigitalPin.P1, PinPullMode.PullUp)Code language: JavaScript (javascript)Showcasing the LTE-M Button at Family Day
The family day event was a big success with kids lining up to press the button!
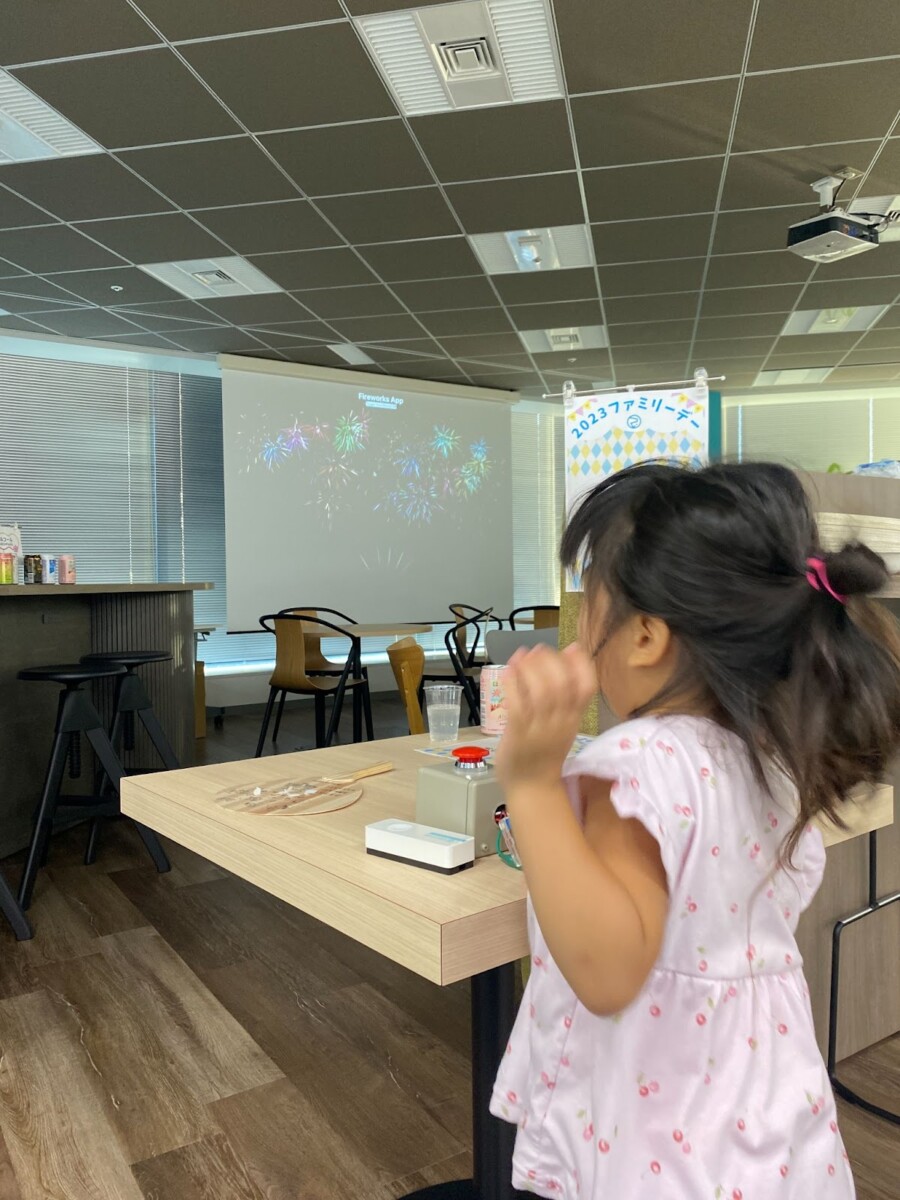
It was really rewarding to see all the kids’ faces light up when the fireworks launched on the projector. Having a cool exterior/button interface was very effective in drawing the kids in, and adding sounds to the fireworks was also a great decision since it made the fireworks feel more realistic. I even got to show a few older kids how the system works behind the scenes and how Soracom’s services are able to help streamline businesses around the globe.
Conclusion
This project was fantastic, as it demonstrated how the button can be linked with various AWS services like Lambda and DynamoDB, and can be used in conjunction with other hardware devices to add cellular features. It was also a lot of fun to see it work at the event, and I truly believe that the process of connecting hardware to the cloud is a uniquely rewarding experience.
The Soracom LTE-M button proved to be a remarkably versatile gadget, with its 2 wire adapter, click-type differentiation, and stable connectivity. This project experience helped me gain further insight into the world of IoT and its ease of implementation.
What will you create with the Soracom LTE-M button? Your only limit is your imagination!
………………
Got any questions about an IoT deployment? Soracom offers a number of powerful solutions that have made us a visionary in the IoT space. Chat with us today to learn how a partnership with Soracom can get your project up and running easily and securely. Contact us today!