
Exploring the Power of Soracom and Couchbase: A Comprehensive Demo

In today’s fast-paced tech world, making different services play nicely together can offer significant enterprise rewards— and in the case of Soracom and Couchbase, the path to integration shows great promise.
With these value-added platforms, developers have an intriguing solution for meshing cellular connectivity with a NoSQL database. In this blog post, we’re going to walk you through a practical demo that shows how Soracom’s cellular connectivity blends seamlessly with Couchbase’s Capella database.
The Raspberry Pi and Ultrasonic Sensor
For our demo, we’ve got a Raspberry Pi with an ultrasonic sensor. This sensor measures distances and will be our data source. Our goal is to send distance data from the device to a Couchbase database using two different methods.
- Sending a JSON Payload via HTTP: We’ll start by showing you how to send data directly from the Raspberry Pi to Couchbase using a simple HTTP request. We’ll take the sensor data, turn it into a JSON payload, and send it securely to the database.
- Binary Data Conversion with Soracom: In the second part of the demo, we’ll dive into a more sophisticated method. We’ll send the data in binary format and use Soracom’s Binary Parser to convert it into a user-friendly JSON format. Then, we’ll use Soracom Beam to securely shoot that JSON over to the Couchbase database. This method shines when you’re looking to offload the additional overhead required by security protocols from your edge device to the cloud.
Getting Started with Soracom and Couchbase Integration
Before you start this exciting journey, make sure you have the necessary tools and services lined up. Here’s the breakdown:
- Soracom Account: If you haven’t already, create a Soracom account and configure your Raspberry Pi to connect to the Soracom cellular network.
- Couchbase Capella Database: Set up a Couchbase Capella database, and make sure you have access credentials and endpoints at your fingertips.
- Link: Couchbase Get Started
- Raspberry Pi Setup: Prepare your Raspberry Pi by connecting the ultrasonic sensor and installing the necessary libraries to enable the sensor’s functionality.
Once you have completed these preliminary steps, you’ll be all set to dive into the demonstration.
Soracom/Couchbase Services
Before we dive in, let’s get acquainted with the Soracom and Couchbase services we’ll be using:
- Soracom Binary Parser: This nifty tool parses binary data from Soracom Air devices and transforms it into easy-to-handle JSON data. You can then send this JSON data to services like Soracom Beam, Funnel, Funk, and Harvest Data.
- Soracom Beam: Beam is a proxy service that forwards data from your device to a specific endpoint. It can handle encryption workloads in the cloud and is handy for devices in which you’re looking to reduce security overhead or devices with protocol limitations.
- Soracom Metadata Service: The Metadata Service allows an Air SIM device to obtain subscriber information and perform basic management tasks directly from the device over HTTP. With Metadata Service, you can retrieve essential information about an Air SIM, such as IMSI and subscription status, and even modify its Speed Class or Tags, all without the need for an SDK or implementing the Soracom API into your application.
- Couchbase Capella: Capella offers Couchbase’s distributed NoSQL database as a fully managed service. It’s the easiest way to get started with Couchbase without the headache of ongoing database management.
- Couchbase Lite: Couchbase Lite is an embedded, NoSQL database designed for mobile and IoT applications. It’s a lightweight version of Couchbase Server, offering offline-first capabilities, which means it can function without a constant internet connection. Data is stored locally on the device, enabling fast access and providing a seamless user experience even when connectivity is intermittent or unavailable.
Setting Up Couchbase User, Role, and Getting Sync Gateway URL
Step 1: Head to the following link and login: Couchbase Sign-In
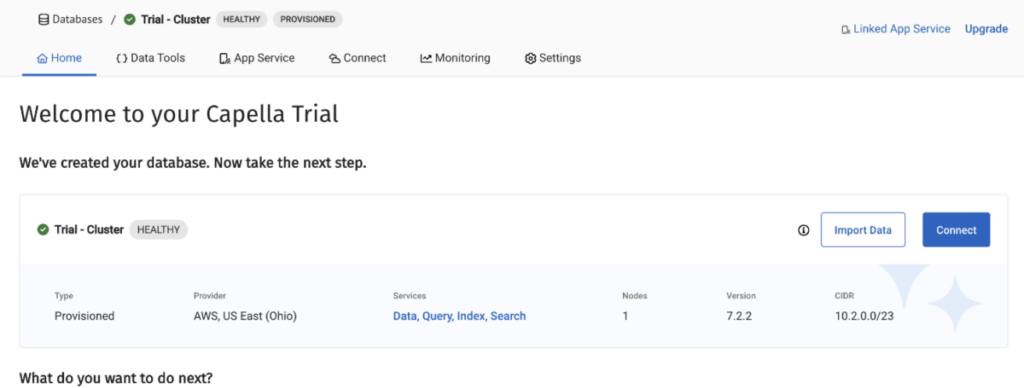
Step 2: When you login, you’ll get to the database page, click on your trial cluster.
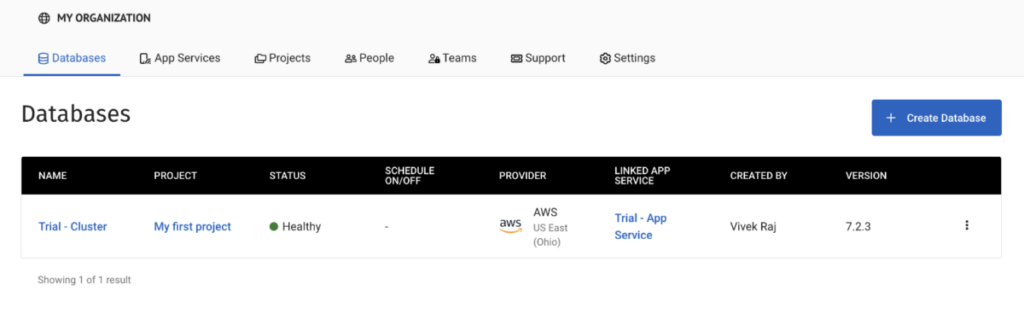
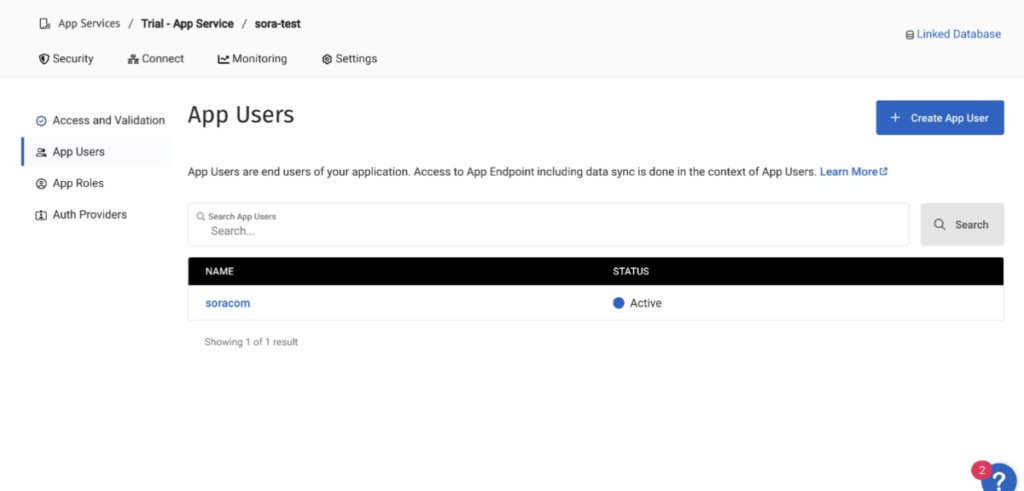
Step 3: Next, click on “App Services” at the top of the page.
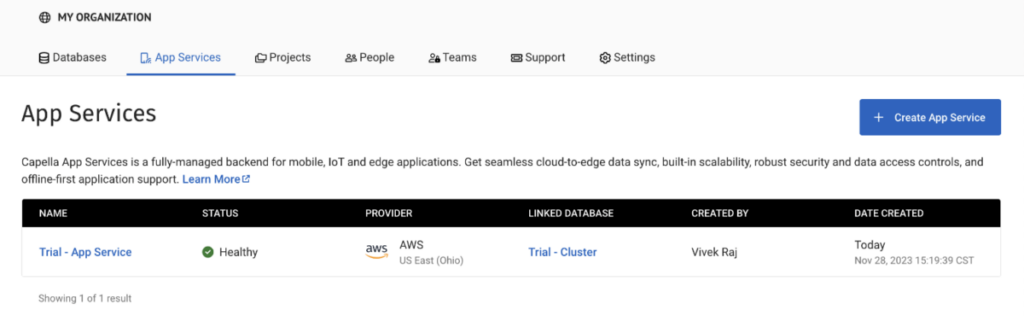
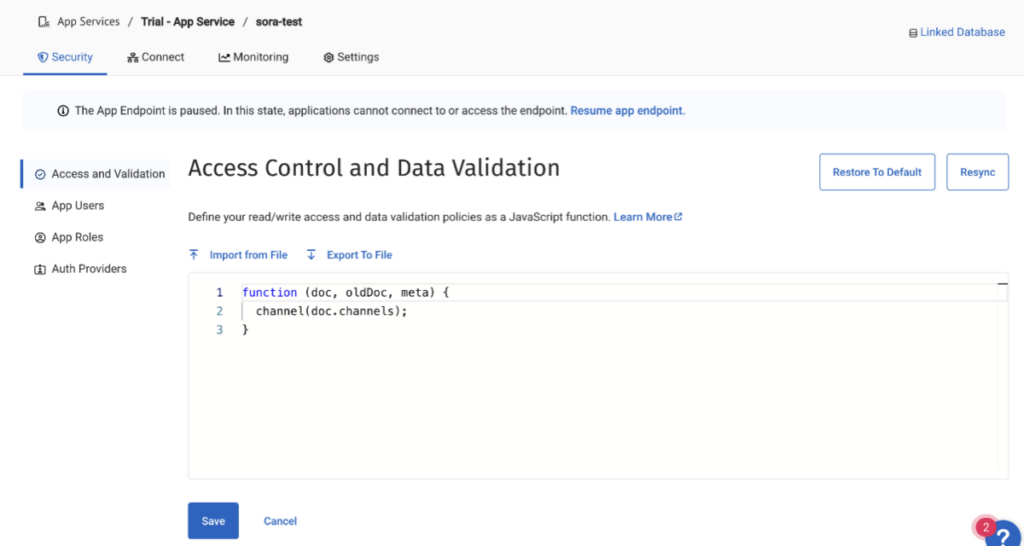
Step 4: This will next take you to your App Endpoints.

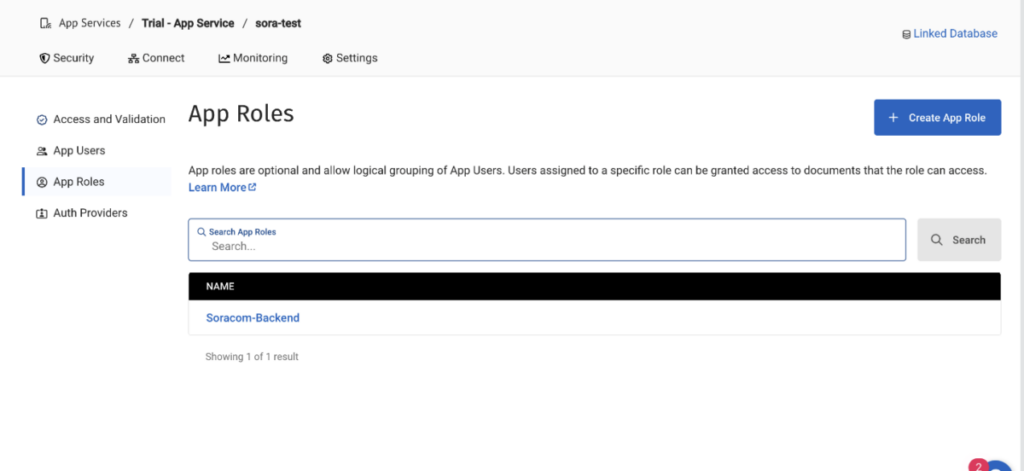
Step 5: The next page will give you the ability to create a user and roles, as well as find the URL by clicking the connect button on the top of the page.
Setting up Soracom Metadata Service, Binary Parser, and Beam
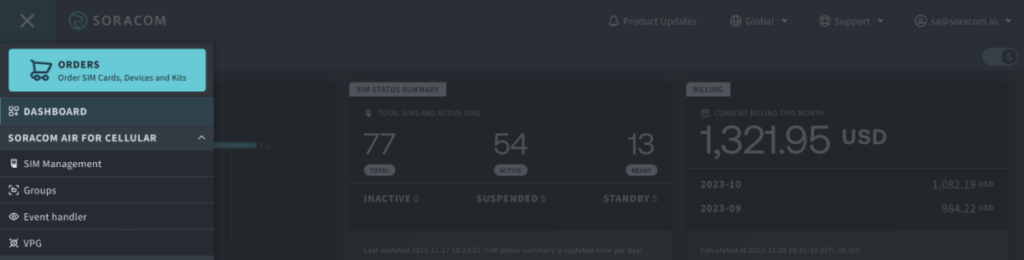
Step 1: Log in to the Soracom Console.
Step 2: Click on the menu icon on the top left and click on “Groups.”
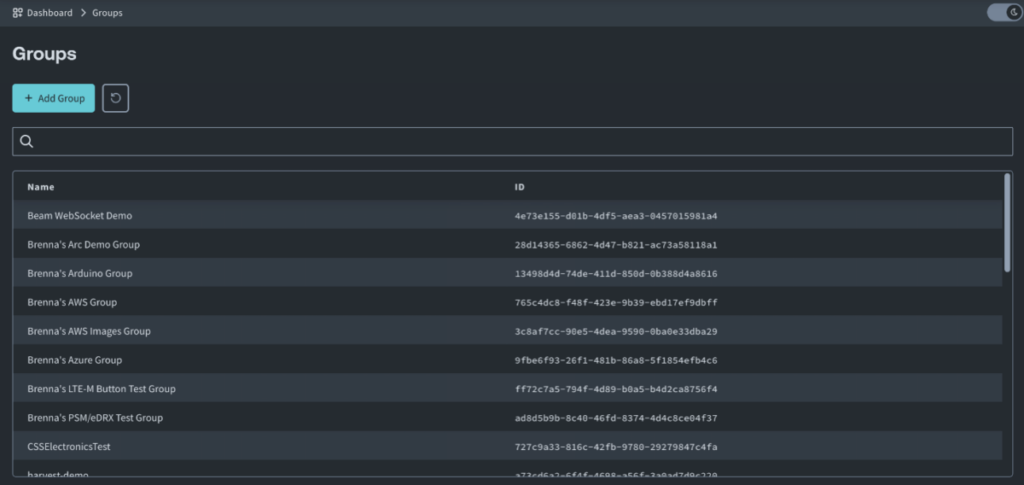
Step 3: This will take you to the next page, which shows all of the groups you have created. Now click on the group that we want to configure.
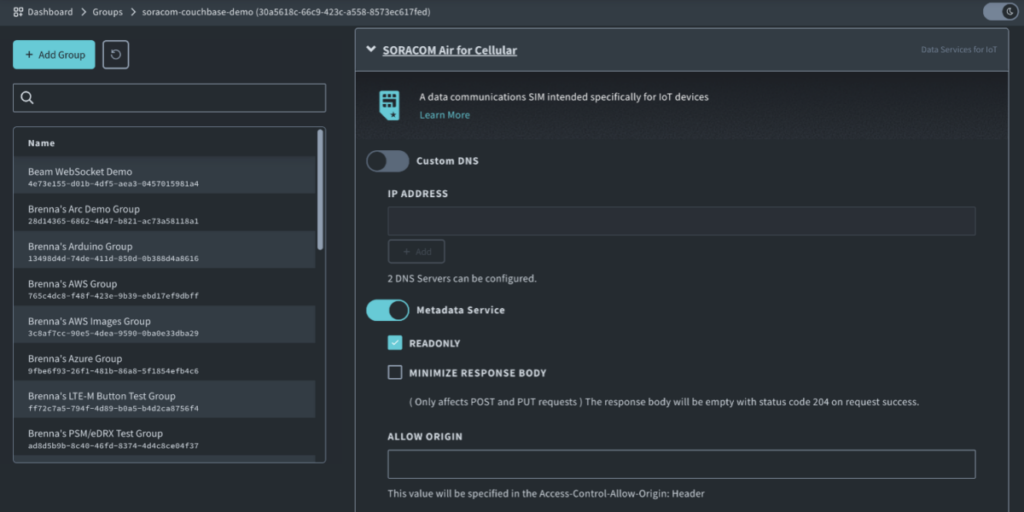
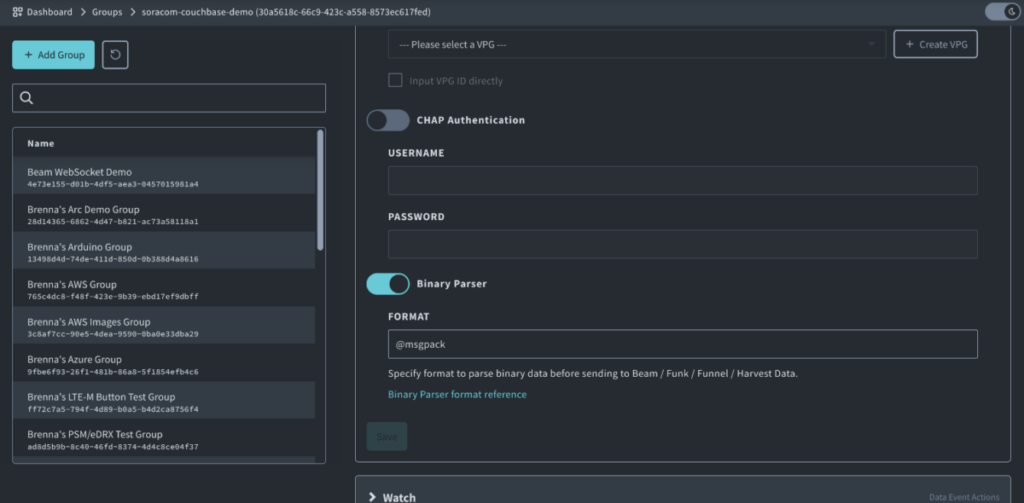
Step 4: Next, we will enable “Metadata Service” and “Binary Parser” under “Soracom Air for Cellular.” For Binary Parser, we have pre-defined formats, and in this example, we will be using MessagePack.
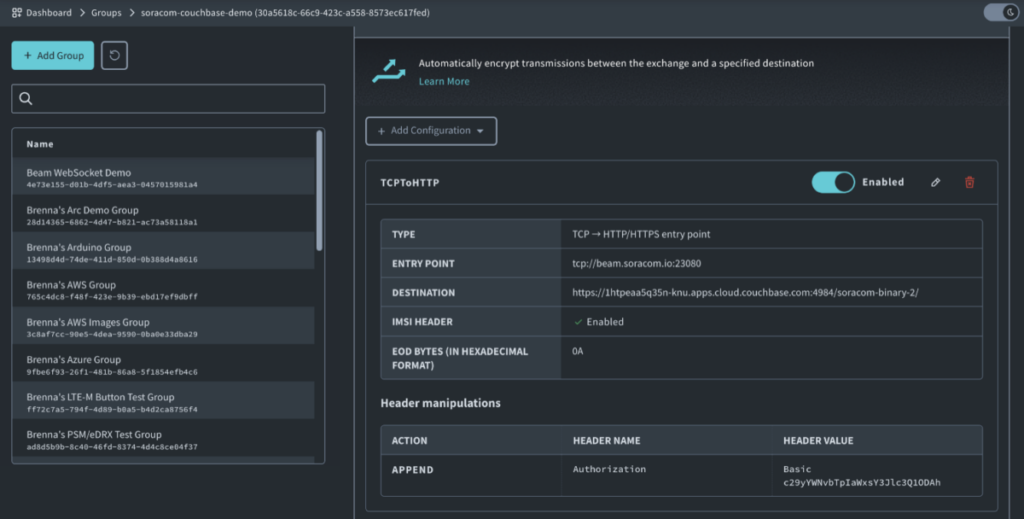
Step 5: Set up Soracom Beam with the Sync Gateway URL. Don’t forget to add a forward slash to the URL and include the base64 encoding of the user and password created in Couchbase for authentication.
Part 1: Sending JSON Data to Couchbase
In this section, we’ll guide you through sending data from the Raspberry Pi to the Couchbase database using a simple HTTP request. We’ll convert sensor data into a JSON payload and securely transmit it to the Couchbase Capella database. We’ll break down the Python code step by step and explain what it’s doing.
Step 1: We will first import all of the required libraries for our demo.
import time # Used for the time.sleep() method to loop

import requests # Used to send HTTP requests

import json # Used to package data into json

import base64 # Used to encode and decode authentication information

import RPi.GPIO as GPIO # Used to control GPIO on Raspberry Pi

import datetime # Used to give a timestamp for each loopCode language: PHP (php)
Step 2: The next thing is to create a function that will get the ICCID of the SIM using Soracom Metadata Service.
# Define a function to get ICCID from Soracom Metadata Service
def get_iccid_from_metadata():
    # Define the Soracom Metadata Service URL
    metadata_url = 'http://metadata.soracom.io/v1/subscriber'

    try:
        # Send an HTTP GET request to the Soracom Metadata Service
        response = requests.get(metadata_url)

        # Check if the request was successful (status code 200)
        if response.status_code == 200:
            # Parse the JSON response to extract the ICCID (SIM ID)
            data = response.json()
            iccid = data.get('iccid')

            if iccid:
                return iccid
            else:
                return "ICCID not found in response."
        else:
            return "Failed to retrieve ICCID. Status code: " + str(response.status_code)
    except Exception as e:
        return "An error occurred: " + str(e)

# Call the function to get ICCID
iccid = get_iccid_from_metadata()Code language: PHP (php)
Step 3: Next will be the function to get the distance data from the ultrasonic sensor.
# Function to read distance from the sensor

def read_distance():

    GPIO.setmode(GPIO.BCM)  # Use Broadcom GPIO pin numbering

    TRIG = 2  # GPIO pin 02

    ECHO = 3  # GPIO pin 03

    GPIO.setup(TRIG, GPIO.OUT)  # Set TRIG pin as output

    GPIO.setup(ECHO, GPIO.IN)  # Set ECHO pin as input

    GPIO.output(TRIG, GPIO.LOW)  # Initialize TRIG output as LOW

    # Send a HIGH signal to TRIG in order to trigger the sensor

    GPIO.output(TRIG, GPIO.HIGH)  # Send a HIGH pulse to TRIG

    time.sleep(0.00001)  # Wait 10 microseconds to trigger sensor

    GPIO.output(TRIG, GPIO.LOW)  # Set TRIG back to LOW

   # Once the sensor is triggered, it will send an ultrasonic pulse and set

    # the ECHO signal to HIGH. As soon as the receiver detects the original

    # ultrasonic pulse, the sensor will set ECHO back to LOW.

    # We need capture the duration between ECHO HIGH and LOW to measure how

    # long the ultrasonic pulse took on its round-trip.

    pulse_start = time.time()               # Record the pulse start time

    while GPIO.input(ECHO) != GPIO.HIGH:    # Continue updating the start time

        pulse_start = time.time()           # until ECHO HIGH is detected

    pulse_end = pulse_start                 # Record the pulse end time

    while time.time() < pulse_start + 0.1:  # Continue updating the end time

        if GPIO.input(ECHO) == GPIO.LOW:    # until ECHO LOW is detected

            pulse_end = time.time()

            break

    GPIO.cleanup()                  # Done with the GPIO, so let's clean it up

    # The difference (pulse_end - pulse_start) will tell us the duration that

    # the pulse travelled between the transmitter and receiver.

    pulse_duration = pulse_end - pulse_start

    # We know that sound moves through air at 343m/s or 34,300cm/s. We can now

    # use d=v×t to calculate the distance. We need to divide by 2, since we only

    # want the one-way distance to the object, not the round-trip distance that

    # the pulse took.

    distance = 34300 * pulse_duration / 2

    # The sensor is not rated to measure distances over 4m (400cm), so if our

    # calculation results in a distance too large, let's ignore it.

    if distance <= 400:

        return distance

    else:

        return NoneCode language: PHP (php)
Step 4: Next, we will go through the different pieces of the loop, starting with getting a timestamp, reading/printing the distance, and cleaning up the ICCID.
if __name__ == "__main__":

    try:

        while True:

            # Get a new timestamp for each loop

            timestamp = str(datetime.datetime.now())

            # Read the distance

            distance = read_distance()

            if distance:

                print("Distance: %.1f cm" % (distance))

            # Define the device_id (iccid)

            iccid = iccid.strip()  # Remove leading/trailing whitespacesCode language: PHP (php)
Step 5: In this step, we will add the URL for a Couchbase Sync Gateway. It’s important to add the forward slash to the end of the URL. We will also document our data and convert it into JSON.
# Couchbase Sync Gateway configuration

            sync_gateway_url = 'https://sample_sync_gateway_url'

            # Document data to be posted

            document_data = {

                "SIM": iccid,

                "Distance": distance,

                "TimeStamp": timestamp

            }

            # Convert the document data to JSON

            document_json = json.dumps(document_data)Code language: PHP (php)
Step 6: The next step is to add the authorization credentials and encode them in base64. We’ll also set the headers with the content and authorization info. This step also includes the HTTP POST request, success/failure messages, and the time to wait for the next loop. Finally is the code to keep looping until keyboard interrupt.
# Set the authentication credentials

            username = "user"  # Replace with your Sync Gateway username

            password = "pass"  # Replace with your Sync Gateway password

            credentials = "{}:{}".format(username, password)

            base64_credentials = base64.b64encode(credentials.encode()).decode()

            # Set the headers for the HTTP request with authentication

            headers = {

                "Content-Type": "application/json",

                "Authorization": "Basic {}".format(base64_credentials)

            }

            # Send an HTTP POST request to create or update the document

            response = requests.post(sync_gateway_url, data=document_json, headers=headers)

            if response.status_code == 201:

                print("Document created successfully")

            elif response.status_code == 200:

                print("Document updated successfully")

            else:

                print("Failed to create/update document. Status code:", response.status_code)

            # Wait for 1 second before the next loop

            time.sleep(1)

    except KeyboardInterrupt:

        passCode language: PHP (php)
Part 2: Binary Data Conversion and Soracom Beam
The second part of our demo introduces a more complex but highly efficient method. We’ll send data from the Raspberry Pi in binary format and use Soracom’s Binary Parser to turn it into JSON. Then, we’ll use Soracom Beam to send that JSON securely to the Couchbase database. This method shines when you’re dealing with a lot of data and want to be bandwidth-efficient.
Step 1: Import the required libraries. They’re mostly the same, with the addition of a socket to create a TCP socket and msgpack to encode data to MessagePack for binary serialization.
import time # Used for the time.sleep() method to loop

import socket # Used to create a TCP socket

import json # Used to package data into json

import base64 # Used to encode and decode authentication information

import RPi.GPIO as GPIO # Used to control GPIO on Raspberry Pi

import requests # Used to send HTTP requests

import msgpack # Used to serialize the data into MessagePack

import datetime # Used to give a timestamp for each loopCode language: PHP (php)
Step 2: The functions for metadata, as well as getting the distance, are the same as the previous demo, so refer back to those. Now we will go to setting the Beam host and port as well as creating the TCP socket to Beam
if __name__ == "__main__":
print("Starting distance measurement! Press Ctrl+C to stop this script.")
time.sleep(1)
# Soracom Beam host and port
beam_host = 'unified.soracom.io'
beam_port = 23080 # Replace with your Soracom Beam port
while True:
try:
# Get a new timestamp for each loop
timestamp = str(datetime.datetime.now())
# Read the distance and output the result
distance = read_distance()
if distance:
print("Distance: %.1f cm" % (distance))
# Create a TCP socket to Soracom Beam
s = socket.socket(socket.AF_INET, socket.SOCK_STREAM)
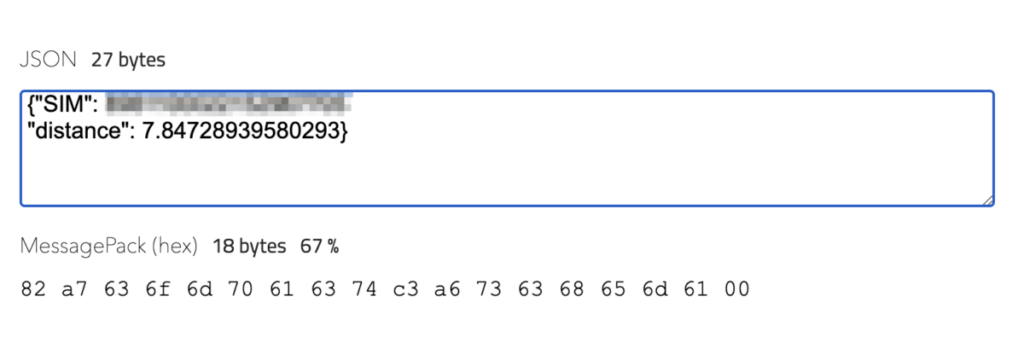
s.connect((beam_host, beam_port))Code language: PHP (php)Step 3: Finally, we will serialize this data into binary using MessagePack and send that over TCP to Soracom. In the image below, you’ll see that by using MessagePack to convert our JSON, it ends up being 67% of the original size of the JSON document.
# Here is the data we are sending

                data_to_send = {

                    "Distance": distance,

                    "SIM": iccid,

                    "Timestamp": timestamp}

                # Serialize data using MessagePack

                msgpack_data = str(msgpack.packb(data_to_send))

                # Debugging: Print the MessagePack data to inspect its content

                print("MessagePack Data:", msgpack_data)

                # Send the MessagePack data over the TCP connection to Soracom Beam

                s.sendall(msgpack_data)

                # Close socket when done

                s.close()

            # Find out how much time to wait until we should loop again, so that

            # each loop lasts 1 second

            time_to_wait = loop_start_time + 1 - time.time()

            if time_to_wait > 0:

                time.sleep(time_to_wait)

        except KeyboardInterrupt:

            print("Script stopped by user.")

            break

        except Exception as e:

            import traceback

            traceback.print_exc()Code language: PHP (php)
This data is converted into JSON using Soracom Binary Parser and then sent to Beam, which forwards it to our Couchbase Capella database.
Part 3: Viewing our data in the Couchbase database
Now that the data is in the database, let’s take a look.
Step 1: Head to the following link and log in: Couchbase Sign-In
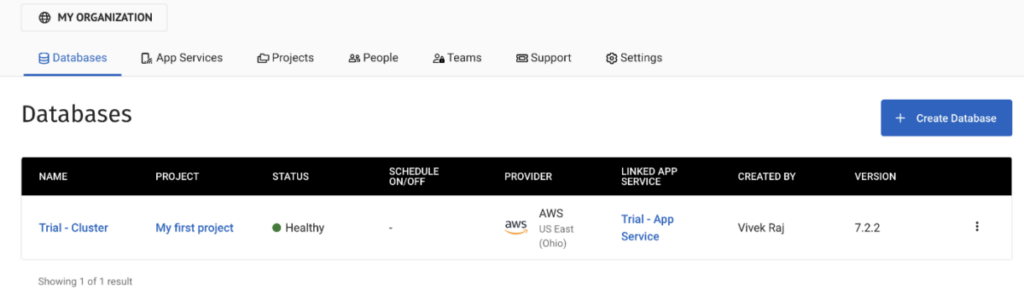
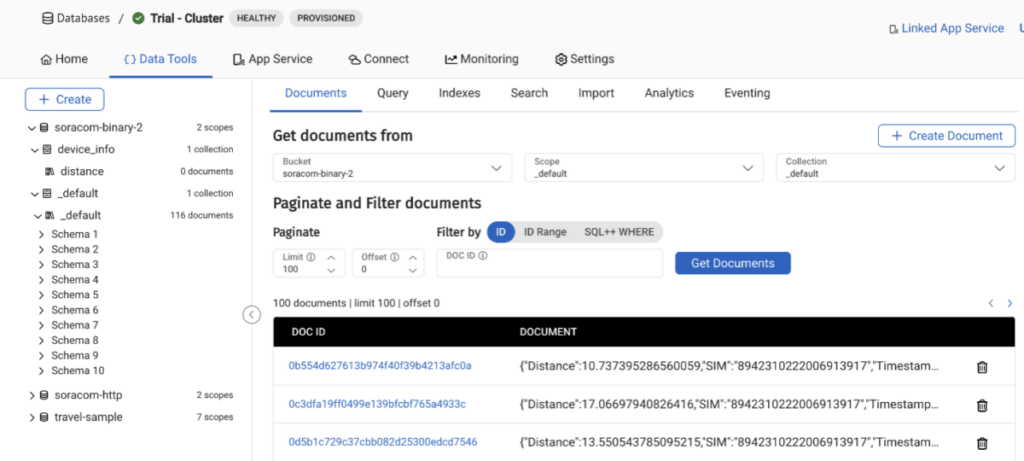
Step 2: We’ll start back to the initial database and click on our “Trial – Cluster” database again.
Step 3: On the next page, click on “Data Tools” at the top of the page, which will take you to your database
Step 4: On the left side of this page, expand your bucket. Our data will be stored under “_default” and “_default.“ To get our data, choose the documents from this bucket, scope, and collection, and it will pull up your documents.
Part 4: Couchbase Lite
Why Integrate Soracom with Couchbase Lite?
The combination of Soracom and Couchbase Lite addresses several critical challenges in IoT development:
- Reliable Data Transmission: Soracom’s network ensures that data sent from devices reaches its destination securely, overcoming the common connectivity issues in remote or challenging environments.
- Offline Data Handling: Couchbase Lite provides a robust solution for data storage and management directly on the device, ensuring functionality even without a constant internet connection.
- Effortless Data Synchronization: Automatic synchronization between local databases on IoT devices and a central database becomes seamless, enabling real-time data availability and decision-making.
- Scalability and Security: Both platforms are built with scalability and security in mind, making this integration suitable for deployments ranging from a handful of devices to millions.
Step 1: Installing Couchbase Lite on Your IoT Device
Couchbase Lite supports a wide range of platforms, including Android, iOS, .NET, and Java. Select the SDK that matches your device’s operating system and follow the installation instructions provided in the Couchbase documentation found here.
Step 2: Integrating Couchbase Lite with Your Application
After installing Couchbase Lite, initialize it within your application. This typically involves setting up a database instance and defining how your application interacts with this local database.
// Initialize Couchbase Lite
CouchbaseLite.init(getApplicationContext());
DatabaseConfiguration config = new DatabaseConfiguration();
Database database = new Database("my_database", config);

// Example: Creating a new document
MutableDocument myDocument = new MutableDocument();
myDocument.setString("type", "example");
myDocument.setString("message", "Hello, World!");
database.save(myDocument);
Code language: JavaScript (javascript)
Step 3: Synchronizing Data with a Central Database
To enable data synchronization between your device’s local Couchbase Lite database and a central Couchbase Server, set up the Couchbase Sync Gateway. Configure the Sync Gateway with your Couchbase Server and define replication rules in your IoT application to manage data sync.
// Configure replication
ReplicatorConfiguration replConfig = new ReplicatorConfiguration(database, new URLEndpoint(new URL("ws://your_sync_gateway_url")));
replConfig.setReplicatorType(ReplicatorConfiguration.ReplicatorType.PUSH_AND_PULL);

// Start replication
Replicator replicator = new Replicator(replConfig);
replicator.start();Code language: JavaScript (javascript)
Integrating Soracom with Couchbase Lite offers a powerful solution for managing IoT data, ensuring devices can communicate efficiently, store data locally, and synchronize with central databases effortlessly. This setup provides a scalable, secure, and reliable framework for IoT applications, empowering developers to create sophisticated and resilient IoT solutions.
We encourage IoT developers to explore the potential of Soracom and Couchbase Lite in their projects. Share your experiences and insights with us, and let’s innovate together in the IoT space.
Conclusion
The Soracom and Couchbase integration is a robust solution for IoT projects that need both cellular connectivity and a NoSQL database. Through our demo with a Raspberry Pi and an ultrasonic sensor, you’ve learned two great ways to send data safely and efficiently.
If you have other deliverables in mind for your IoT project, consult our developer docs or our solution architects for assistance.
………………
Want to learn more about the partnership between Soracom and Couchbase? Check out their blog to see just some of the amazing things possible when combining Soracom’s best-in-class connectivity and Couchbase’s plug-and-go network for IoT devices.
………………
Got a question for Soracom? Whether you’re an existing customer, interested in learning more about our product and services, or want to learn about our Partner program – we’d love to hear from you!


MORE LIKE THIS


What is Soracom?
Discover why technology innovators choose Soracom for connecting their
devices to the cloud over cellular.

Soracom's Picks
Advices and interviews, to inform and inspire.

Your Sensors Are Talking. Is Anyone Listening?
TL;DR Somewhere in your operation, a sensor is reporting a…

Roaming is Not a Four-Letter Word: Decoding the Complexity of Global IoT Deployments Without the Massive Bill
TL:DR Picture the moment. A VP of Operations is reviewing…

Catch the Traffic Before You Cut It Off: Auto-Capturing a PCAP with Event Handler + Soracom Flux
TL:DR The 10 GB Weekend A field device sits on…


Cloud Native
IoT Connectivity Platform
Soracom built the worlds first cloud-native connectivity management platform, built on AWS. Learn more about going beyond connectivity.