How-to: AWS Greengrass core with Soracom HSM eUICC
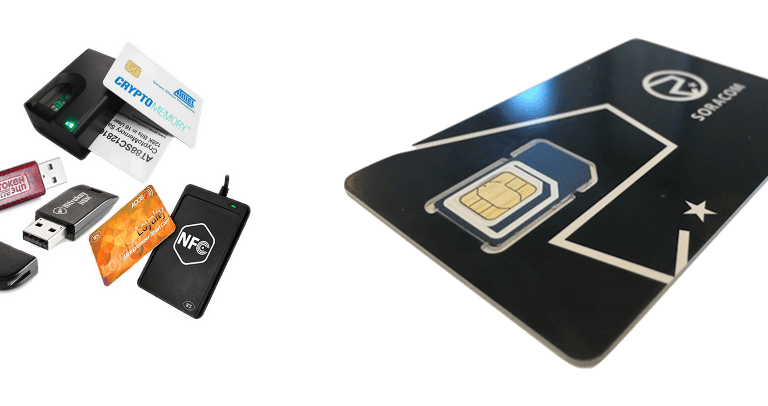
When I was first introduced to the concept of Hardware Security Module (HSM) back in 2008, I imagined that it was a huge computer heavily guarded with physical security access protocols. It turned out my concept was a little exaggerated. Wikipedia defines the HSM as “a physical computing device that safeguards and manages digital keys for strong authentication and provides cryptoprocessing. These modules traditionally come in the form of a plug-in card or an external device that attaches directly to a computer or network server.”
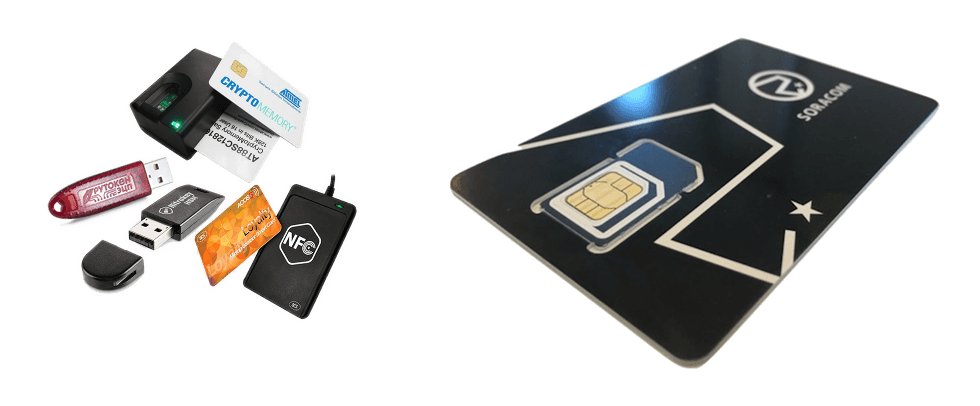
Once your secret keys are generated in the HSM, there is no way they can be compromised. Be aware that nowadays you can find HSM devices in the form of USB sticks and smart cards. Soracom has taken this concept one step further by enabling HSM services on its SIM (UICC and eUICC implied).
Considering the hardware crypto chip available on a SIM card and the level of security implemented backed by countermeasures against attacks such as Differential Power Analysis (DPA), the smart card and the SIM are ideal platforms for such use.
In the industry, the common access method used to consume the services of a HSM is a standard Application Programming Interface (API) with codename “Cryptoki”. This actually refers to the PKCS11 standard, originally written by RSA laboratories and now actively maintained by Oasis group. The standard describes a shared library which provides an API meant to consume the crypto services (in our case, the HSM Services provided by the Soracom SIM).
Soracom provides its own shared library (Soracryptoki) and relevant documentation to help you consume the HSM services programmatically. In its initial version, the library provided uses ISO7816 smart card interface (PC/SC) to communicate with the smart card. In the future, a version of the library will make use of the serial interface to communicate with the SIM directly through the modem, thereby not requiring special hardware such as a smart card reader.
 An interesting use case, to which we are directing our attention, is the coupling of an AWS Greengrass core with the Soracom Cryptoki solution. AWS Greengrass is a software solution that extends AWS Cloud capabilities to local devices, making it possible for those devices to collect and analyze data closer to the source of information, while also securely communicating with each other on local networks. The Greengrass core software can be deployed to a device to manage local processes for Greengrass groups, such as communication, shadow sync, and token exchange. This is an interesting optimization which removes the need for all your IoT devices and sensors to be connected directly to the cloud. Instead, they can be connected to your local network.
The Greengrass core manages secure communication to and from your cloud using HTTPS protocol and to/from your IoT devices using MQTT protocol. Greengrass core furthermore lets you trigger AWS Lambda functions for processing your sensor data or triggering actions. AWS Lambda functions are units of functional code provisioned in the cloud, and now available locally thanks to AWS Greengrass.
The goal here is to generate a set of RSA 2048 keys directly on the Soracom SIM to manage the HTTP and MQTT communications. In this scenario, the public key has public accessibility whereas the private key can never be disclosed, not even to the Security Officer (SO in cryptoki terminology).
The following walkthrough will guide you through the process of empowering your Greengrass core with an affordable HSM solution from Soracom:
Before you begin, you’ll need:
- a computer with an SD card reader
- 1 special eUICC Soracom Card with our Cryptoki javacard applet on it
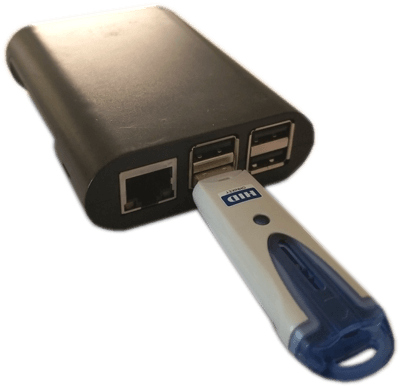
- a Mini SIM PC/SC compliant Card reader (eg: Omnikey 6121 Mobile USB Smart Card Reader)
- a Raspberry PI3 with keyboard+mouse and HDMI monitor
- an 8GB SD card
- The Soracryptoki library for your target platform as distributed by Soracom
1. Download a copy of Raspbian OS onto your computer and use Etcher software to write it to a micro SD card
2. Insert your micro SD card into the Pi, and power it up
3. Set the user password and connect your Pi to WiFi and let the Pi update itself
4. Follow the Greengrass core steps to make the Pi Greengrass ready [Step 9 to 13]
(https://docs.aws.amazon.com/greengrass/latest/developerguide/module1.html)
5. Install PCSC lite API
sudo apt-get install libusb-dev libusb-1.0 libusb-1.0-0.dev
sudo apt-get install libccid
sudo apt-get install pcscd
sudo apt-get install libpcsclite1
sudo apt-get install libpcsclite-dev
6. Install PS/SC Generic drivers
wget https://ccid.apdu.fr/files/ccid-1.4.30.tar.bz2
tar xvjf ccid-*.tar.bz2
cd ccid-1.4.30
./configure
Make
sudo make install
cd ..
7. Install libssl1.0-dev
sudo apt install libssl1.0-dev
8. Install the Soracryptoki library and its command line tool.(First Copy the file “soracryptoki-armv7l.tgz to your raspberry pi home directory: /home/pi)
tar xvzf soracryptoki-armv7l.tgz
cd soracryptoki-armv7l
sudo ./INSTALL.SH
cd ..

soracryptoki-init --getslotinfo --slot 0
9. Connect the Card reader with the eUICC inside. Check if it works with command:
soracryptoki-init --getslotinfo --slot 0
10. Initialise the token and generate an RSA keypair (thereby outputing a CSR)
soracryptoki-init --init-token --slot 0 --sopin 87654321 --userpin 12345678 --label greengrass
soracryptoki-init --genkeypair --slot 0 --userpin 12345678 --label iotkey --keypairtype RSA --keysize 2048 --csr iotkey.csr
11. Sign in to you Amazon Web Service Console and open IOT Core
12. Click the Greengrass section
13. Create a Core
- Under Greengrass, click Cores
- Click the Create Core button
- Click Create Group and Core
- Click “Use easy creation”
- Give a group name (eg: AWSIOT) then click Next
- Give Core Name (eg: AWSIOT_Core) then click Next
- Click Create Group and Core
- Download the created resources (Eg: ba84f02140-setup.tar.gz)
- Download the appropriate software bundle as well (greegrass-linux) unless you have a special bundle already available
- Click Finish
14. Adding Certificate to your IOT Core.
- By default you should be in the AWSIOT Group
- Go back to Services ->_Iot Core from the AWS console window
- Click Manage-> Things
- Select the AWSIOT_Core that you just created
- Click Security
- Under Certificates, click “View other options”
- Click Create with CSR, select the CSR file which was created in Step 10,
- Click Upload file
- From the results page, download the certificate for the thing : *.cert.pem
- Still from the results page, where it says “You also need to download a root CA for AWS IoT” Download the Verisign signed Root CA for RSA 2048 bit key and Name it “root.ca.pem”
- Click Activate to activate the certificate
- Click Attach Policy
- Select AWSIOT_Core-policy
- Click Done
15. Install the greengrass software bundle (from Step 13) on the device (it is better to extract under the root directory /)
sudo tar xzvf greengrass-linux-armv7l-1.6.99.tar.gz -C /
16. Unpack your downloaded resources from step 13 and copy only the json config file to the config folder of greengrass (overwrite the existing)
tar xzvf ba84f02140-setup.tar.gz
sudo cp config/config.json /greengrass/config/config.json
Note: please ignore all the files extracted under the “cert” directory
rm -rf certs
17. Copy the downloaded certificate to the cert folder of the greengrass software bundle and the generated certificate also.
sudo cp root.ca.pem /greengrass/certs/root.ca.pem
sudo cp 8a064351aa-certificate.pem.crt.txt /greengrass/certs/8a064351aa.cert.pem
18. Edit the Greengrass configuration file (greengrass/config/config.json)
sudo vi greengrass/config/config.json
- A “crypto” json element must be added before the “coreThing” element. And “caPath” , “certPath” and “keyPath” elements can be removed from runtime;
- If there exists a crypto element with value null at the end of the json structure, please remove it as well as the comma just before this element.
- See example below:
{
    "crypto": {
        "caPath" : "file:///greengrass/certs/root.ca.pem",
        "PKCS11" : {
            "OpenSSLEngine" : "/path-to-p11-openssl-engine",
            "P11Provider" : "/usr/lib/libsoracryptoki.so",
            "slotLabel" : "greengrass",
            "slotUserPin" : "12345678"
        },
        "principals" : {
            "IoTCertificate" : {
                "privateKeyPath" : "pkcs11:object=iotkey;type=private",
                "certificatePath" : "file:///greengrass/certs/8a064351aa.cert.pem"
            },
            "MQTTServerCertificate" : {
                "privateKeyPath" : "pkcs11:object=iotkey;type=private"
            }
        }
    },
    "coreThing": {
        "thingArn": "arn:aws:iot:us-east-1:189983132292:thing/AWSIOT_Core",
        "iotHost" : "a1ir7wrfjeljfi.iot.us-east-1.amazonaws.com",
        	"ggHost" : "greengrass.iot.us-east-1.amazonaws.com",
        	"keepAlive" : 600
    },
    "runtime": {
        "cgroup": {
            "useSystemd": "yes"
        }
    },
    "managedRespawn": false
 }
19. Finally, start the Greengrass Core service
cd /home/pi/greengrass/ggc/core

sudo ./greengrassd start
And there you are, running the security through the SIM card HSM.
You can find more information about AWS Greengrass on the AWS Greengrass developer website : https://docs.aws.amazon.com/greengrass/latest/developerguide/what-is-gg.html
You can furthermore code applications which consume the cryptoki services by making use of the soracryptoki library (/usr/lib/libsoracryptoki.so). Plenty of code examples can be found in the standard itself: http://docs.oasis-open.org/pkcs11/pkcs11-base/v2.40/os/pkcs11-base-v2.40-os.html
Leverage your IoT use cases by using the Soracom console and suite of services. Discover more on http://developers.soracom.io/
Happy coding!