
How to use NB-IoT in the US with Soracom and M5Stack
In the past year, Soracom began to offer T-Mobile NB-IoT in the US. In this article, we will demonstrate how to connect to the network with Soracom plan01S SIM and M5Stack. Example code will be provided.
What is NB-IoT?
NB-IoT stands for Narrowband Internet of Things, which is a wireless communication standard that uses low-power wide area network (LPWAN) technology.
It is a low-bitrate technology that is integral to 4G and 5G connectivity. It is optimized for infrequent transmissions that mainly use small data volumes to reduce energy usage.
Therefore, the main benefits of NB-IoT are:
- Ubiquitous coverage and secure connection, equivalent to LTE networks
- Longer battery life for devices with less energy use
- Cheaper device costs resulting from the simplicity of modems
With these features, NB-IoT is an ideal solution for applications such as:
- Smart gas or water meters
- Smart street lighting
- Smart farming (monitoring temperature and humidity)
- Etc.
Devices and Setup
For this process, we will be using the following tools and devices:
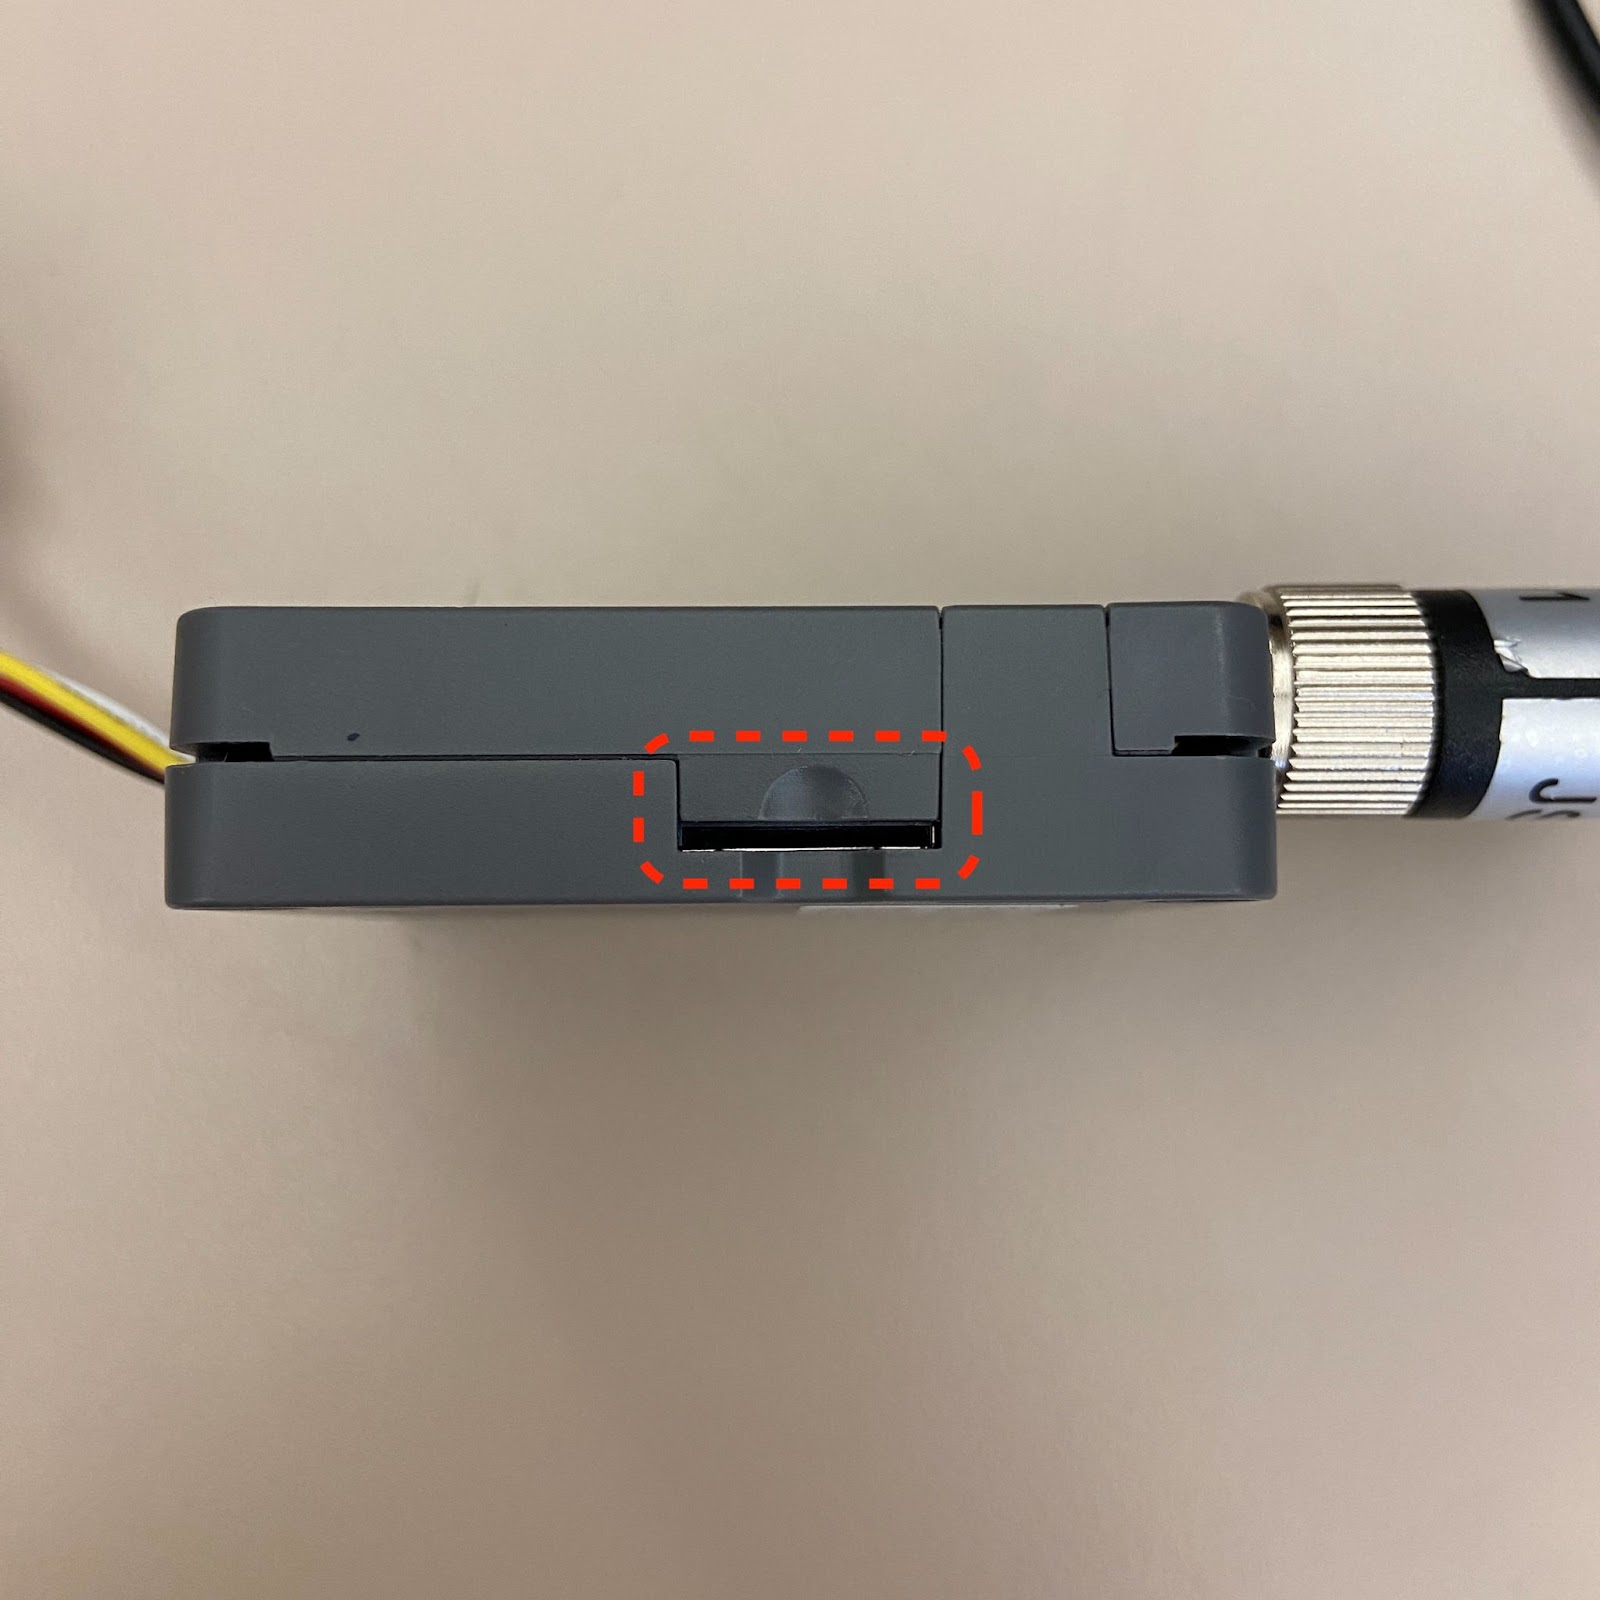
Soracom Plan01s SIM card
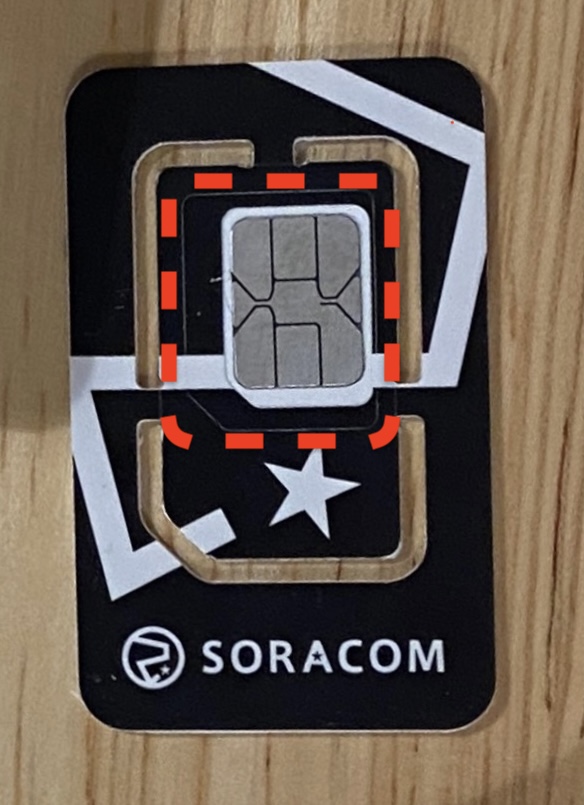
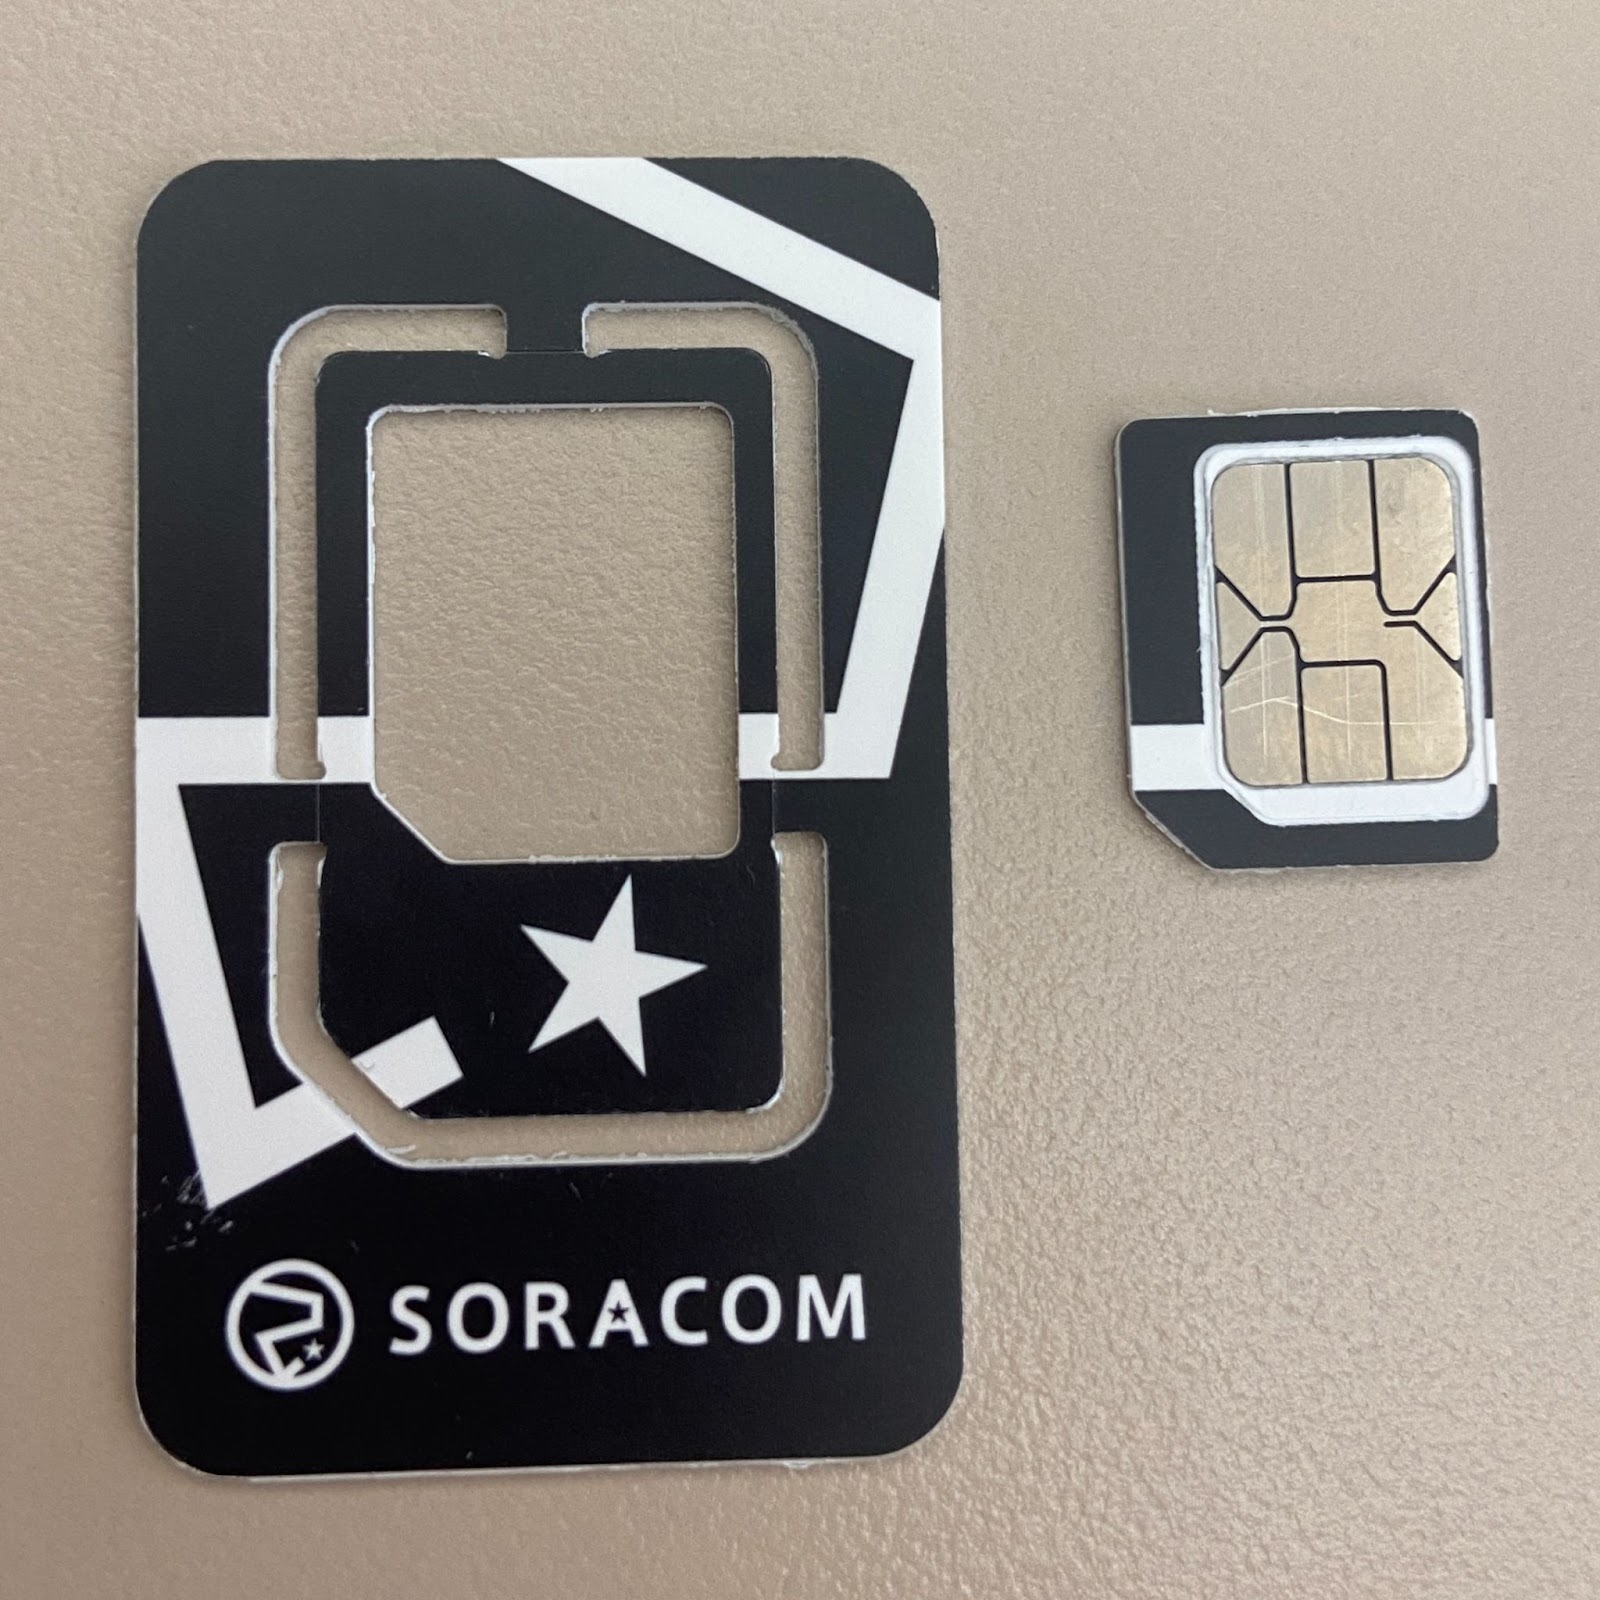
For this test, we will be using the Micro-SIM form factor. Carefully remove the Micro-SIM as shown by the red line, taking care not to make it the smallest size (Nano-SIM).
M5Stack Core2 ESP32 IoT Development Kit
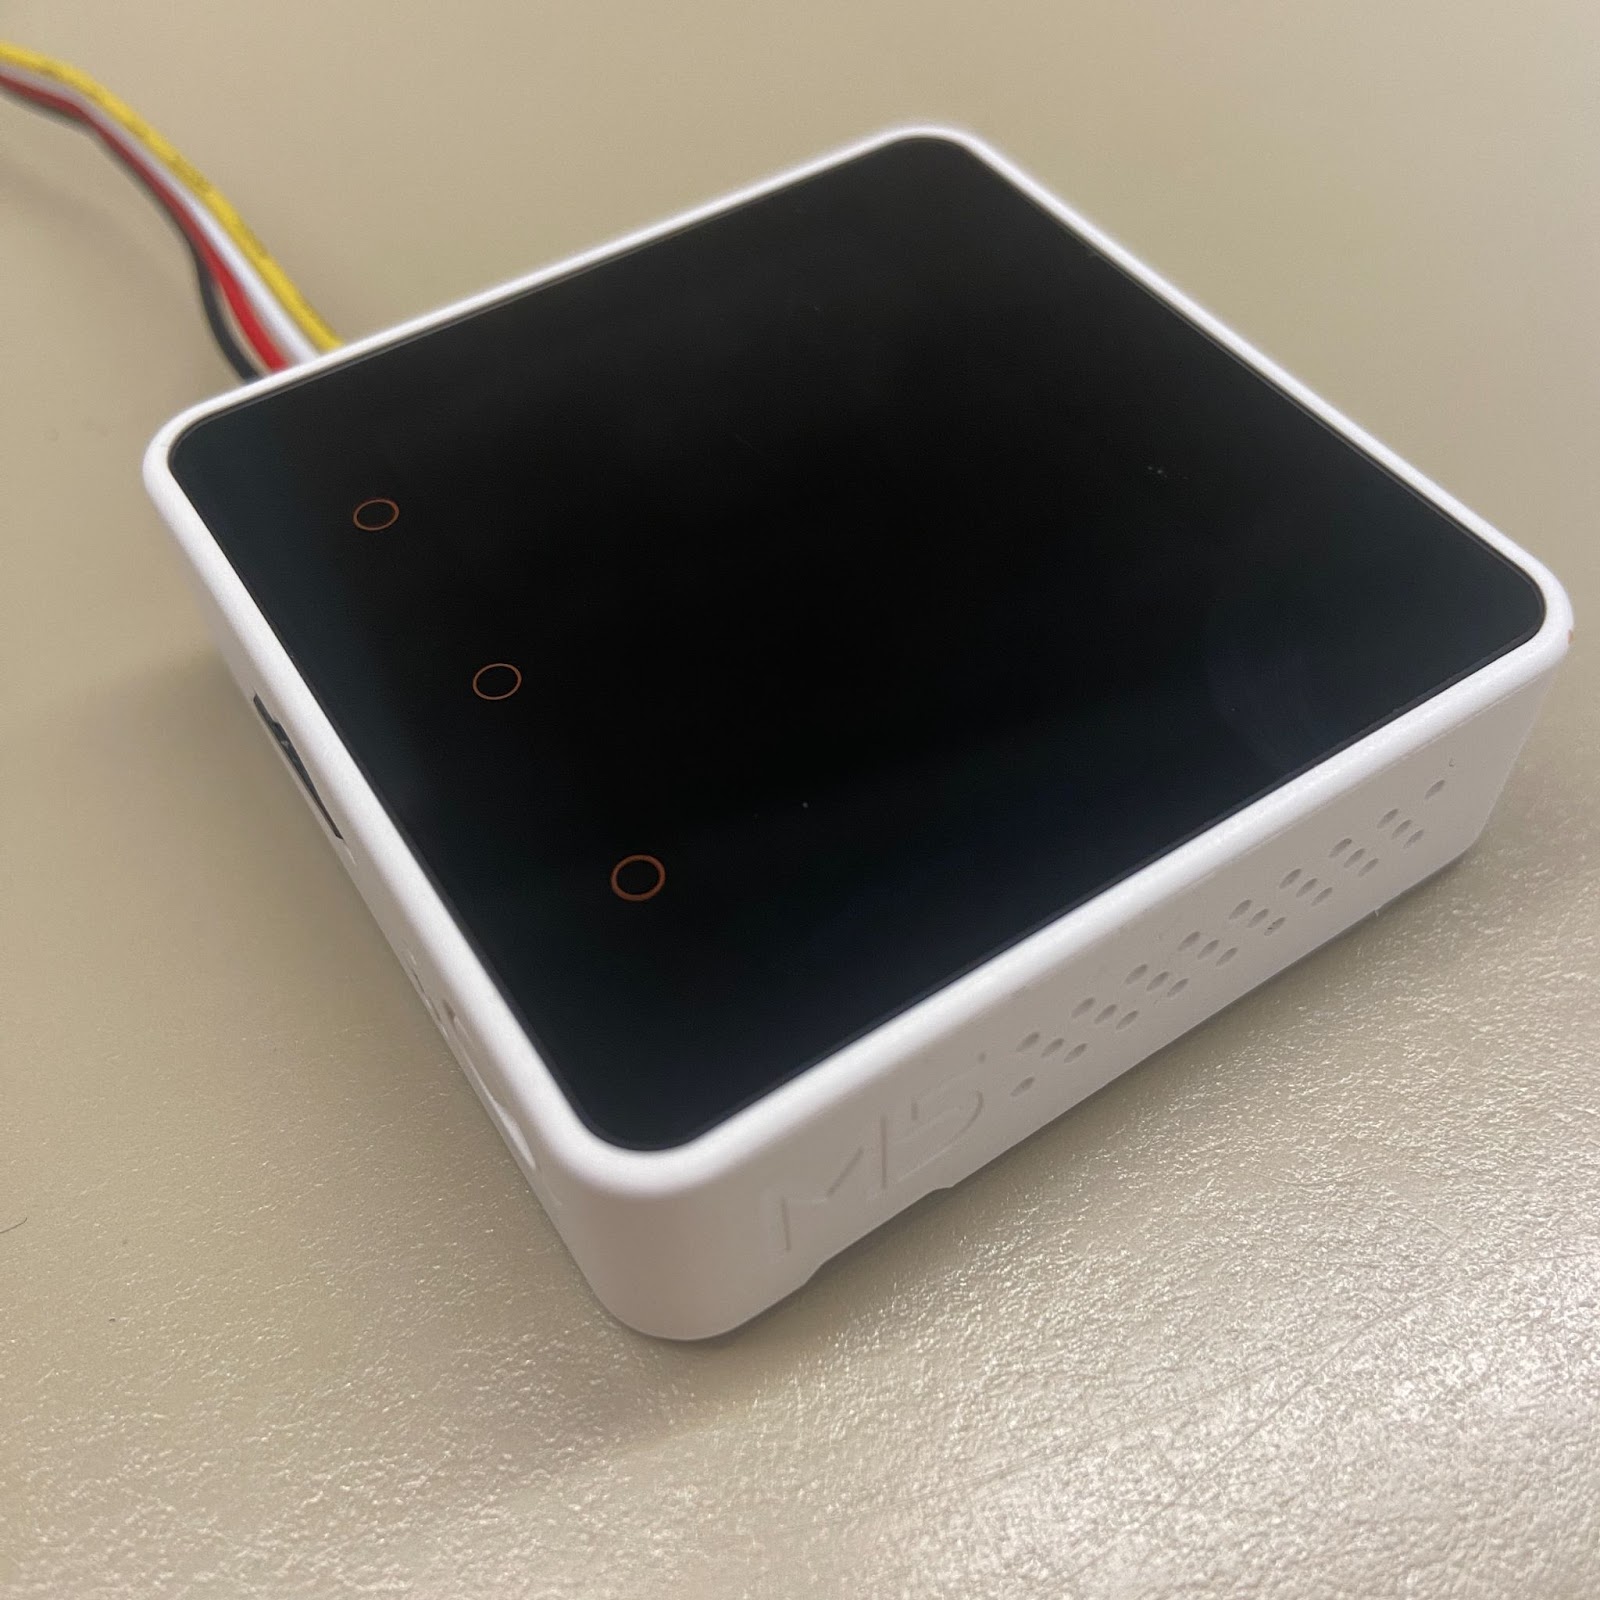
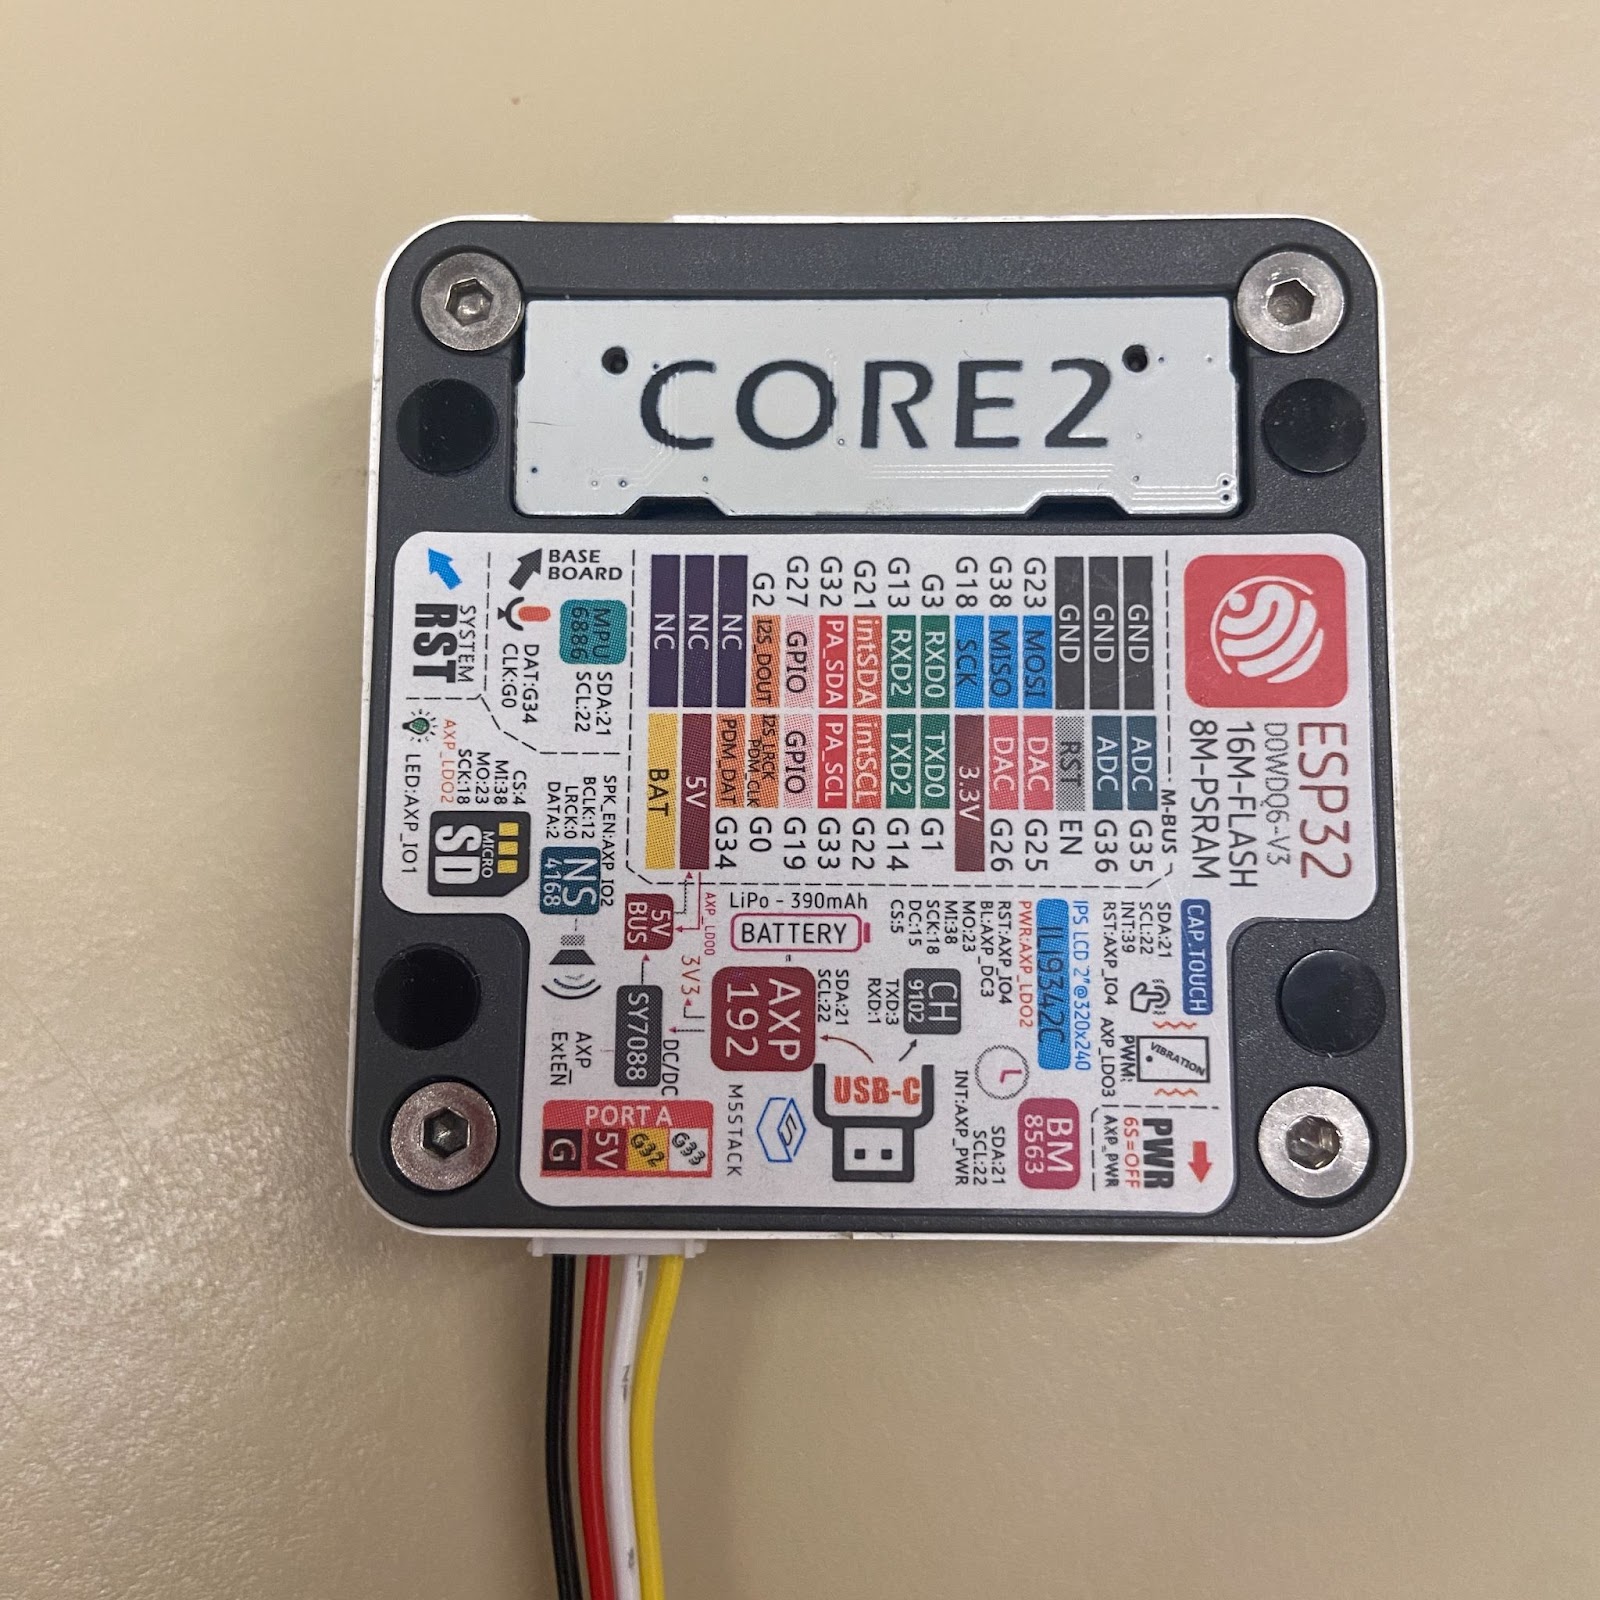
We will also be using the M5Stack Core2 development kit, which you can find here.
UNIT CatM+GNSS
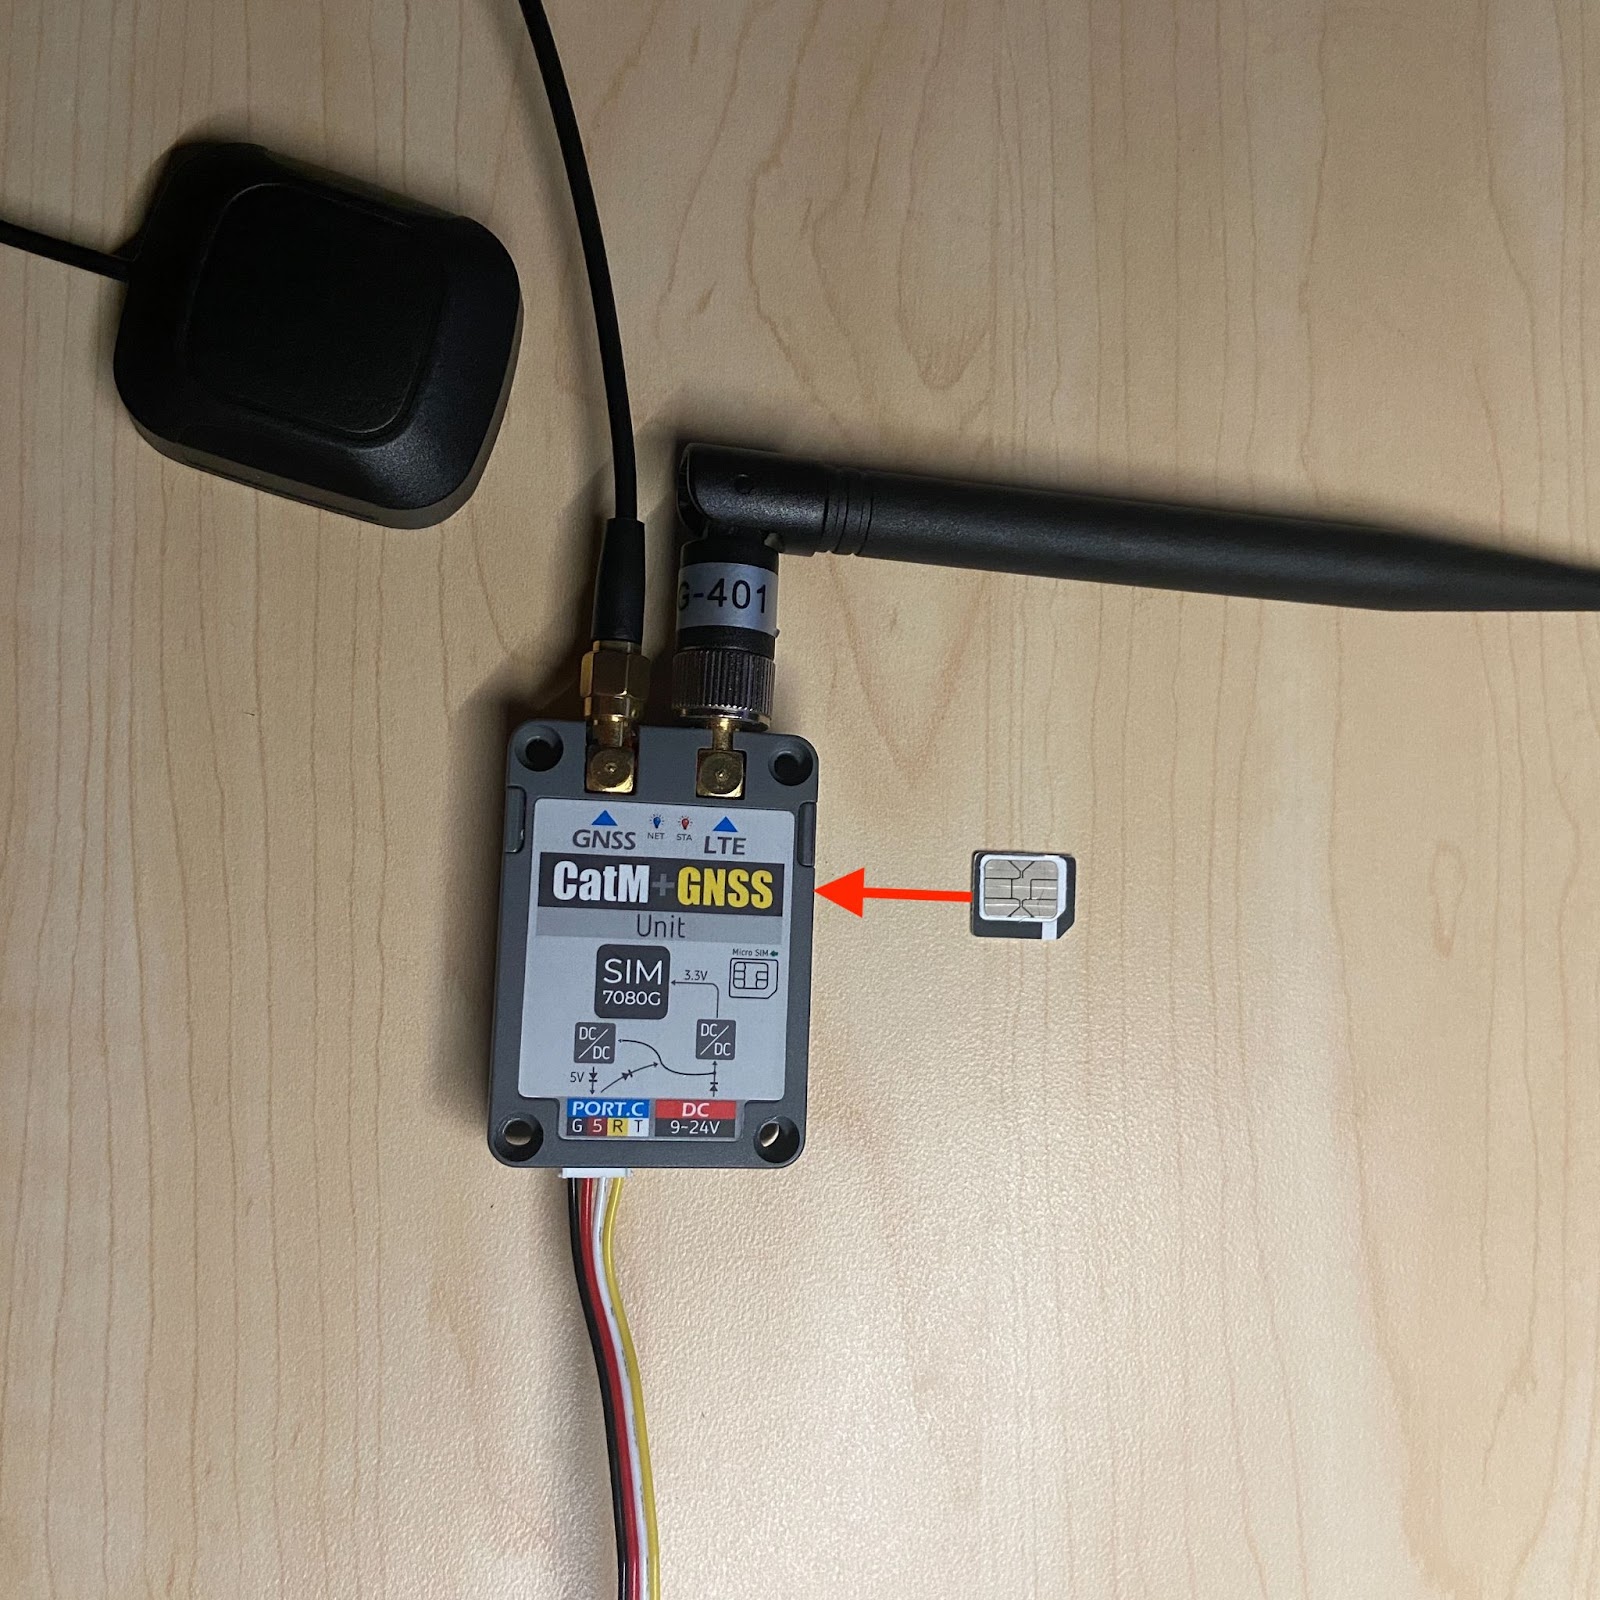
We will also utilize the CAT-M/NB-IoT+GNSS unit with SIM7080G.
You will want to insert the Soracom SIM card into the right side where shown.
Macbook Pro (Corei5, Monterey)
Other computers (Windows, Linux) are fine, but we will be using a Mac in this article. Fortunately, reference links to other operating systems will also be provided.
4 Conductor Flat Cable
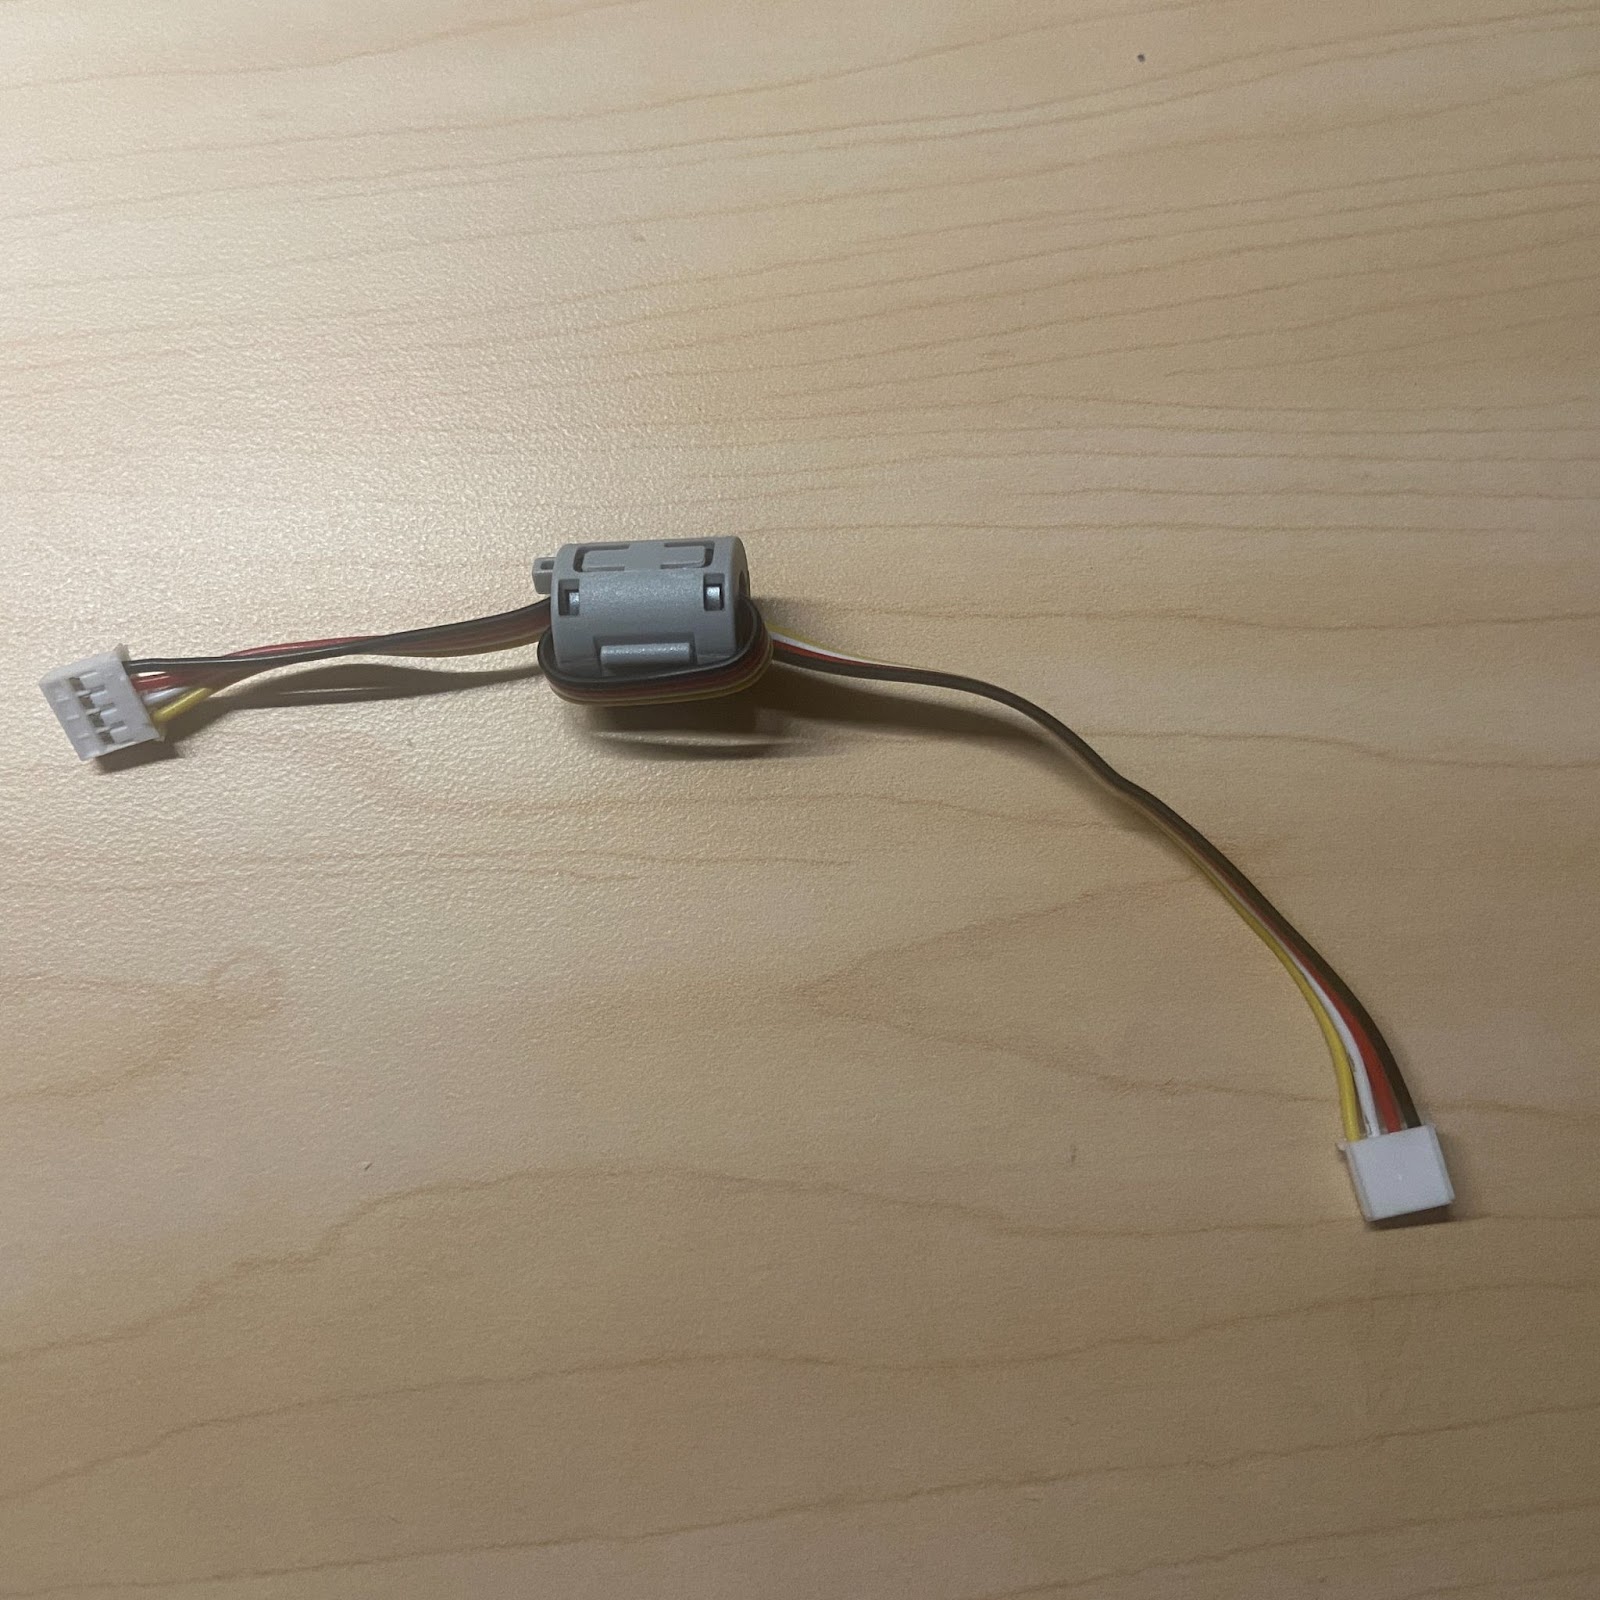
This will be used to connect the UNIT CatM+GNSS and M5Stack Core2.
USB-C cable
This will be used to connect the M5Stack Core2 to the computer.
Setup Overview
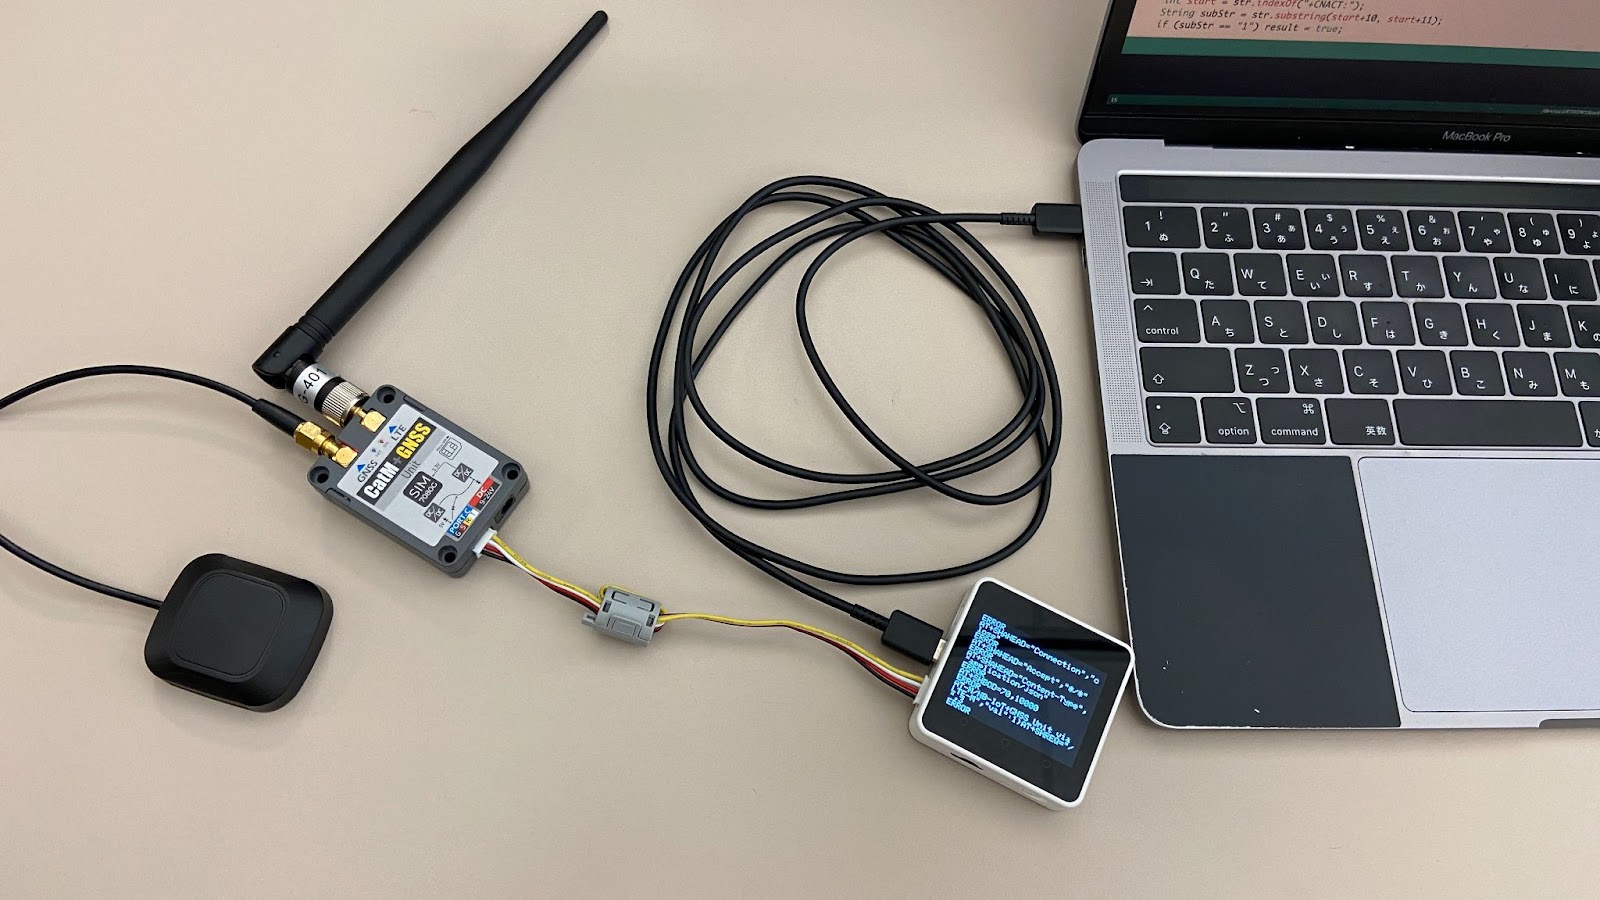
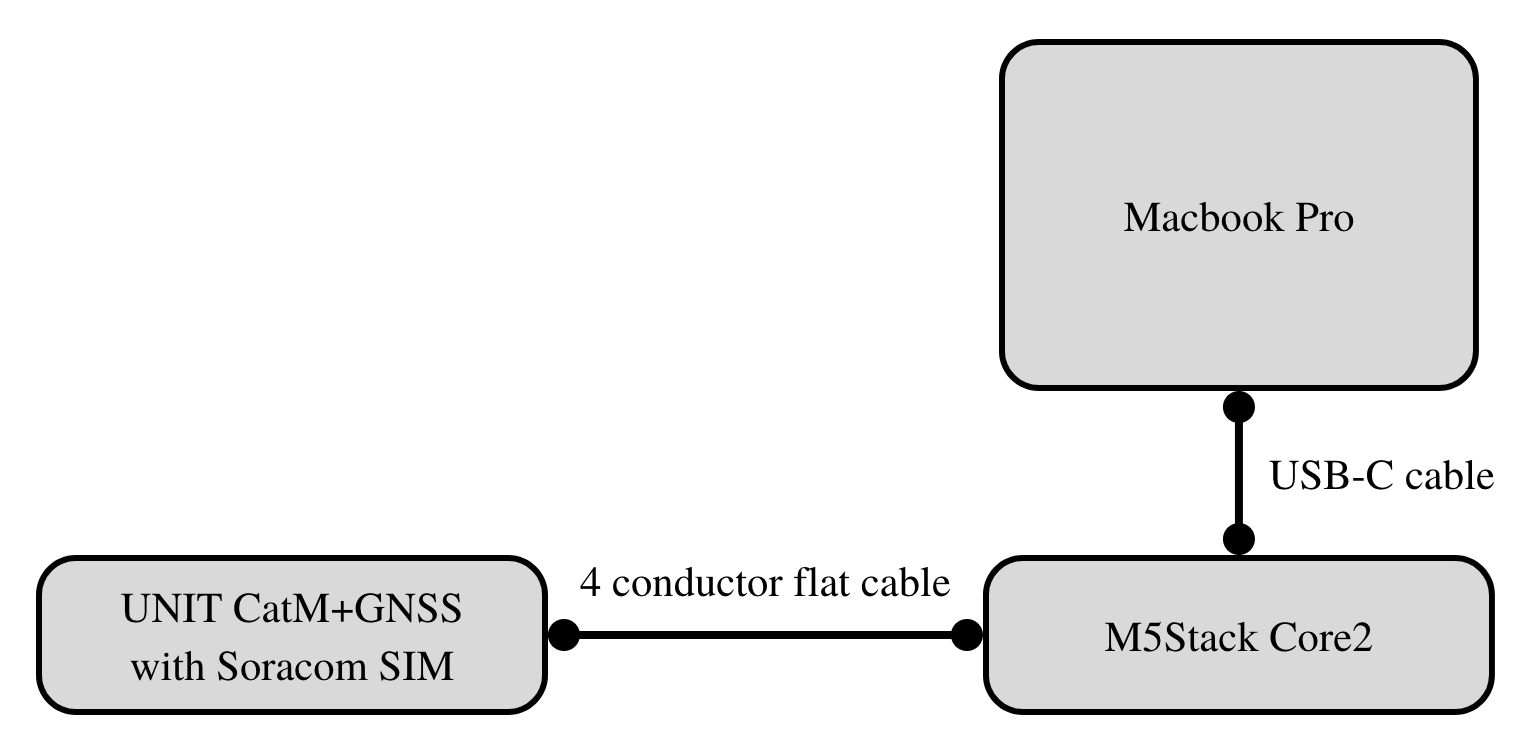
First, connect the M5 Core2 to the UNIT CatM+GNSS with a flat cable, and then to your computer with a USB-C cable.
Development Environment Setup
If you are using a computer running Windows or Linux, follow the M5 Stack official instructions here.
1). Install Arduino IDE
If you do not have Arduino IDE on your computer, you will need to install the IDE from here.
2). Install USB Driver and ESP32 Boards to Arduino IDE
Follow the M5Stack’s official instructions. If your Arduino IDE does not recognize the board after installing both the driver and the boards, you can follow the process laid out in this community post. The Mac OS does seem to introduce some specific challenges, so you may need to troubleshoot.
3). Prepare a Header File for SIM7080G
Download the header file for SIM 7080G from here. Locate this file in the proper directory, depending on where your sketch is, so that the sketch can include the header file.
Sample Code and Its Explanation
What the Code Will Do:
- Set up the board display
- Initialize and reboot SIM7080G
- Connect to NB-IoT network
- Send JSON data to Soracom Harvest through a POST request using AT commands.
Example code
Here is the code that can connect to T-Mobile NB-IoT.
| #include “M5Core2.h” #include “M5GFX.h” #include “M5_SIM7080G.h” M5GFX display; M5Canvas canvas(&display); M5_SIM7080G device; String readstr; bool DEBUG = true; bool SORACOM_CONNECTED = false; void log(String str) { Serial.print(str); canvas.print(str); canvas.pushSprite(0, 0); } void debug(String str) { Serial.print(str + “rn”); } bool isIpActive(String str) { bool result = false; int start = str.indexOf(“+CNACT:”); String subStr = str.substring(start+10, start+11); if (subStr == “1”) result = true; return result; } String getIpAddress(String str) { int total = str.length(); int start = str.indexOf(“+CNACT:”); String buf = str.substring(start+13, total); int term = buf.indexOf(“r”); String result = buf.substring(0, term-1); return result; } void connectSoracom() { log(String(“Connecting to SORACOM…rn”)); device.sendMsg(“AT+GSNrn”); // Request TA Serial Number Identification(IMEI) readstr = device.waitMsg(1000); log(readstr); debug(readstr); device.sendMsg(“AT+CFUN=0rn”); readstr = device.waitMsg(1000); debug(readstr); device.sendMsg(”AT+CGDCONT=1,”IP”,”soracom.io”rn”); readstr = device.waitMsg(1000); debug(readstr); device.sendMsg(“AT+CFUN=1rn”); readstr = device.waitMsg(1000); debug(readstr); device.sendMsg(“AT+CGNAPNrn”); readstr = device.waitMsg(1000); debug(readstr); // set the preferred selection between CAT-M and NB-IOT device.sendMsg(“AT+CMNB?rn”); readstr = device.waitMsg(1000); debug(readstr); log(readstr); device.sendMsg(“AT+CPSI?rn”); // Inquiring UE System Information readstr = device.waitMsg(1000); debug(readstr); log(String(“CPSI?”)+readstr); device.sendMsg(“AT+CNACT=0,1rn”); readstr = device.waitMsg(1000); debug(readstr); device.sendMsg(“AT+CNACT?rn”); readstr = device.waitMsg(1000); log(readstr); debug(readstr); if (isIpActive(readstr) == true) { log(String(“IP: “) + getIpAddress(readstr) + String(“rn”)); SORACOM_CONNECTED = true; log(String(“Connected Successfuly!.rn”)); log(String(“Changing to NB-IoT.rn”)); device.sendMsg(“AT+CMNB=2rn”); readstr = device.waitMsg(1000); log(readstr); device.sendMsg(“AT+COPS=1,2,”310260″rn”); readstr = device.waitMsg(1000); log(readstr); // Check which network the device is connected to. device.sendMsg(“AT+CMNB?rn”); readstr = device.waitMsg(1000); log(String(“CMNB?”)); debug(readstr); log(readstr); // Check UE system information device.sendMsg(“AT+CPSI?rn”); readstr = device.waitMsg(1000); log(String(“CPSI?”)); debug(readstr); log(readstr); } else { log(String(“Not connected.rn”)); } } // Posts json data to Soracom Harvest. void postData() { device.sendMsg(“AT+SHCONF=”URL”,”http://uni.soracom.io”rn”); readstr = device.waitMsg(1000); log(readstr); device.sendMsg(“AT+SHCONF=”BODYLEN”,1024rn”); readstr = device.waitMsg(1000); log(readstr); device.sendMsg(“AT+SHCONF=”HEADERLEN”,350rn”); readstr = device.waitMsg(1000); log(readstr); device.sendMsg(“AT+SHCONNrn”); readstr = device.waitMsg(1000); log(readstr); device.sendMsg(“AT+SHSTATE?rn”); readstr = device.waitMsg(1000); log(readstr); device.sendMsg(“AT+SHCHEADrn”); readstr = device.waitMsg(1000); log(readstr); device.sendMsg(“AT+SHAHEAD=”User-Agent”,”CAT-M/NB-IoT+GNSS Unit w/ SIM7080G”rn”); readstr = device.waitMsg(1000); log(readstr); device.sendMsg(“AT+SHAHEAD=”Connection”,”close”rn”); readstr = device.waitMsg(1000); log(readstr); device.sendMsg(“AT+SHAHEAD=”Accept”,”*/*”rn”); readstr = device.waitMsg(1000); log(readstr); device.sendMsg(“AT+SHAHEAD=”Content-Type”,”application/json”rn”); readstr = device.waitMsg(1000); log(readstr); device.sendMsg(“AT+SHBOD=70,10000rn”); readstr = device.waitMsg(1000); log(readstr); device.sendMsg(“{“str”:”Hello Soracom! from CAT-M/NB-IoT+GNSS Unit via LTE-M”,”val”:1}”); readstr = device.waitMsg(1000); log(readstr); device.sendMsg(“AT+SHREQ=”/”,3rn”); readstr = device.waitMsg(1000); log(readstr); } void setup() { M5.begin(); display.begin(); if (display.isEPD()) { display.setEpdMode(epd_mode_t::epd_fastest); display.invertDisplay(true); display.clear(TFT_BLACK); } if (display.width() < display.height()) { display.setRotation(display.getRotation() ^ 1); } canvas.setColorDepth(1); // mono color canvas.createSprite(display.width(), display.height()); canvas.setTextSize((float)canvas.width() / 160); canvas.setTextScroll(true); //SIM7080 log(String(”Start SIM7080 init…rn”)); device.Init(&Serial2, 33, 32); /* Reboot SIM7080G */ log(“Reboot SIM7080G..”); while (device.send_and_getMsg(”AT+CREBOOTrn”).indexOf(”OK”) == -1) { log(device.send_and_getMsg(”AT+CREBOOTrn”)); log(“#”); delay(1000); } log(String(”Finishedrn”)); } void loop() { // connect soracom if (SORACOM_CONNECTED == false) { connectSoracom(); } else { postData(); exit(0); } } |
Learn more about AT commands here.
Before executing the code, please make sure that the power supply is enough. When the power is enough, a blue LED flashes. When only a red LED is flashing, your flat cable may be damaged, or the board is not connected to your computer.
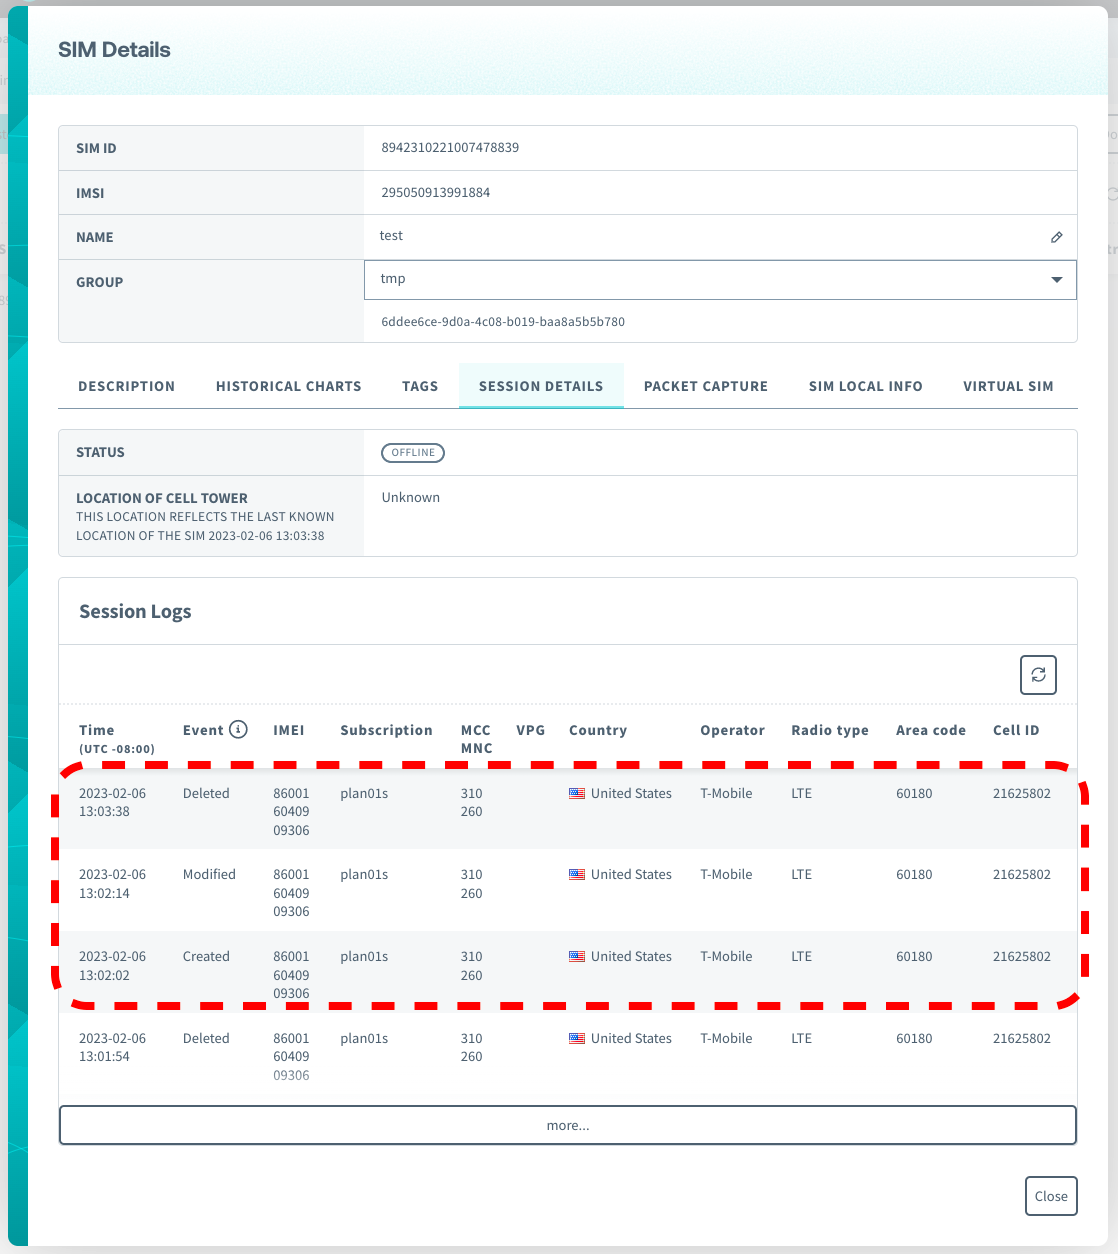
Checking the SIM Connection to NB-IoT
In the Soracom console, you can check the SIM status. Below, you can see that the session has been created, which means that the SIM is online and ready to transmit data.
- Event “Created” indicates that your device established a connection to Cat M.
- Event “Modified” indicates that your device changed to NB-IoT from Cat M.
- Event “Deleted” indicates that your device closed a connection.
Since the Soracom console shows “Radio type” as LTE, we want to make sure that it is connected to the NB-IoT network. The part of the log that shows network status is below.

These strings show that it is connected to the NB-IoT network properly.
- AT+CMNB is used to check which network your device is connected to. Number 2 stands for NB-IoT.
- [AT+CPSI?](https://m2msupport.net/m2msupport/atcpsi-inquiring-ue-system-information/) is used to return system information. It shows the network is NB-IOT, and it is online.
Once the code has sent JSON data to Soracom Harvest and the connection is properly established, you should be able to check the data from the console.
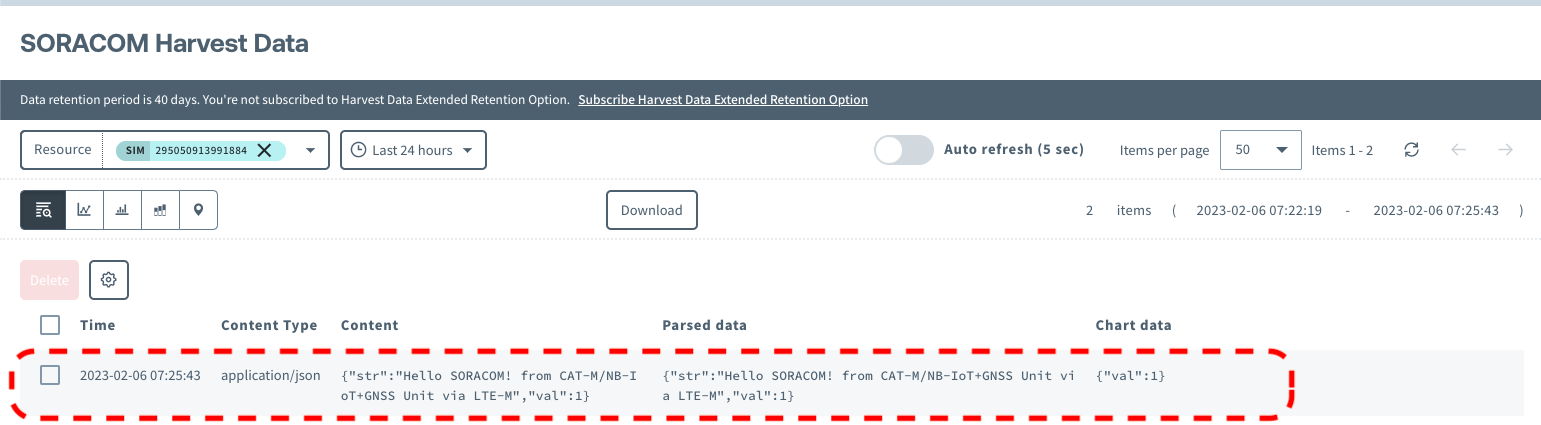
If you see the transmitted data here, congratulations! This means that your device was able to send the data through the NB-IoT network.
Tips for Successful Connection
- You do not need to supply power to the device as long as the board is connected to the computer. If the blue LED light is flashing, the power is sufficient. When only a red LED light is flashing, there is not enough power being supplied. Please make sure that the flat cable is not damaged and is fully connected.
- Reading the serial with anything other than 15200 bps may result in garbled characters.
- If you get an error message saying “Exec: “python”: executable file not found in $PATH”, replace all “python” with “python3” in “~/Library/Arduino15/packages/esp32/hardware/esp32/*/platform.txt” to solve the error. [Reference](https://forum.arduino.cc/t/exec-python-executable-file-not-found-in-path/971847/15)
- Depending on your M5 Stack board version, proper port numbers can change.
- Please make sure you have activated Soracom Harvest before executing the code.
………….
Do you have questions about this process or another IoT project? Speak with one of our experts today to learn how Soracom has helped more than 20,000 innovators deploy, scale, and secure their IoT projects.


MORE LIKE THIS


What is Soracom?
Discover why technology innovators choose Soracom for connecting their
devices to the cloud over cellular.

Soracom's Picks
Advices and interviews, to inform and inspire.


Security Shouldn’t Depend on the Device: Introducing Soracom Traffic Filtering
TL:DR There’s a quiet paradox at the heart of IoT…

Soracom-KDDI’s Recognition as a Leader in the Gartner® Magic Quadrant™
TL;DR A New High-Water Mark for Soracom This has been…

eSIM vs. iSIM: The Battle for the Smallest Square Inch
TL;DR The Paradox of Shrinking Devices There’s a quiet tension…


Cloud Native
IoT Connectivity Platform
Soracom built the worlds first cloud-native connectivity management platform, built on AWS. Learn more about going beyond connectivity.