Sending MQTT Messages From a Cellular Modem via AT Commands
If you are working in the IoT space, chances are you have worked with, or at least run across, the MQTT protocol (Message Queuing Telemetry Transport). MQTT is a data-agnostic publish/subscribe messaging protocol designed to support applications that are constrained by low bandwidth and low power while offering continuous session awareness. Those benefits, coupled with the fact that it is supported by all major IoT cloud providers, have made MQTT a widely used protocol for IoT communication.
The MQTT protocol is open-source and there are many available libraries across many different languages and platforms. For example, there are at least six libraries to choose from for Python, five for Node.js, and several binaries. For an up to date list, you can find recommended libraries on the MQTT Github or Wikipedia.
So far so good… but now the question becomes, how do you pick one? How do you maintain these libraries across thousands of IoT devices? What if the library you originally chose is now missing a critical feature for your project and you need to rip and replace it with a new library? You will also want to review the licenses of these open-source libraries beforehand to avoid any legal issues with using them. Even though MQTT is known to have a lightweight code footprint, the dependency on an open-source library can create some pain points in your application.
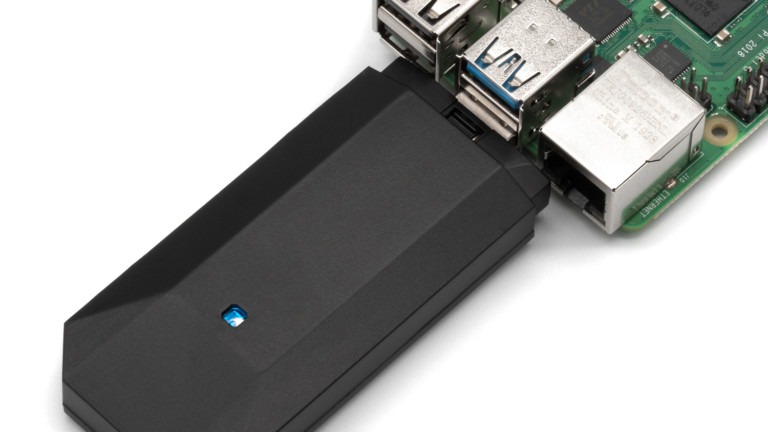
The good news is that there is a way to use MQTT in your IoT project without one of these libraries. In cellular IoT, we can actually use the built-in functionality of the cellular modem to send MQTT messages instead of using a library. In the following example, we will be using a Soracom Onyx LTE USB dongle and a Raspberry Pi.
Example
Modern modems contain their own embedded microprocessor. In the case of the Soracom Onyx dongle, the chipset is a Qualcomm MDM9207, which contains an ARM Cortex A7 microprocessor. While not as powerful as the microprocessor in something like a Raspberry Pi, the important thing is that there is an execution environment that lets the manufacturer add application features like MQTT, HTTP, TCP, etc.
Let’s take a look at a quick example of how to use the modem’s built-in MQTT support to send data to AWS IoT Core. We can use the built-in AT commands that control the cellular modem to send these messages. You will notice that the AT commands are specific to the Onyx modem, which is evidenced by the fact the commands start with ‘AT+Q’.
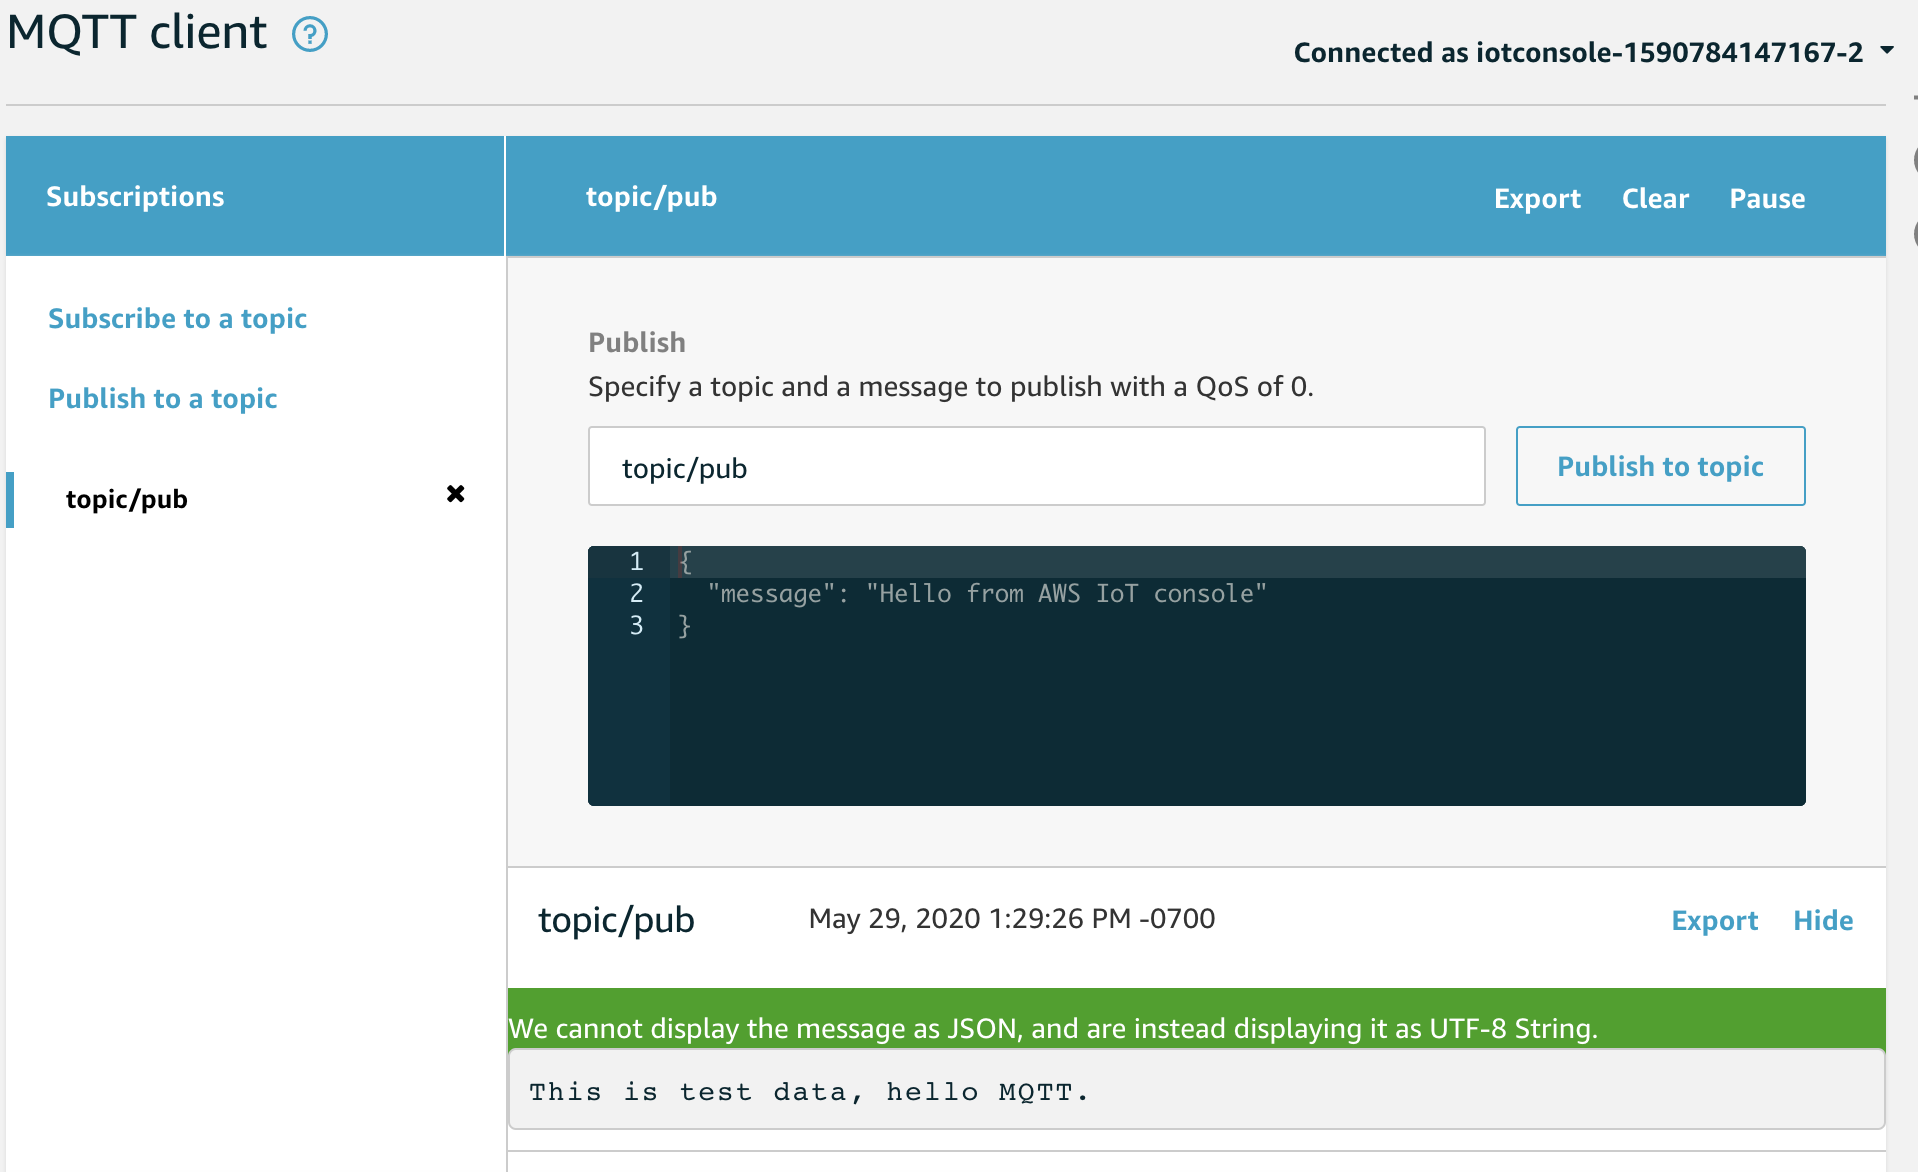
AWS IoT Core has very specific TLS requirements which can be hard to manage, which is why it may not always be supported on constrained IoT devices like microcontrollers. However, we can work around that here by using Soracom Beam to store IoT Core credentials in the cloud and also take care of encrypting and forwarding the data to IoT Core. This will keep the modem behavior and setup simple. (Be sure to take a look at our Beam documentation and blog posts for more information.)
With Beam set up and ready to accept data over MQTT, let’s open up the serial interface of the modem using minicom or screen:
screen /dev/ttyUSB2
(You may need to test a couple of different ports (0-3) until you find which one will receive the AT command. In this case it is 2.)
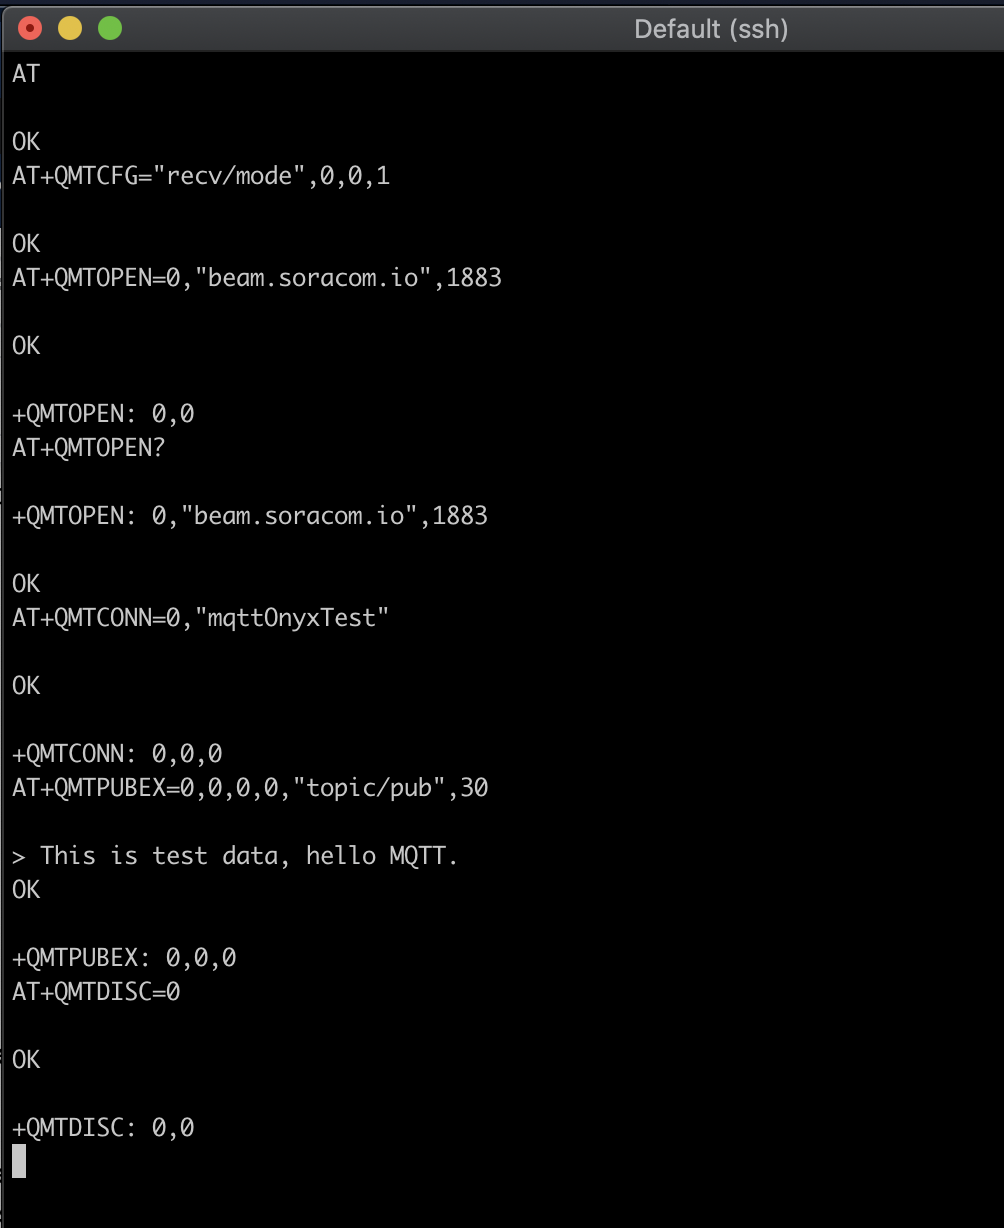
AT Commands:
AT
AT+QMTCFG="recv/mode",0,0,1
This command configures the receiving mode for MQTT client 0, with options 0 = show messages received from server, and 1 = show length of received messages
AT+QMTOPEN=0,"beam.soracom.io",1883
AT+QMTOPEN?
AT+QMTCONN=0,"mqttOnyxTest"
AT+QMTPUBEX=0,0,0,0,"topic/pub",30
>This is test data, hello MQTT.
AT+QMTDISC=0
What this means is that for devices where communicating through the serial interface or sending AT commands to the cellular modem is readily available, you do not need an MQTT library at all even in your application code. For example, here is a simple python example that leverages pySerial, a package that comes bundled with some Linux distributions, to send the AT commands to the Quectel modem.
at_commands.py

import serial

import time
phone = serial.Serial("/dev/ttyUSB2", baudrate=115200, timeout=1.0)
atCommands = [

'AT',

'AT+QMTCFG="recv/mode",0,0,1',

'AT+QMTOPEN=0,"beam.soracom.io",1883',

'AT+QMTOPEN? ',

'AT+QMTCONN=0,"mqttOnyxTest"',

'AT+QMTPUBEX=0,0,0,0,"topic/pub",30',

'This is test data, hello MQTT.',

'AT+QMTDISC=0'

]
for command in atCommands:

phone.write(command + '\r\n')

result=phone.read(100)

print(result)
To learn more about publishing and subscribing to topics please refer to the Quectel application documentation found on the product page. You can purchase an Onyx LTE Dongle on the Soracom Marketplace.
Summary
Leveraging MQTT application capabilities that are built into the modem, gives us much greater flexibility for evolving our device design. While this example uses a Raspberry Pi, which has more than enough computing power and memory to import a software MQTT library, by handling it in the modem we can keep device requirements extremely low (we only need a USB controller and a serial interface), which lets us consider migrating to smaller, more power-efficient microcontrollers in the future without worrying about rewriting our application code.
Big thank you to Felix Hsieh for the idea and support.