How To Create Your Own Private Mobile Network with Soracom

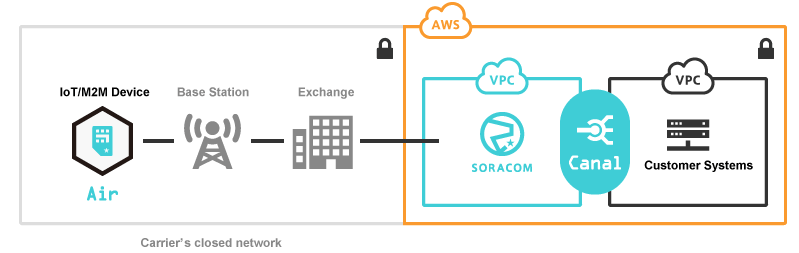
In this blog, I will build a closed mobile network environment using Soracom and AWS, and confirm that the terminal (a cellular Raspberry PI) and the AWS EC2 instance in a Virtual Private Cloud VPC can communicate with each other using private IP addresses. This provides a layered security approach while allowing you to reach your remote devices located wherever there is an Internet connection.
For the purposes of this blog, we will assume the following of the user:
- Has a Soracom account (if not, learn how to open a Soracom account)
- Has a Soracom Air SIM and a device that can be used to test with (i.e., smartphone/tablet, mobile router, cellular IoT device, etc.)
- Has an AWS account.
If you do not have a Soracom account, please follow the Quick Start Guide to create an account and set up your payment information.
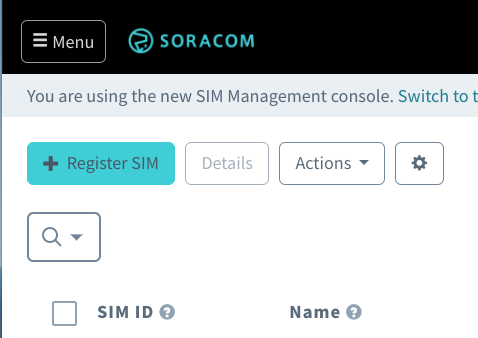
If you already have an account or have completed the above, please complete the SIM registration.
About Amazon VPC
If you want to know more about VPC, please also refer to the following guide (AWS official documents).
Overall Flow
Once your Soracom account is created and your SIM is registered, here are the steps we will take in this blog.
- Create a private mobile network using Soracom Canal
- Building an AWS VPC with an Amazon Linux EC2 instance
- Configure Soracom Canal settings from the VPG to the VPC
- Confirmation of communication from the device to Canal
- Access your device using Soracom Gate
- Enable Gate in the VPG
- Set up VXLAN on the Amazon Linux EC2 instance
- Access the device from the instance
Why Soracom Canal?
Soracom Canal is a private connection service that directly connects the customer’s virtual private cloud environment built on Amazon Web Services (AWS) and the Soracom platform.
The Soracom platform is built on top of an AWS VPC. Therefore, by using a function called “VPC peering” that connects VPCs, you can connect Soracom’s VPG and your own in a closed environment within AWS.
AWS VPCs that can be peered to using Canal are available in multiple regions of AWS.
Canal makes a peering connection with your VPC by using a gateway that mediates between Soracom Air and your VPC, which is called a Virtual Private Gateway (VPG).
When you create a VPG, you can choose whether to route to the Internet or just peer to it. If you set only the peering destination, you will create a completely closed network that does not allow internet access, hence the term private mobile network.

You can opt to use VPG for any created group of Soracom SIMs. Even if it is the same Air SIM, it is possible to switch access to the customer’s VPC by changing the group to which it belongs.
Here are the steps we will use to get started with Canal:
- Step 1: Create an AWS VPC and EC2 instance using the Amazon Linux AMI
- Step 2: Create a Soracom VPG and set up a VPC peering connection to that AWS VPC
- Step 3: [AWS] Accept the peering connection and configure the network routing
- Step 4: Connect with a closed mobile network
Soracom Canal setup
Step 1: Create a VPC and EC2 instance
Here is how we create the VPC, as shown in the red dotted line box.
In this blog, you are to create a VPC and EC2 instance with Amazon Linux. You will need a key pair for your EC2 instance in advance, so let’s create that first.
From the EC2 dashboard in the AWS Management Console, select “Create Key Pair.”
Enter the key pair name and save it to your hard drive you can SSH into the EC2 Linux instance using telnet or putty. AWS also offers shell access to the machine through the web browser.
If you use the external and public IP address of the EC2 instance, you can gain access to the machine. We’re using a global IP address to access the EC2, but by setting up Canal, we’ll be able to access it with a private address, provided you don’t use the instance connect console on AWS.
Step 2: Create a VPG and set up a VPC peer connection
Here, we will create a VPG and set up a VPC peer connection. Created in the following red dotted line part.
Creating a VPG
Log in to the Soracom user console.
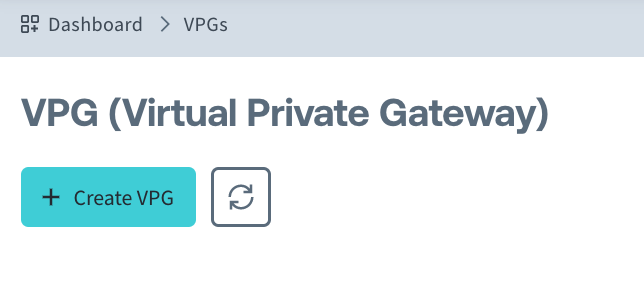
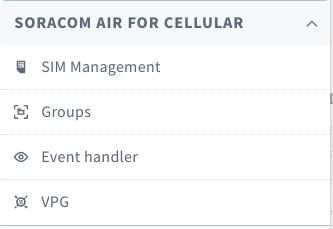
Open the menu at the top left of the screen and select “VPG”.

Click create VPG
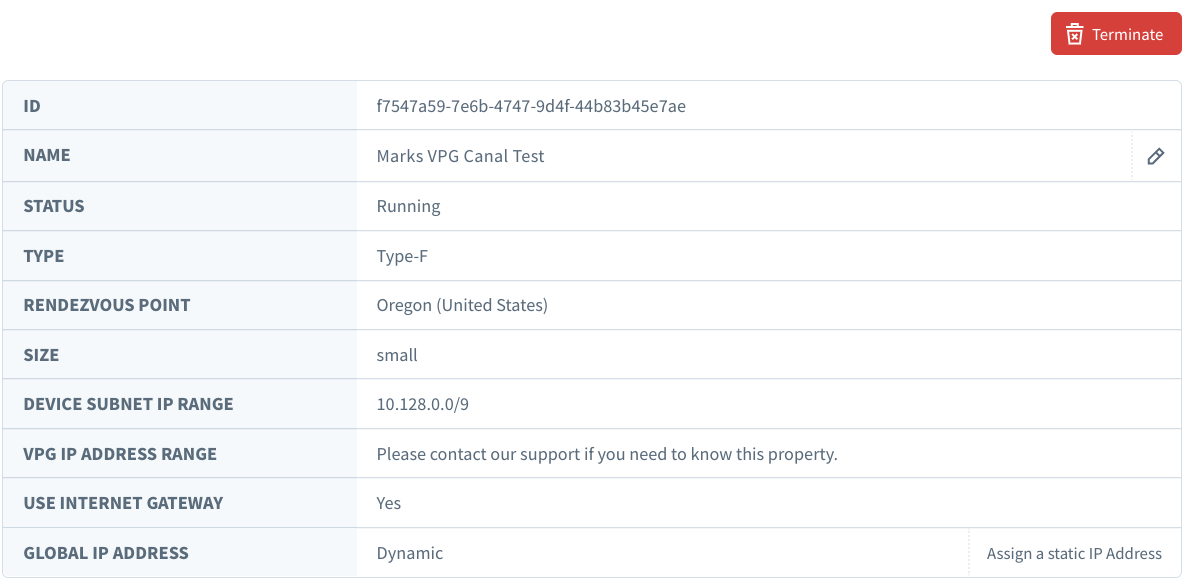
Name your VPG and choose Type F, as well as your rendezvous point, or wherever you chose to host your VPC that you want to peer to. I chose Oregon.

“Use Internet gateway” is the setting that defines whether you route to the Internet introduced at the beginning or use only the peering destination.
If “Use Internet Gateway” is turned off, the mobile network will be completely closed without Internet access. Here, turn on the Internet gateway.
When you click “Create,” the “Status” will change to “Creating.”
Click on the name of your VPG, then choose Closed Network and Canal as the target service.
After a brief processing period, the status will change to “Running” when the VPG has been successfully created.
Next, set up a peer connection to the VPC created in Step 1.
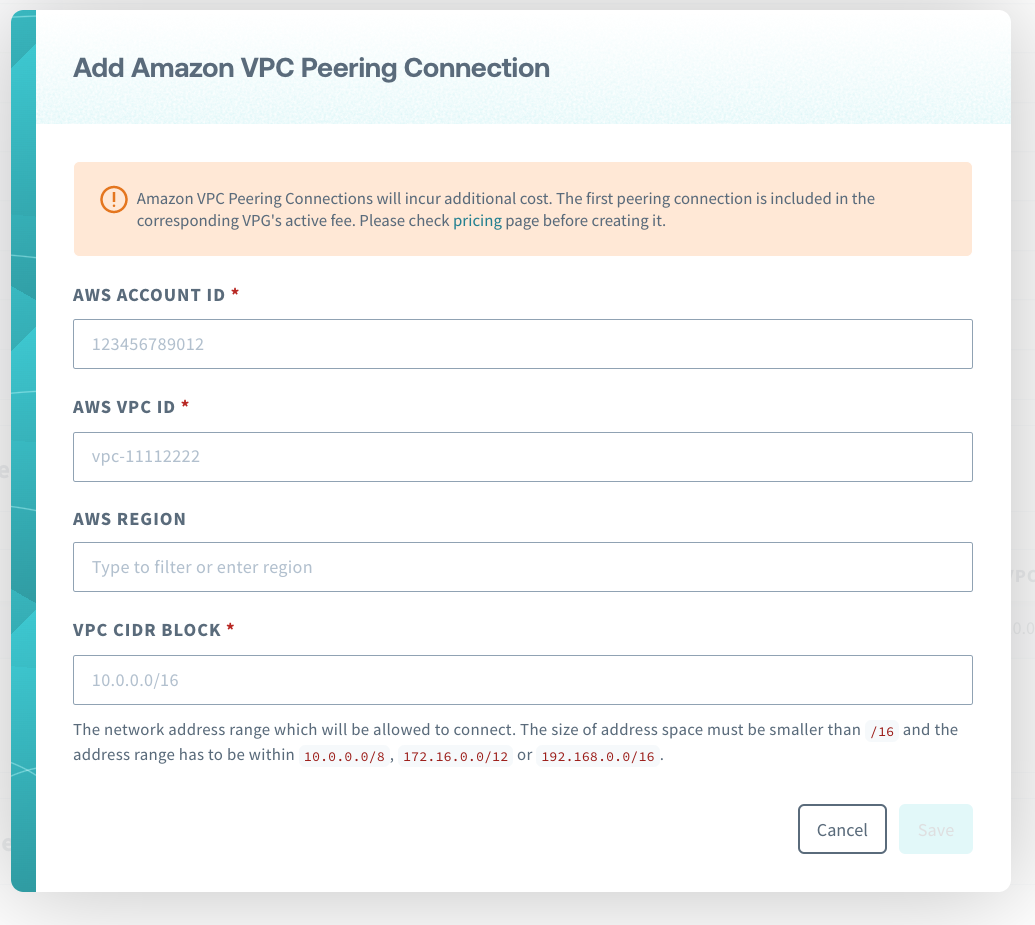
The following information is required to set up a peer connection.
- AWS account number
- A destination VPC ID to connect
- VPC Address Range (CIDR)
You can find your AWS account number in the Support Center by clicking Support → Support Center in the upper right-hand corner of the AWS Management Console.
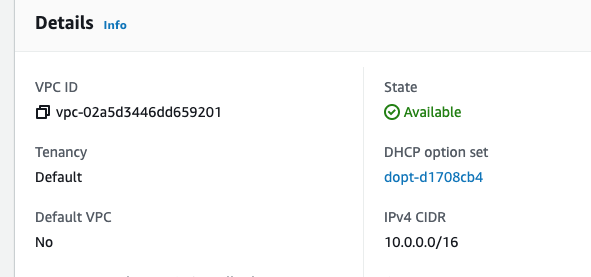
You can see your VPC ID and VPC Address Range (VPC CIDR) from the VPC dashboard from the AWS Management Console.
VPC peer connection settings
Now let’s set up a peer connection.
First, select the VPG you just created.

Click “Add” from “Basic Settings”-> “VPC Peer Connections (Soracom Canal).” Enter the following information and click Save.
You can find your AWS account number in the Support Center by clicking Support → Support Center in the upper righthand corner of the AWS Management Console.
You can see your VPC ID and VPC Address Range (VPC CIDR) from the VPC dashboard from the AWS Management Console.
With this operation, Soracom is requesting a peer connection to the VPC created in Step 1.
Step 3: Accept peering connection and set up the mobile network
At this point, we will ensure the VPC created in Step 1 accepts peer connections and you need to configure the network settings (route table settings).
Go to the VPC dashboard from the AWS Management Console.
Select VPC Peering. Fill out your peering request as follows:
Select the relevant peering and select “Approve Request” from “Action”.

A window (seen below) will be displayed. Select “Routes” to change the route table.

Select the route table in your VPC and make it a peering connection (pcx-xxxxxx) that accepts 100.82.2.52/27. If you have been following this hands-on procedure thus far, you have created a VPC with one public subnet, so the explicitly associated subnet will be the route table displayed as “1 subnet”.
Since the address range of the VPG is 100.82.2.52/27, the destination of this address is the VPG identified as PCX-XXXXXXXXX. Use the address range created by the VPG in your routing table of your VPC.

Click “Save”.
You have now accepted peer connections and set the route table.
Step 4: Connect with a closed mobilennetwork
Finally, we will connect the closed mobile network through Canal.
Follow the steps below to:
- Create a group and set the VPG
- Make Air SIM(s) belong to a group
- Access from Air SIM with a private address.
Create a group and set the VPG
Select Group menu from the Soracom user console.
Click Add and enter the group name to create a new group. (see below)


Open the VPG screen and attach the group to the VPG as shown below.

In “Soracom Air Settings”, there is a section labeled “VPG (Virtual Private Gateway) Settings,” as shown below.
Set it to “ON” and select the VPG created in step 2.
Click Save.
Now only Air SIM included in the specified group with VPG will use VPG.
By switching the group to which the Air SIM belongs, you can switch between using and not using VPG even for the same Air SIM. This allows you to control whether or not a closed network connection is possible.
How to Reconnect a SIM
Since the settings of the VPG to which the SIM connects have been changed, you will need to disconnect and then reconnect any previously connected devices to accept the new settings.
Here are some ways to reconnect:
- If you have the device at hand
- Smartphones, tablets, etc.: Toggle Airplane/In-flight mode on and off
- For any PCs, Linux or Arduino devices, etc.: Reboot or restart the connection software.
- Final Option: Reboot the device itself
- If the device is in a remote location
- From the user console, select the SIM right click “delete the session” it will establish itself again.
- Or run the deleteSubscriberSession API
Access from Air SIM with a private address
From the group that uses the VPG, access the EC2 instance in the VPC that you created in Step 1.
Ping the private address of your EC2 instance.
You can access it with your private address “10.0.X.XXX”!
Troubleshooting
If you can’t connect, check the following
- Did you allow VPC Peering requests?
- Is the route properly set in the RouteTable of the VPC?
- Is your LTE communication reconnected after changing the Air SIM affiliation group?
You have now set up Soracom Canal.
By using Canal, not only can you access your VPC without going through the Internet, your VPC doesn’t need to open a port to the Internet either.
In this guide, the VPG’s Internet gateway was created as “ON”, but if “OFF” (peer connection destination only) is set, it will be a completely closed network that does not allow Internet access. Which helps protect your mobile network from external attacks and the potential for Malware incursions.
Why Soracom Gate?
Soracom Gate is a service that connects your mobile network and device via LAN to establish a secure connection from your VPC to your device by creating a gateway server (hereinafter referred to as Gate Peer) on a network outside Soracom and building a virtual L2 network with Soracom Virtual Private Gateway (hereinafter VPG). Then communication between devices is possible.
Features of Gate
Gate has two features that help you leverage your IoT devices.
Direct access function from customer VPC to device
Using Gate, you can configure a virtual L2 network by tunneling between a network outside Soracom and a Gate-enabled VPG. The tunneled network outside Soracom will connect to the network of the device under VPG, and the network outside Soracom can access the device via VPG with a private IP address. At the moment, it uses VXLAN as a tunneling technology.
Device-to-device communication function
When Gate is enabled, VPGs and IoT devices will be placed on the same virtual subnet. In other words, if the device belongs to a group for which Gate is enabled, it is possible for devices in the group to communicate with each other.
You can easily access devices within your private network, by acquiring an additional Air SIM and assigning it to the same VPG, so please try it.
In the next section, we will combine Canal and Gate to build an environment where the device can communicate in both directions with the customer’s virtual private cloud environment (Amazon Virtual Private Cloud) built on Amazon Web Services (AWS).
Setting up Soracom Gate
There are 4 steps from setup to confirmation of connection.
- Step 5: Activate Gate
- Step 6: Register an EC2 instance that will be the Gate Peer
- Step 7: (AWS Settings) Submit VXLAN settings to Gate Peer
- Step 8: Make sure you can connect to your device from Gate Peer

Step 5: Activate Gate
Set “Enable Gate” to ON in the VPG setting screen> “Advanced settings” and save.
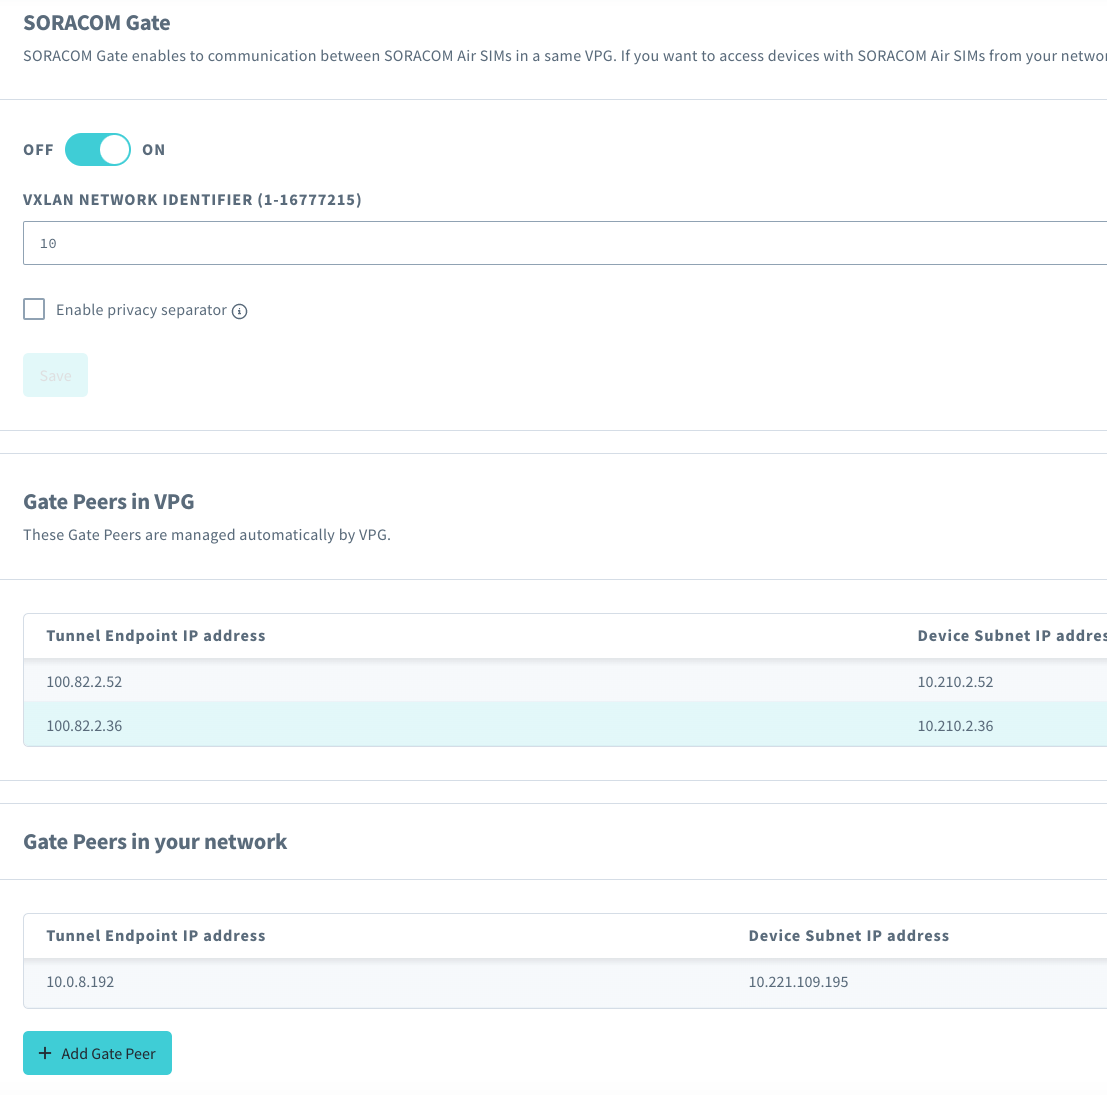
At this point, the devices under VPG will be able to communicate directly with each other. If you have multiple Air SIMs, try it.
Step 6: Register an EC2 instance that will be the Gate Peer
In the VPG settings screen> “Advanced settings”, click the “Add Gate Peer” button in the Customer Gate Peer list.
Register the Gate Peer IP address in the dialog.
- IP address for tunnel connection: Specify the private IP address of the EC2 instance that will be the Gate Peer. This is mandatory.
- IP address in device subnet: You can specify the IP address that Gate Peer will use within the virtual L2 network. If you leave it blank, it will be automatically assigned. Entering this field is optional.

Step 7: (AWS Settings) Submit VXLAN settings to Gate Peer
After completing the Gate Peer registration, it’s time to configure VXLAN.
Check Gate Peer information
You can check the required information in “VPG Gate Peer List” in VPG Settings screen> Advanced Settings. In the procedure that follows, use the IP address that corresponds to the innerIpAddress of the API response, as described in “IP address for tunnel connection”.

SSH into Gate Peer and enter VXLAN settings
Next, submit the VXLAN settings to the EC2 instance that will be the Gate Peer. SSH into Gate Peer and run the commands with root privileges in the following order:
- The Public IP address of the EC2 instance that will be the Gate Peer is output to Outputs of CloudFormation.
- The routing settings and packet forwarding settings in this step will be deleted when Gate Peer is restarted.
- If you want to use Gate Peer permanently, create a setting script so that these settings will be done automatically at restart.
Use the script
wget https://soracom-files.s3-ap-northeast-1.amazonaws.com/gate-peer-tools/gate_init_vxlan.sh
$ chmod +x gate_init_vxlan.sh
sudo ./gate_init_vxlan.sh \
eth0 \
10.0.8.192 \
vxlan0 \
10.221.109.195 \
9 \
that configures VXLAN. Of course, use your own IP addresses from your subnet and the VPG.
Set the routing to the device. Replace the following items with the IP address of VPG or Gate Peer.
Step 8: Make sure you can connect to your device from Gate Peer
After completing each step s up to this point, your VPC and device should be connected by Gate. Make sure you can connect to your device from Gate Peer.
First, use Air SIM to connect your device to the network.
- Note: See Getting Started: Using Soracom Air with Various Devices for an example of connecting devices.
After connecting the device with Air SIM, try accessing it from Gate Peer.
The following is an example of executing a command with Gate Peer and pinging the Raspberry PI. Communication is possible with a private IP address.

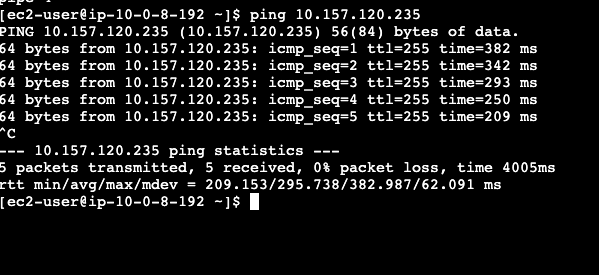
This completes the Gate setup and operation check.
By using Canal, it is possible to communicate from a device to your VPC, and by using Gate, it is possible to communicate from a VPC to the device.
When not using Gate features, you can disable it through the User Console or the closeGate API. You can stop access to your device by disabling Gate.
When enabling or disabling Gate, communication will be interrupted for a few seconds.
Conclusion
By using Soracom services Canal, Gate and VPG, you have now created a private mobile network providing layered security and worldwide global access to your devices and servers.
………….
Do you have questions about an IoT project? Speak with one of our experts today to learn how Soracom has helped more than 20,000 innovators deploy, scale, and secure their IoT projects.