
Intelligent Drowsiness Monitor for Safer Driving Through CV

Things used in this project
Hardware components
| Huawei Dongle | × 1 | |

|
Raspberry Pi 3 Model B | × 1 |

|
SORACOM Air Global IoT SIM | × 1 |
| Camera (generic) | × 1 | |
| VMA204 Accelerometer | × 1 | |
| Speaker (Generic) | × 1 | |

|
Breadboard (generic) | × 1 |
Software apps and online services

|
Raspbian | × 1 |

|
SORACOM Funnel | × 1 |
Story
Introduction:Sleeping, one of the most basic needs of the human being, is a daily task that, at least, we must perform for 8 hours. However, it seems that sleeping is a luxury that not many can have. Some do not sleep for pending work, for enjoying some more episodes of their favorite series, or even for a party.
Not sleeping today is a common practice among young people, however not sleeping reduces the ability to react and attention to perform tasks as simple as sending a text message or even tasks as complex as driving a car.According to the National Highway Traffic Safety Administration and the Centers for Disease Control and Prevention they say that it is 7 times dangerous driving tired to driving drunk.
The problem we have here is, what happens if we need to drive and we are tired?
The best solution to this problem will always be to sleep at night, if it is not possible to do it, as a solution I create the drowsiness monitor to avoid falling asleep while driving.
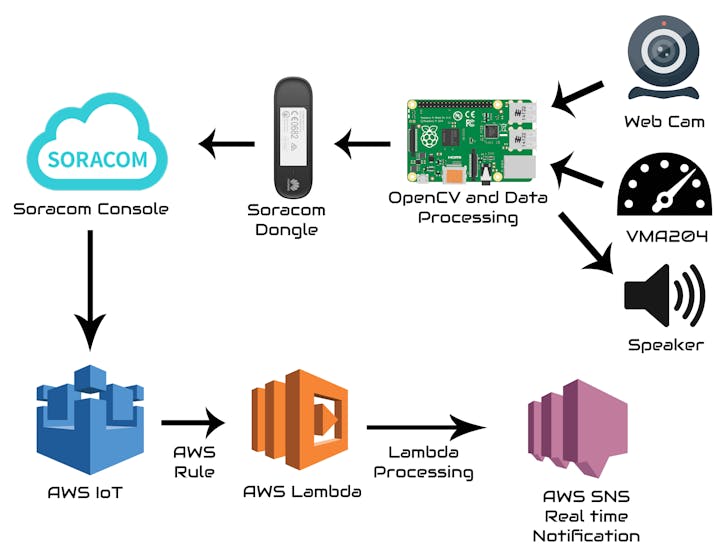
https://www.nhtsa.gov/risky-driving/drunk-driving *https://www.cdc.gov/features/dsdrowsydriving/index.html **Connection Diagram:This is the connection diagram of the system:
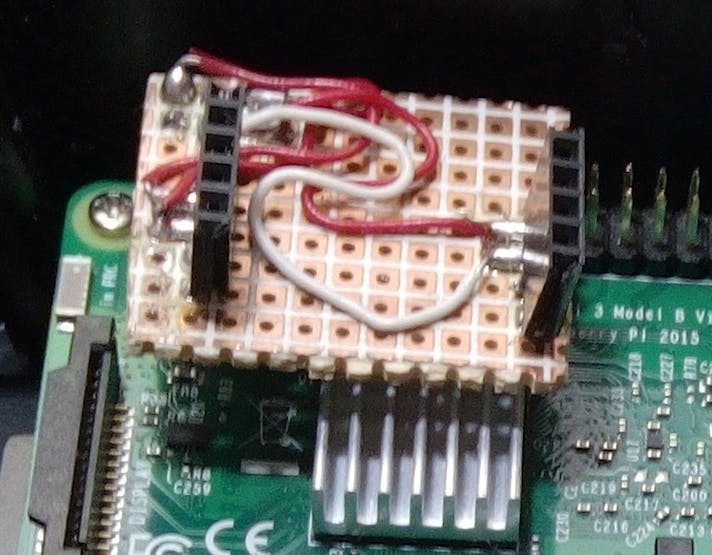
 VMA Circuit for RaspberryPi:
As a first step it is necessary to make a circuit that allows the Raspberry to obtain the accelerometer data, communicated by I2C also known as TWI, it will be necessary to realize a circuit which allows the connection of this module to the headers of the raspberry.
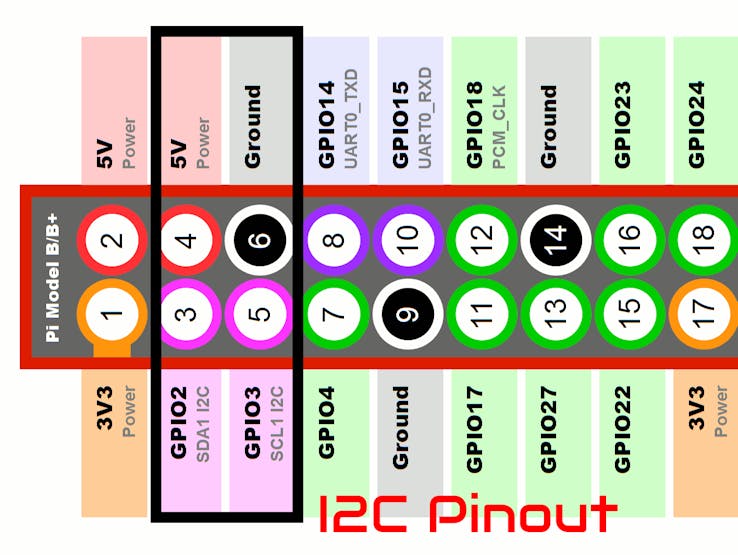
This is the connection diagram:
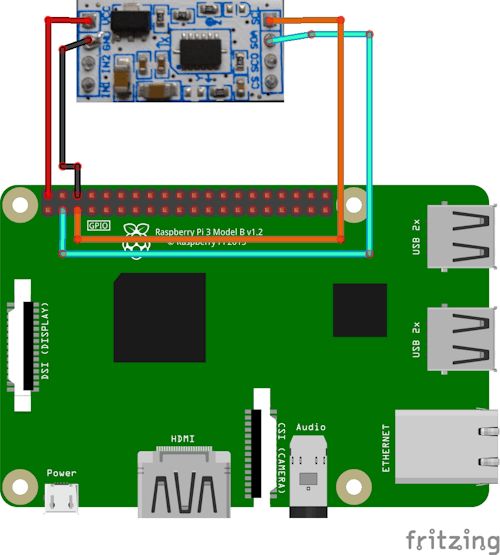
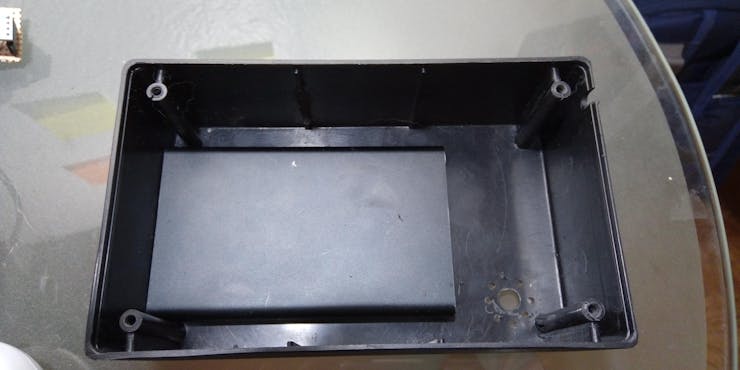
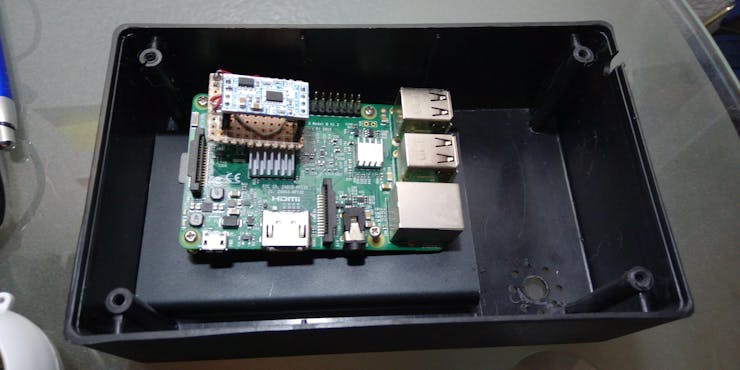
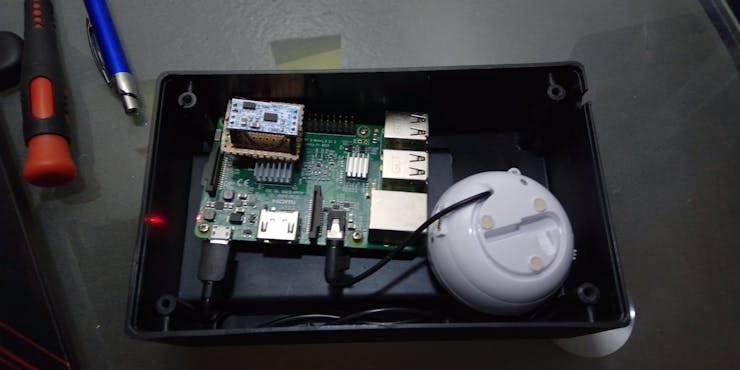
In my case I made a "Shield" with a PCB Breadboard so I could place it on the raspberry easily.
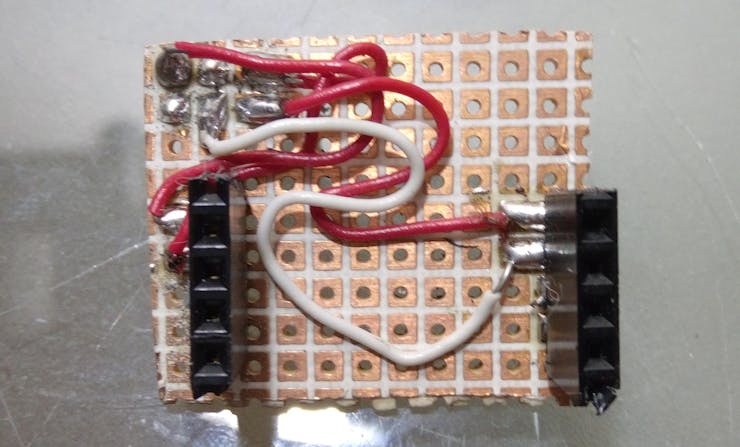

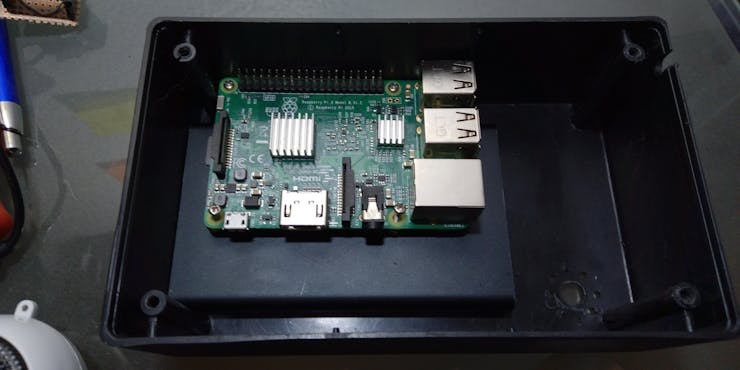
Already placed on the raspberry:
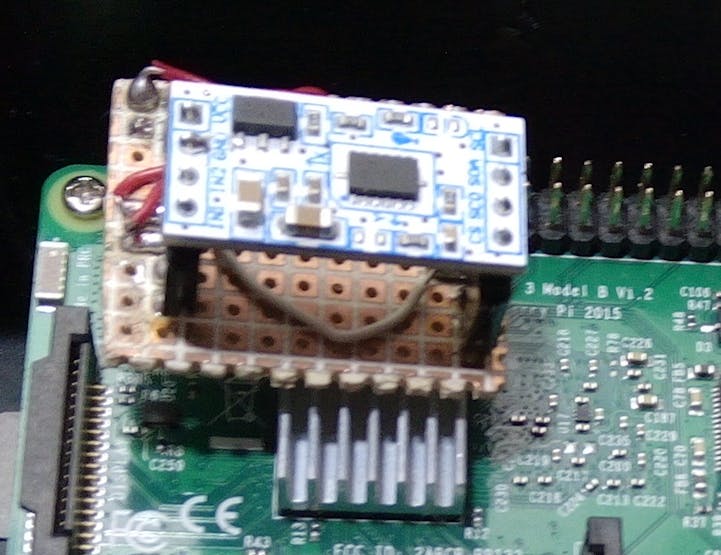
Otherwise, if you do not want to make this "Shield" you can simply connect it using dupont cable XP, but the soldered circuit is always better.
Raspberry Setup:Note: for this tutorial it is necessary setup the raspberry with an HDMI monitor and a Touchpad and a Keyboard USB. We will not use a normal internet connection, we use a connection through the Huawei 3G USB dongle.
Download "Raspbian Stretch with desktop" from https://www.raspberrypi.org/downloads/raspbian/.Flash Raspbian on the sd card as indicated on the official page. https://www.raspberrypi.org/documentation/installation/installing-images/README.md OpenCV Setup:
This was the tutorial that I used and it worked, however there are many different tutorials on internet, if this does not work try another one.
https://www.learnopencv.com/tag/raspberry-pi/https://tutorials-raspberrypi.com/installing-opencv-on-the-raspberry-pi/pip install smbus pygame time
Example of image processing with OpenCV: Click on the image
 Webcam Setup:
Open in Thonny Editor this code and run.
# -*- coding: utf-8 -*- """ Created on Thu Apr 11 01:48:57 2019 @author: ANDRE """ import smbus import numpy as np import urllib.request import cv2 import pygame import time import os import math import requests import json # Code to create the Accelerometer Module and obtain data from its. class MMA7455(): bus = smbus.SMBus(1) def __init__(self): self.bus.write_byte_data(0x1D, 0x16, 0x55) # Setup the Mode self.bus.write_byte_data(0x1D, 0x10, 0) # Calibrate self.bus.write_byte_data(0x1D, 0x11, 0) # Calibrate self.bus.write_byte_data(0x1D, 0x12, 0) # Calibrate self.bus.write_byte_data(0x1D, 0x13, 0) # Calibrate self.bus.write_byte_data(0x1D, 0x14, 0) # Calibrate self.bus.write_byte_data(0x1D, 0x15, 0) # Calibrate def getValueX(self): return self.bus.read_byte_data(0x1D, 0x06) def getValueY(self): return self.bus.read_byte_data(0x1D, 0x07) def getValueZ(self): return self.bus.read_byte_data(0x1D, 0x08) #Audio File attached in the repository or hackster page file = 'b.mp3' #Initialization of pygame to play audio. pygame.init() pygame.mixer.init() # The haarcascades are attached in the respository and hackster tutorial. face_cascade = cv2.CascadeClassifier('haarcascade/haarcascade_frontalface_default.xml') eye_cascade = cv2.CascadeClassifier('haarcascade/haarcascade_eye.xml') # Input Camera Source. cap = cv2.VideoCapture(0) # Url to send data to Soracom and Obtain Location url = 'http://funnel.soracom.io' send_url = 'http://freegeoip.net/json' #Count Variables nf=1 #Number of Faces ne=1 #Number of Eyes count=0 #Special Counter mma = MMA7455() # Memory X,Y and Z values to compare xmem=mma.getValueX() ymem=mma.getValueY() zmem=mma.getValueZ() #Converting signed byte values to unsigned byte if(xmem > 127): xmem=xmem-255 if(ymem > 127): ymem=ymem-255 if(zmem > 127): zmem=zmem-255 # Seed Time values time1=time.time() time2=time.time() while 1: x = mma.getValueX() y = mma.getValueY() z = mma.getValueZ() if(x > 127): x=x-255 if(y > 127): y=y-255 if(z > 127): z=z-255 # We need compare the memory value and the actual value to determine the acceleration, if the acceleration is more than 10, we determine the car crash, you can adjust this value for your convenience. if(abs(xmem-x)>10): print('crash') # to obtain our location we send a request to "send_url" url to obtain our position r = requests.get(send_url) j = json.loads(r.text) # We convert json to string lat = j['latitude'] lon = j['longitude'] # We create the payload and headers payload = '{"deviceid" : "Car 0001", "lat" : lat, "lon" :lon}' headers = {'content-type': 'application/json', 'Accept-Charset': 'UTF-8'} # We send to soracom the notification r = requests.post(url, data=payload, headers=headers) exit() if(abs(ymem-y)>10): print('crash') # to obtain our location we send a request to "send_url" url to obtain our position r = requests.get(send_url) j = json.loads(r.text) # We convert json to string lat = j['latitude'] lon = j['longitude'] # We create the payload and headers payload = '{"deviceid" : "Car 0001", "lat" : lat, "lon" :lon}' headers = {'content-type': 'application/json', 'Accept-Charset': 'UTF-8'} # We send to soracom the notification r = requests.post(url, data=payload, headers=headers) exit() if(abs(zmem-z)>10): print('crash') # to obtain our location we send a request to "send_url" url to obtain our position r = requests.get(send_url) j = json.loads(r.text) # We convert json to string lat = j['latitude'] lon = j['longitude'] # We create the payload and headers payload = '{"deviceid" : "Car 0001", "lat" : lat, "lon" :lon}' headers = {'content-type': 'application/json', 'Accept-Charset': 'UTF-8'} # We send to soracom the notification r = requests.post(url, data=payload, headers=headers) exit() # We obtain an image from our source of images (in this case the camera) ret, img = cap.read () # through the following algorithm we get the number of faces and eyes that the camera can see gray = cv2.cvtColor(img, cv2.COLOR_BGR2GRAY) faces = face_cascade.detectMultiScale(gray, 1.3, 5) for (x,y,w,h) in faces: cv2.rectangle(img,(x,y),(x+w,y+h),(255,0,0),2) roi_gray = gray[y:y+h, x:x+w] roi_color = img[y:y+h, x:x+w] eyes = eye_cascade.detectMultiScale(roi_gray,1.3, 40) ne=len(eyes) for (ex,ey,ew,eh) in eyes: cv2.rectangle(roi_color,(ex,ey),(ex+ew,ey+eh),(0,255,0),2) # Since we have the number of faces we will check that the algorithm can see at least one face and at least one open eye, if it is able to see a face and does not detect any open eye, after 3 seconds it will start to sound an annoying noise that will wake up to the condutor nf=len(faces) if(nf>0 and ne<1): time1=time.time() print(time1-time2) if((time1-time2)>=3): pygame.mixer.music.load(file) pygame.mixer.music.play() else: pygame.mixer.music.stop() time1=time.time() time2=time1 cv2.imshow('img',img) k = cv2.waitKey(30) & 0xff if k == 27: break cv2.destroyAllWindows()sudo nano /etc/rc.localAdd after "fi" paste the next code to set the jack output and excecute the program.amixer cset numid=3 1sudo python E.pyCloud Development:Note: This tutorial is designed for people who already have an account and SIM registered in https://console.soracom.io/Configuration AWS IAM Credentials.As a first step we will have to configure AWS IAM so that Soracom can communicate without restrictions to AWS IoT.
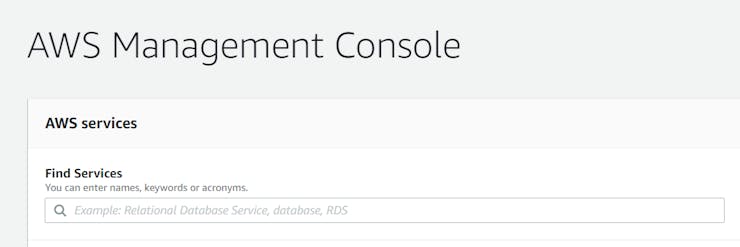
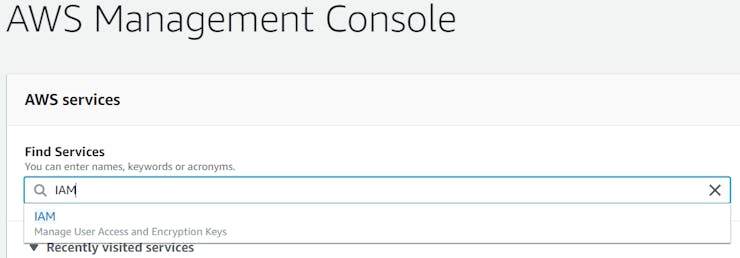
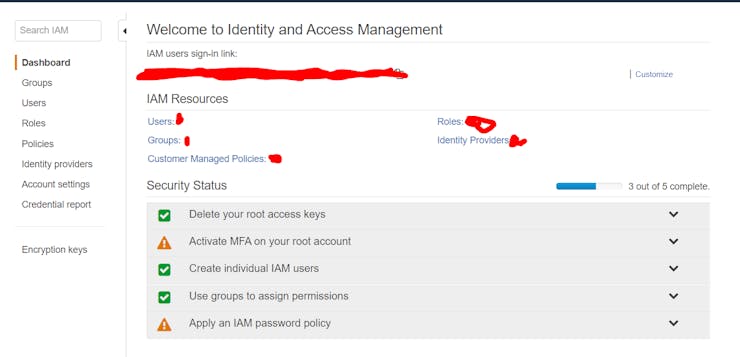
* We enter the option of IAM.
* Inside the IAM console we enter the "Users" option.
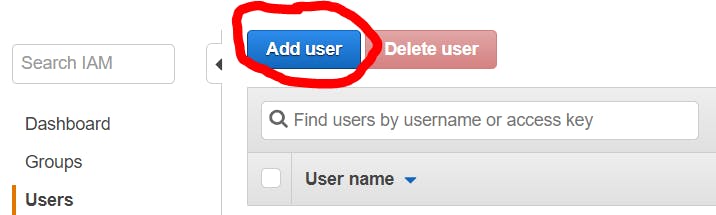
* Click on the "Add user" button.
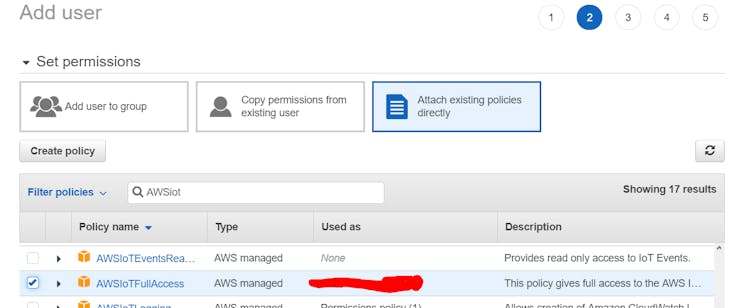
* We put the name you want and select the option "Programatic Access".

* In the "Attach existing polices directly" option, we select "AWSIotFullAccess".
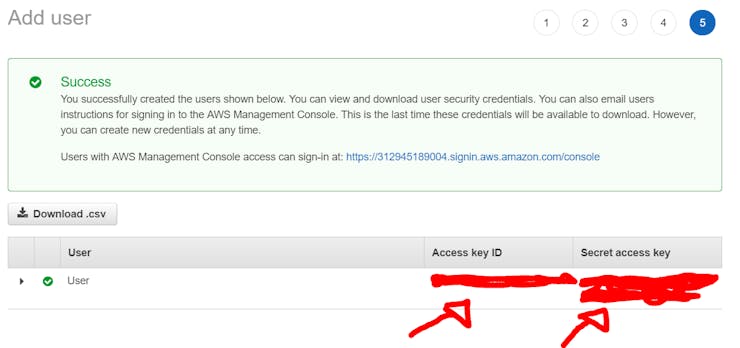
* Once we finish everything we will access our Access key ID and Secret Access key (Save them well because we will use them to configure the Soracom console)
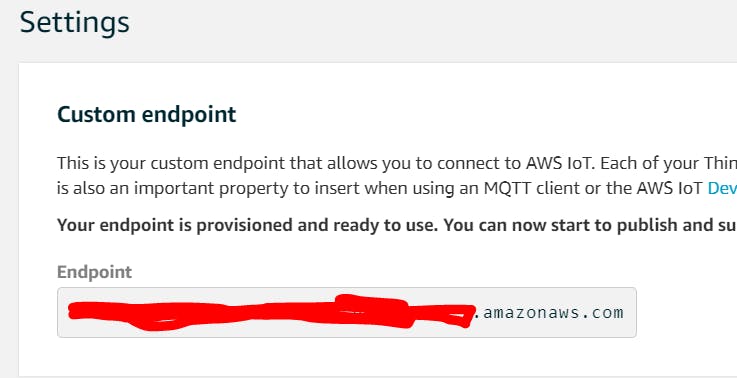
* We go to the AWS IoT Console and go to the "Settings" option.
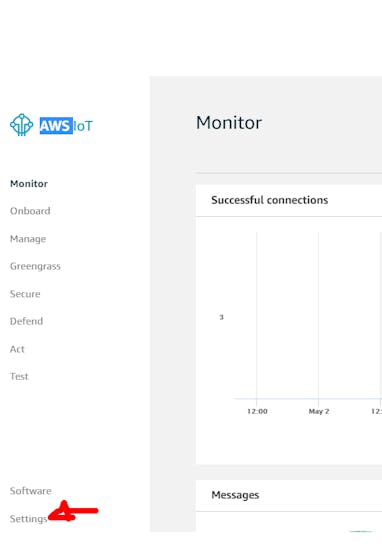
* In the "Settings" option we obtain our Endpoint API.
 Configuration Soracom Funnel.
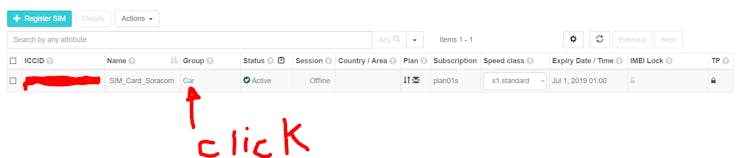
* Browse Funnel and paste the Endpoint that we obtained in the AWS IoT console and add the Topic where we will post the data.
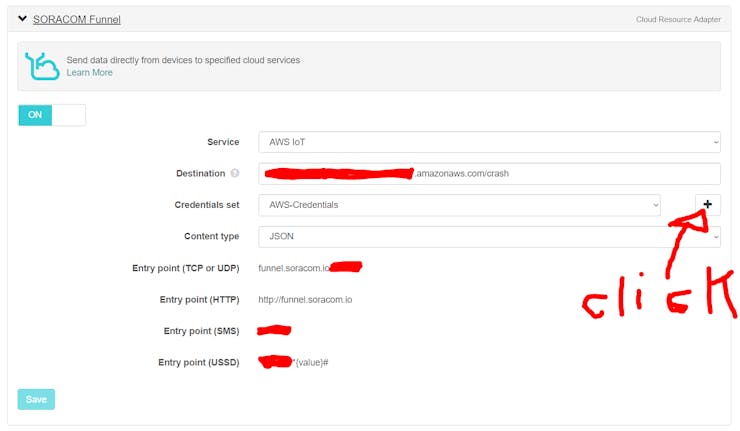
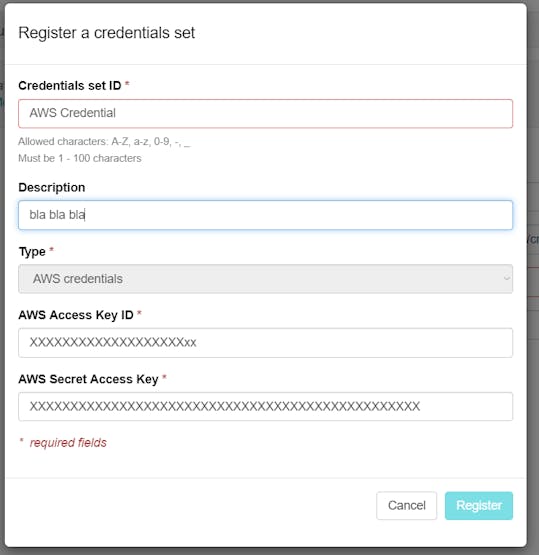
* Finally We create the IAM credentials in Funnel as shown in the image.
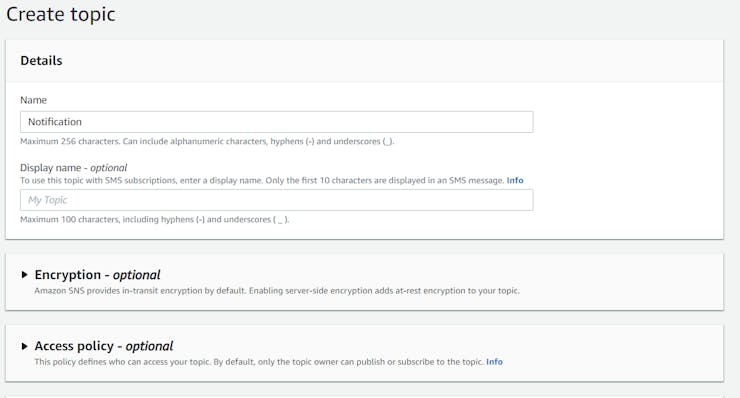
 Configuration AWS SNS.
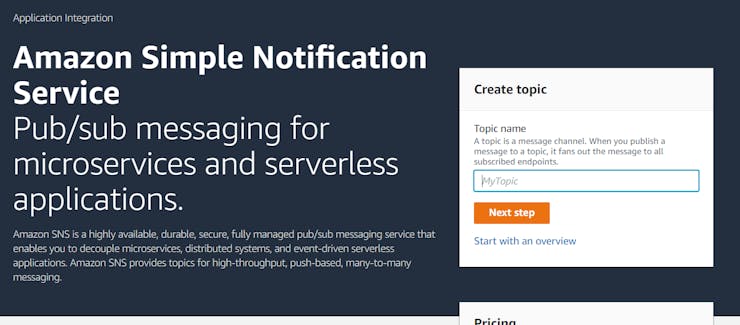
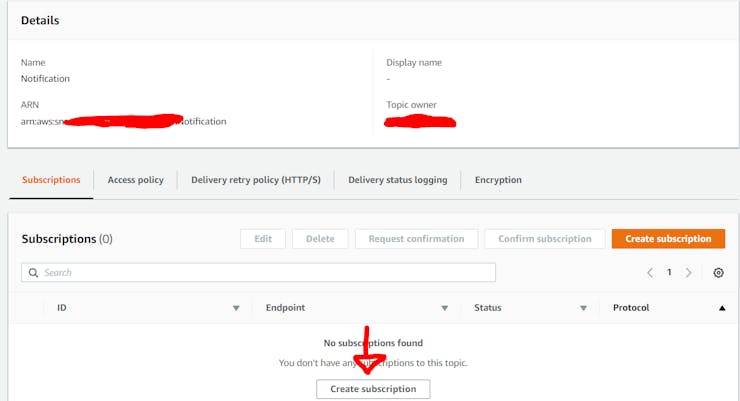
* To subscribe an email or a mobile phone select the option "Create subscription"
* All the notification options we can make are all the following.
 Configuration AWS IoT.
* Click on "Create"

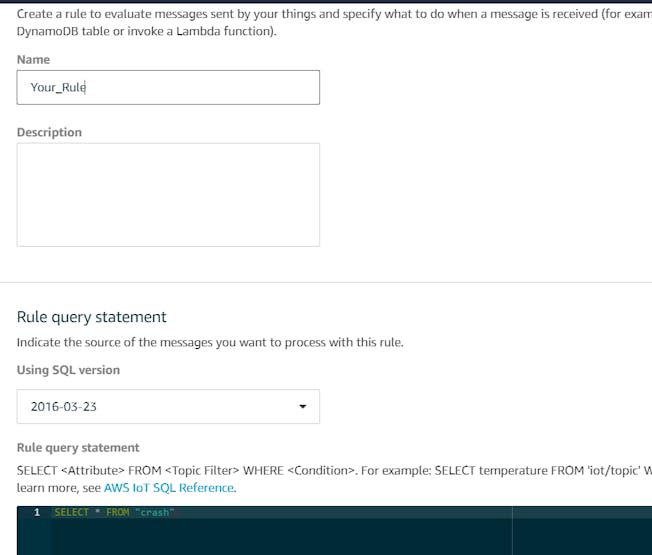
* We select any name for the rule and we put in Rule Query statement
SELECT * FROM "crash"
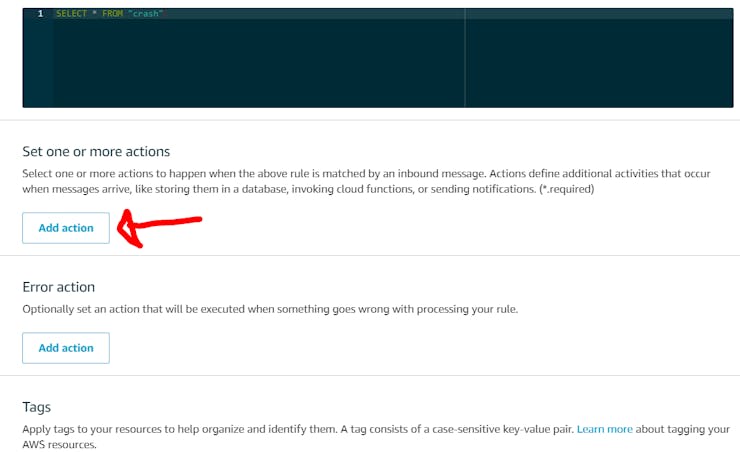
* We select the option "Add action"
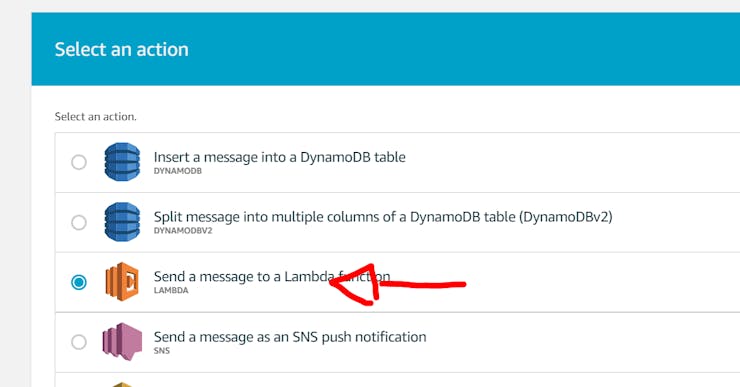
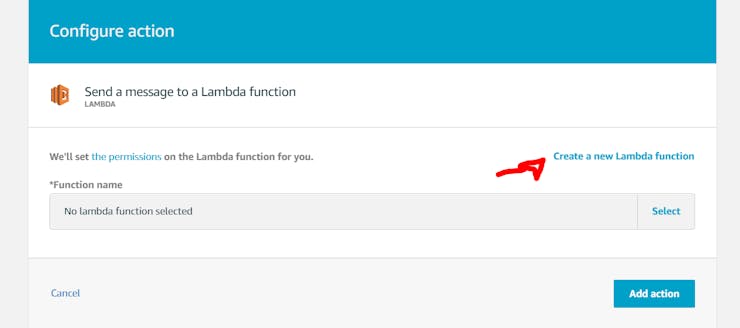
* We select the option of Send message to lambda.
* We select "Create a new Lambda function"
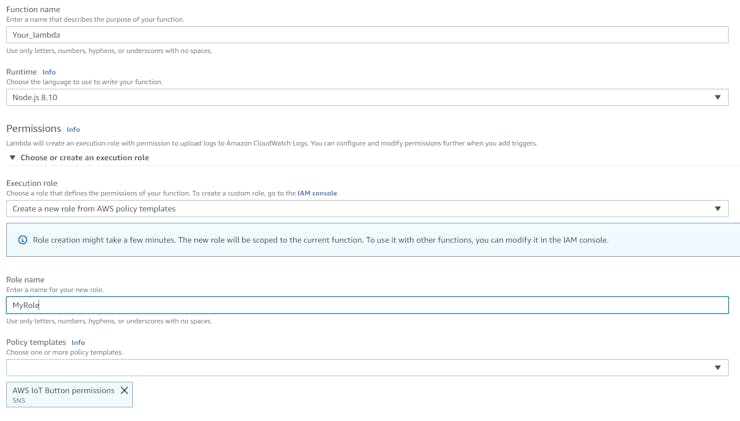
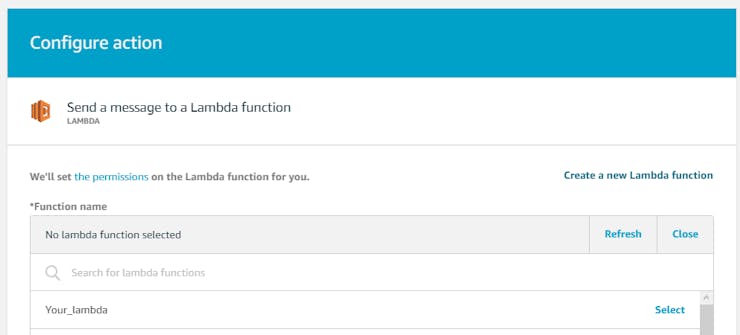
* We set the Lambda configuration as shown on the screen.
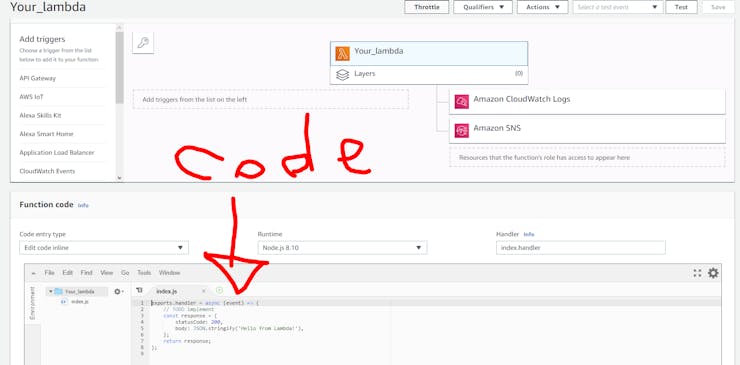
* In the code section we paste the code below, editing the "TopicArn" for the topic created in the previous point of SNS.
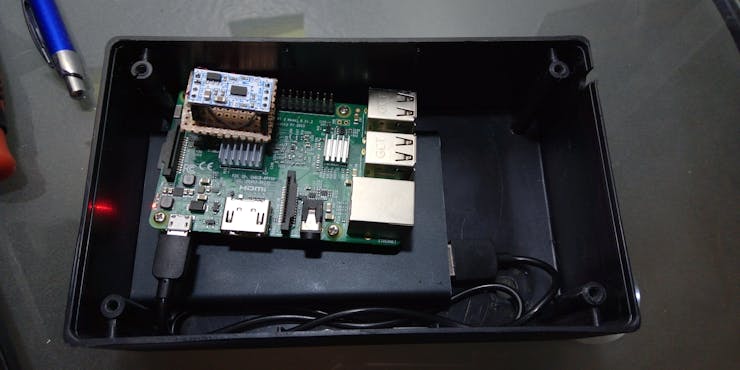
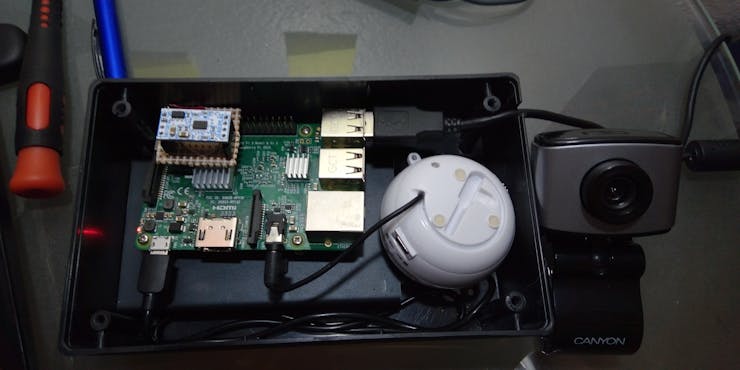
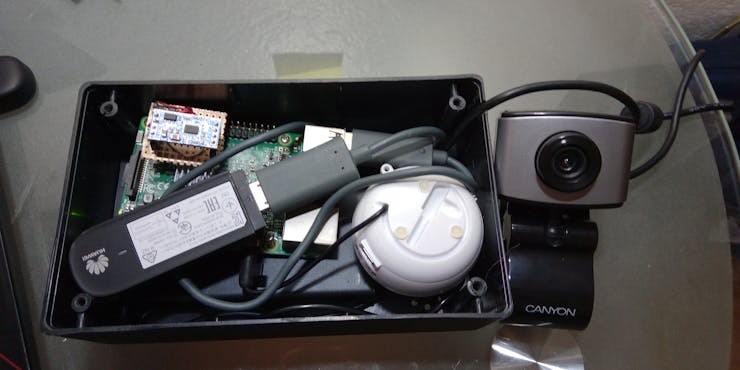
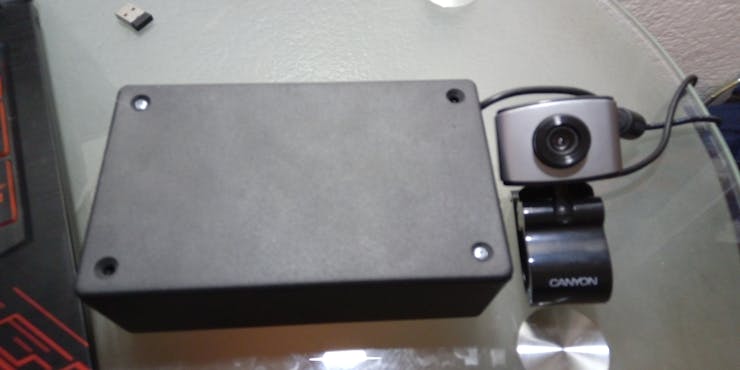 The Final Product:
Now just put it in your vehicle and you are set! You will not have to worry about falling asleep while driving!
Future Rollout:During the development of the project, I really enjoyed the Soracom platform as I was sending data to AWS IoT. The next development that can be sought to follow, is to improve the case and the components to obtain the following advantages: