How I Built a Smart Water Meter with Azure, AWS IoT and Soracom
Measuring Water Levels with an IoT SIM Card
Recently, I had the pleasure of participating in the Microsoft Azure AI Hackathon, where close to 1,000 participants hacked together projects using Microsoft Azure’s Cognitive Services.
In this blog post, I’ll cover how I used a Soracom Air SIM, the Soracom Raspberry Pi Starter Kit, and the Azure Anomaly Detector API to create a cellular IoT smart water meter that measures drastic changes in water levels. Also, check out the video that I made on the contest entry.
Let’s get started.
Materials You Need For Your Smart Water Meter
- IoT Starter Kit with Raspberry Pi and IoT Sim
- A Soracom Account
- An Azure Account
- Sample code
- *optional* some sort of enclosure for the project.
First off, let’s cover what we’ll be doing with the above components. The main goal is to collect readings from the starter kit’s ultrasonic sensor and send it via HTTP over cellular to Soracom Beam. Next, we’ll configure Beam to encrypt that message into HTTPS, and then send it along to our Azure Anomaly Detector endpoint. Azure will return a response to Beam noting whether or not an anomaly was detected, and Beam will return that response to the IoT smart water meter so that it can then take an action based on the outcome.
A timestamp and distance reading is taken from the ultrasonic sensor every minute and stored in a CSV file on the device. Once enough data points are stored (Anomaly Detector API currently has a minimum of 12) the data is sent to the Anomaly Detector API to analyze the latest value against the previous ones.
When an uncommon event occurs, the Anomaly Detector API will return a message to the device letting it know that an anomaly has been detected. This message can then be used to trigger any type of action that you can think of. Currently, it will make light up a red LED attached to the Raspberry Pi.
Here’s four simple steps to how I built this intelligent IoT water meter – and how you can build your own!
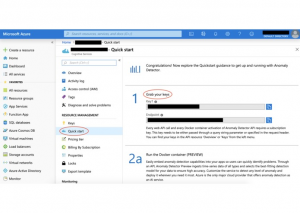
Step 1: Set up the Azure Anomaly Detector API
Create your Anomaly Detector endpoint within the Azure Portal. Currently, a free pricing tier is available (woo hoo!). Once created, please take note of the key and endpoint, which are listed under the “Quick Start” section of the resource.
We’ll need to plug these values into our Soracom Beam configuration in the next step. Here’s a link to the Anomaly Detector API Reference.
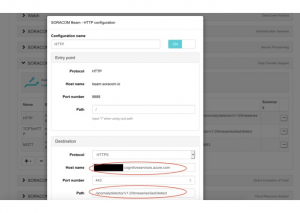
Step 2: Set up Soracom Beam
Next, head over the the Soracom User Console and configure Soracom Beam so that it’s ready to convert HTTP posts from the device into HTTPS posts to the Anomaly Detector API endpoint.

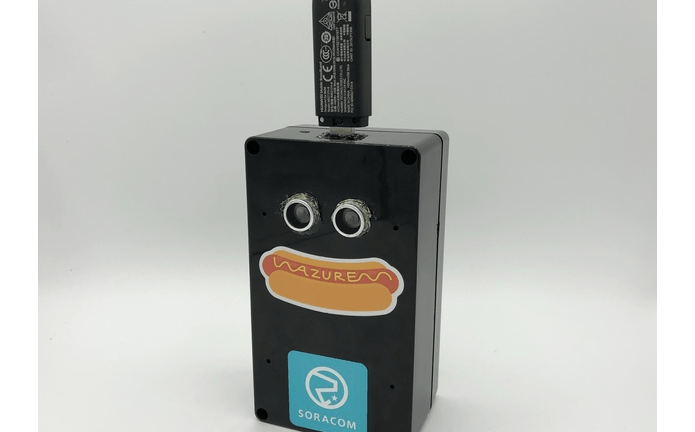
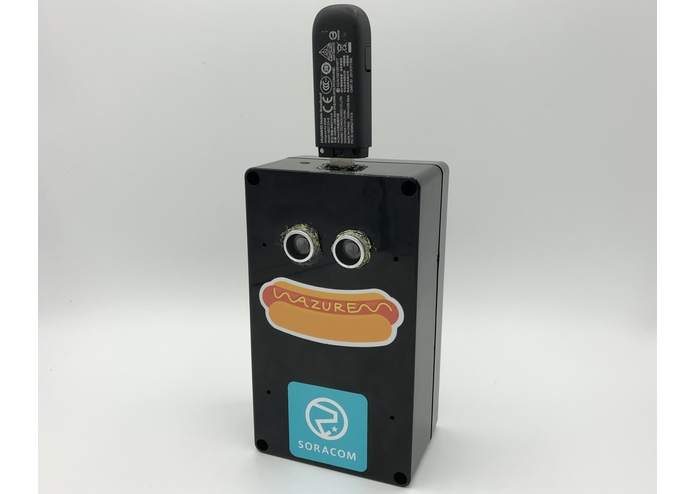
Step 3: Build the Soracom Starter Kit
Now that we have the cellular IoT and cloud plumbing all taken care of, let’s build the device. Open your Soracom Starter Kit, and walk through the following guide for getting it set up. Keep going until you’ve completed the “Setup the ultrasonic range finder” section:
Step 4: Collect and transmit sensor data to Microsoft Azure
With the device successfully built and ready to transmit data, we’ll need to get the Python scripts loaded onto it which will handle collecting the data and sending it via HTTP to Soracom Beam.
SSH back into the Raspberry Pi and follow the next steps to download the code, unzip it, and run it:
- From within your SSH session to the Raspberry Pi, download a zip of this repository to the current directory:
wget https://github.com/RoyCodes/Water-Level-Detector/archive/master.zip
- Unzip master.zip. You should now have a folder called “Water-Level-Detector-Master” which includes all of the Python scripts in this repository:
unzip master.zip
- Finally we’ll clean up by deleting the .zip file, as we’ve already extracted the contents:
rm master.zip
- To start the project, `cd` into the “Water-Level-Detector-Master” folder and run the following command:
python ultrasonic_beam.py 60
The 60 at the end lets the script know to take a sensor reading every 60 seconds. This is because we’ve got our Azure Anomaly Detector API granularity set to “minutely”. It also supports “hourly”, but then we’d need to wait at least 12 hours to see if we broke anything.
Why I Used Soracom Beam for This Smart Water Meter
If we were to send our sensor data from the Raspberry Pi directly to Azure, we’d have to consider a couple of extra factors. Firstly, we’d have to store both our endpoint and credential directly on the device. This means that if we were to ever rotate keys or change the endpoint, we’d have to reach back down into the IoT smart water meter to make the change. Secondly, we’d have to send the data over HTTPS since it would need to traverse the public internet in order to reach Azure. This means extra overhead on the device as well as an increase in bandwidth costs due to the extra header size.
Soracom Beam lives within the Soracom platform and off of the public internet, so our smart water meter can send plain HTTP because the data transmission is already secured through SIM authentication. The Soracom User Console lets us manage our Azure endpoint and credentials so that the device can focus on sending data to Soracom and is unaffected when future changes to endpoints and credentials are made. These burdens may not be too significant on this single IoT smart water meter, but can add up significantly at scale.
Going Beyond Cellular IoT for My Smart Water Meter
Congratulations! Now that you’ve got the IoT smart water meter sending data to Microsoft Azure and responding to the result, here are some ideas on what you can do to improve upon this cellular IoT project:
- Modify what the Python script does when it detects an anomaly. It could send an alert, trigger some other API, or maybe interact with other sensors, motors, or relays that you’ll want to wire up to the Raspberry Pi.
- Improve the sample code by submitting a pull request to the GitHub repository.
- Build an enclosure for the project. Warm up the 3D printer? Hollow out an old Furby? (remember to send me photos!)
Come find me over on Twitter @Roycodes. If you’re interested in seeing more exciting cellular IoT projects, you can learn how two software engineering interns built their very own IoT escooter with fully-functioning surge pricing capabilities using Soracom, Raspberry Pi and AWS IoT.
………………
Got any questions about an IoT deployment? Soracom offers a number of powerful solutions that have made us a visionary in the IoT space. Chat with us today to learn how a partnership with Soracom can get your project up and running easily and securely. Contact us today!